Repair
P 12/ 15
[3]DISASSEMBLY/ASSEMBLY
[3]-7. Magazine (cont.)
Points of ASSEMBLING
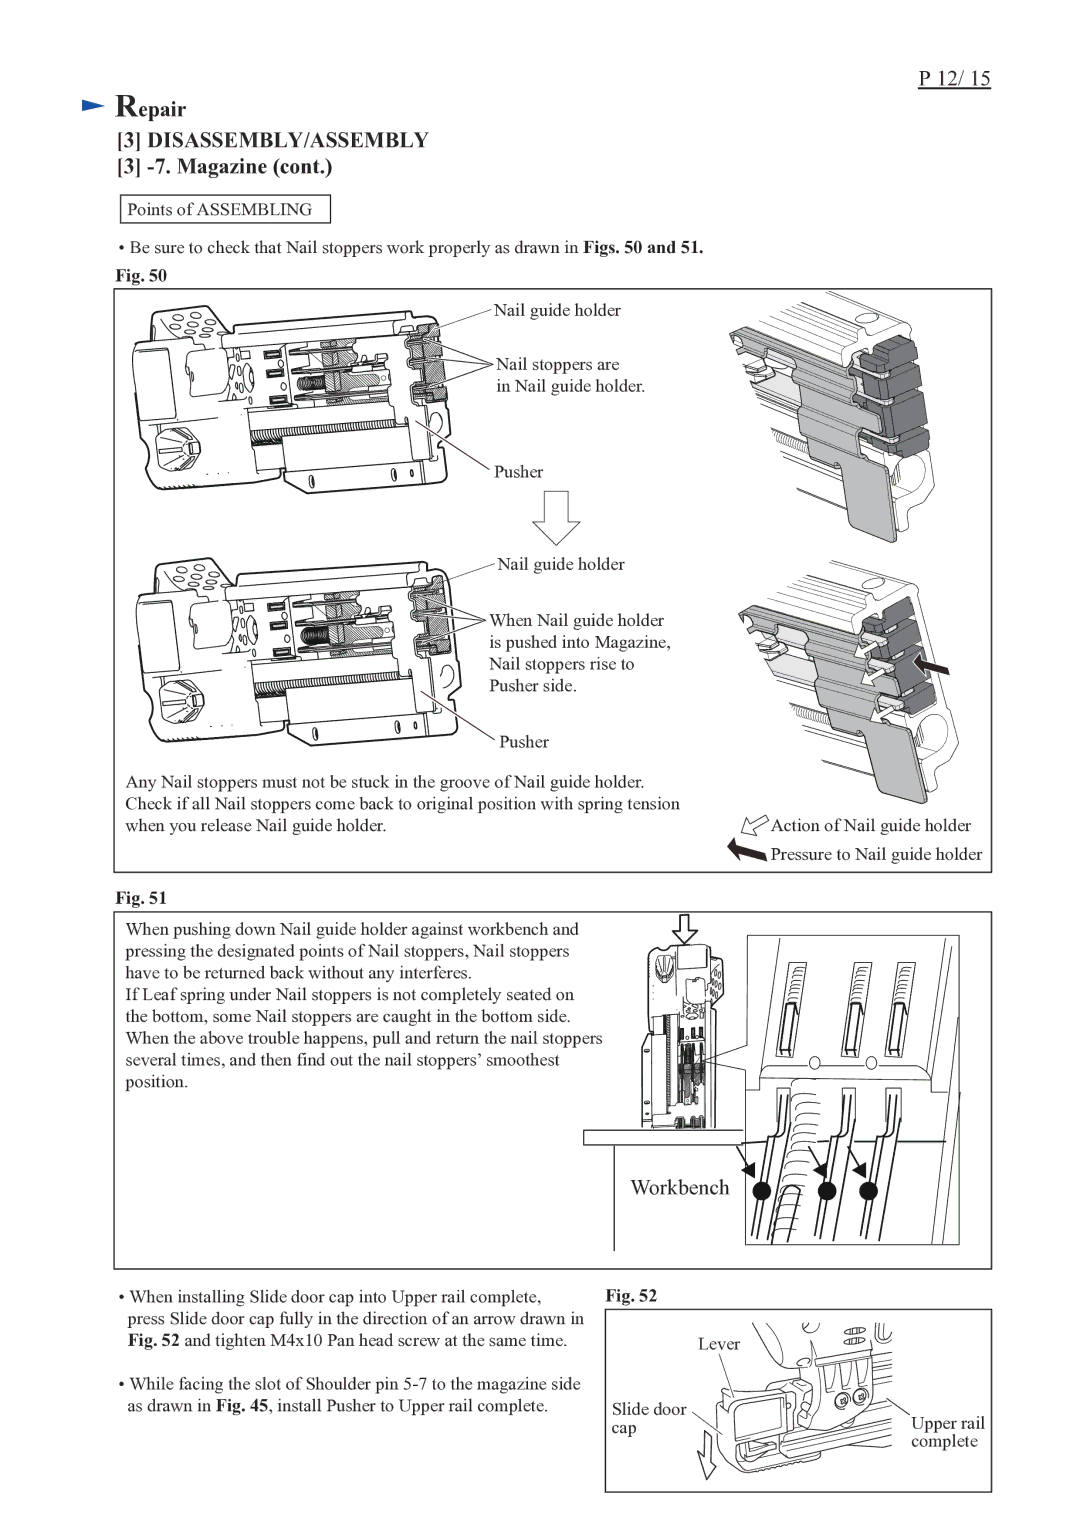
•Be sure to check that Nail stoppers work properly as drawn in Figs. 50 and 51.
Fig. 50
Nail guide holder
![]()
![]()
![]()
![]() Nail stoppers are
Nail stoppers are ![]()
![]()
![]() in Nail guide holder.
in Nail guide holder.
![]() Pusher
Pusher
Nail guide holder |
|
When Nail guide holder |
|
is pushed into Magazine, |
|
Nail stoppers rise to |
|
Pusher side. |
|
Pusher |
|
Any Nail stoppers must not be stuck in the groove of Nail guide holder. |
|
Check if all Nail stoppers come back to original position with spring tension | Action of Nail guide holder |
when you release Nail guide holder. | |
| Pressure to Nail guide holder |
Fig. 51
When pushing down Nail guide holder against workbench and pressing the designated points of Nail stoppers, Nail stoppers have to be returned back without any interferes.
If Leaf spring under Nail stoppers is not completely seated on the bottom, some Nail stoppers are caught in the bottom side. When the above trouble happens, pull and return the nail stoppers several times, and then find out the nail stoppers’ smoothest position.
Workbench
•When installing Slide door cap into Upper rail complete, press Slide door cap fully in the direction of an arrow drawn in Fig. 52 and tighten M4x10 Pan head screw at the same time.
•While facing the slot of Shoulder pin
Fig. 52
Lever
Slide door cap
Upper rail complete