Repair
P 6/ 15
[3]DISASSEMBLY/ASSEMBLY
[3]-5. Spring Section (cont.)
DISASSEMBLING
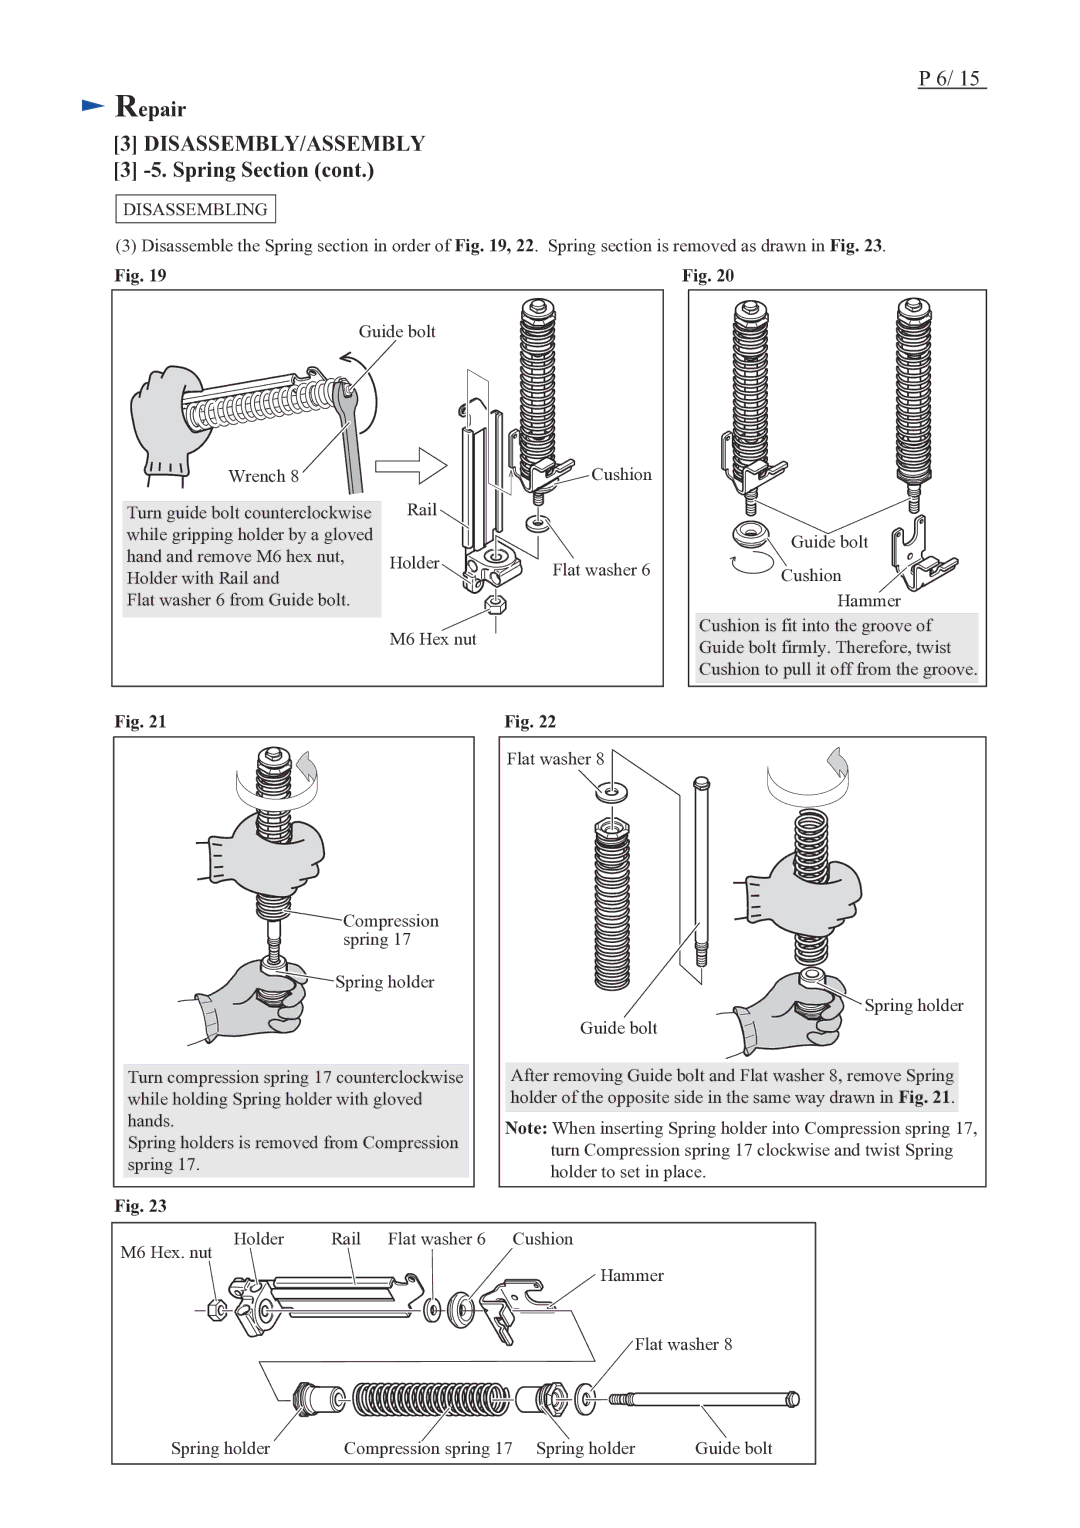
(3) Disassemble the Spring section in order of Fig. 19, 22. Spring section is removed as drawn in Fig. 23.
Fig. 19 | Fig. 20 |
Guide bolt
Wrench 8 ![]()
Turn guide bolt counterclockwise while gripping holder by a gloved hand and remove M6 hex nut, Holder with Rail and
Flat washer 6 from Guide bolt.
Cushion |
Rail
Holder![]()
![]()
![]() Flat washer 6
Flat washer 6
M6 Hex nut
Guide bolt
![]() Cushion
Cushion ![]()
![]()
![]() Hammer
Hammer
Cushion is fit into the groove of Guide bolt firmly. Therefore, twist Cushion to pull it off from the groove.
Fig. 21
![]() Compression
Compression
spring 17
![]() Spring holder
Spring holder
Turn compression spring 17 counterclockwise while holding Spring holder with gloved hands.
Spring holders is removed from Compression spring 17.
Fig. 22
Flat washer 8
![]()
![]() Spring holder
Spring holder
Guide bolt
After removing Guide bolt and Flat washer 8, remove Spring holder of the opposite side in the same way drawn in Fig. 21.
Note: When inserting Spring holder into Compression spring 17, turn Compression spring 17 clockwise and twist Spring holder to set in place.
Fig. 23
M6 Hex. nut | Holder | Rail | Flat washer 6 | Cushion |
|
|
|
| Hammer |
| |
|
|
|
|
| |
|
|
|
| Flat washer 8 | |
Spring holder | Compression spring 17 | Spring holder | Guide bolt | ||