Diopter Adjustment
Look through the viewfinder and make sure that the focus frame (Rectangle with Circle) is in sharp focus. If it is not, turn the diopter adjustment dial in the
*Point the camera at a bright, plain object such as a white wall when making this adjustment.
Range of adjustment of diopter corrected lenses (Optional accessory)
Replacing the diopter corrected lens
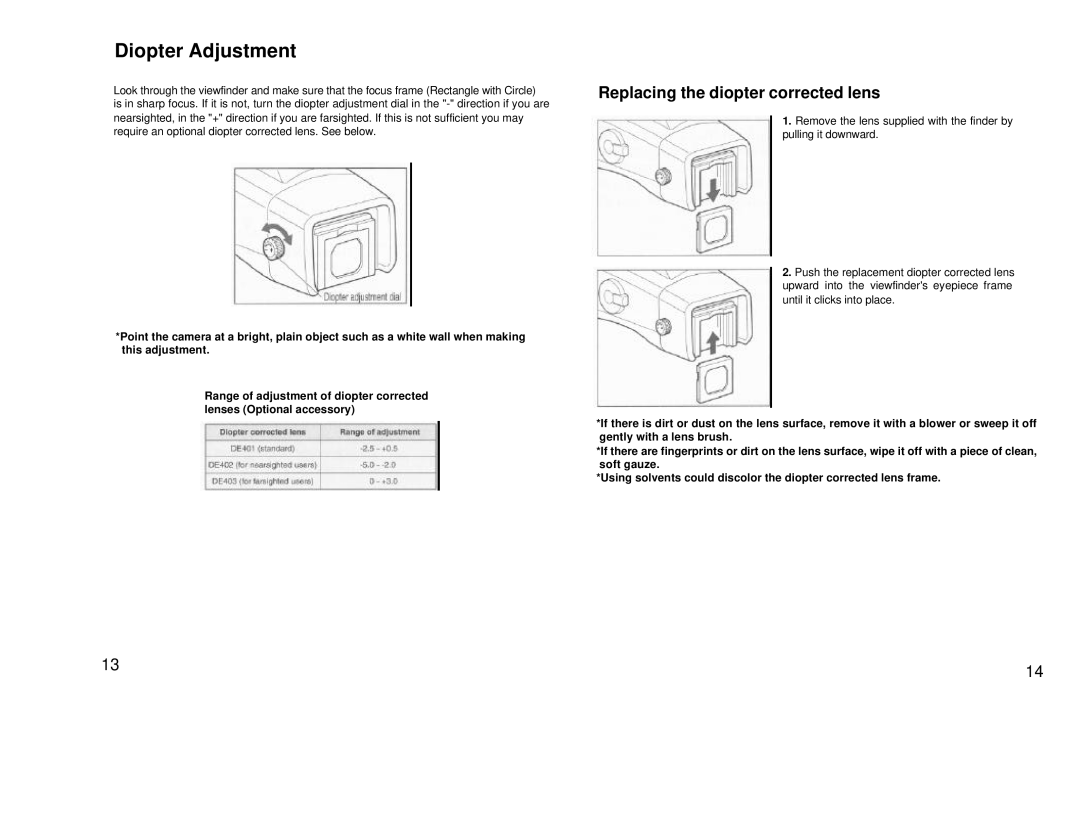
1.Remove the lens supplied with the finder by pulling it downward.
2.Push the replacement diopter corrected lens upward into the viewfinder's eyepiece frame until it clicks into place.
*If there is dirt or dust on the lens surface, remove it with a blower or sweep it off gently with a lens brush.
*If there are fingerprints or dirt on the lens surface, wipe it off with a piece of clean, soft gauze.
*Using solvents could discolor the diopter corrected lens frame.
13 | 14 |
|