ENGLISH
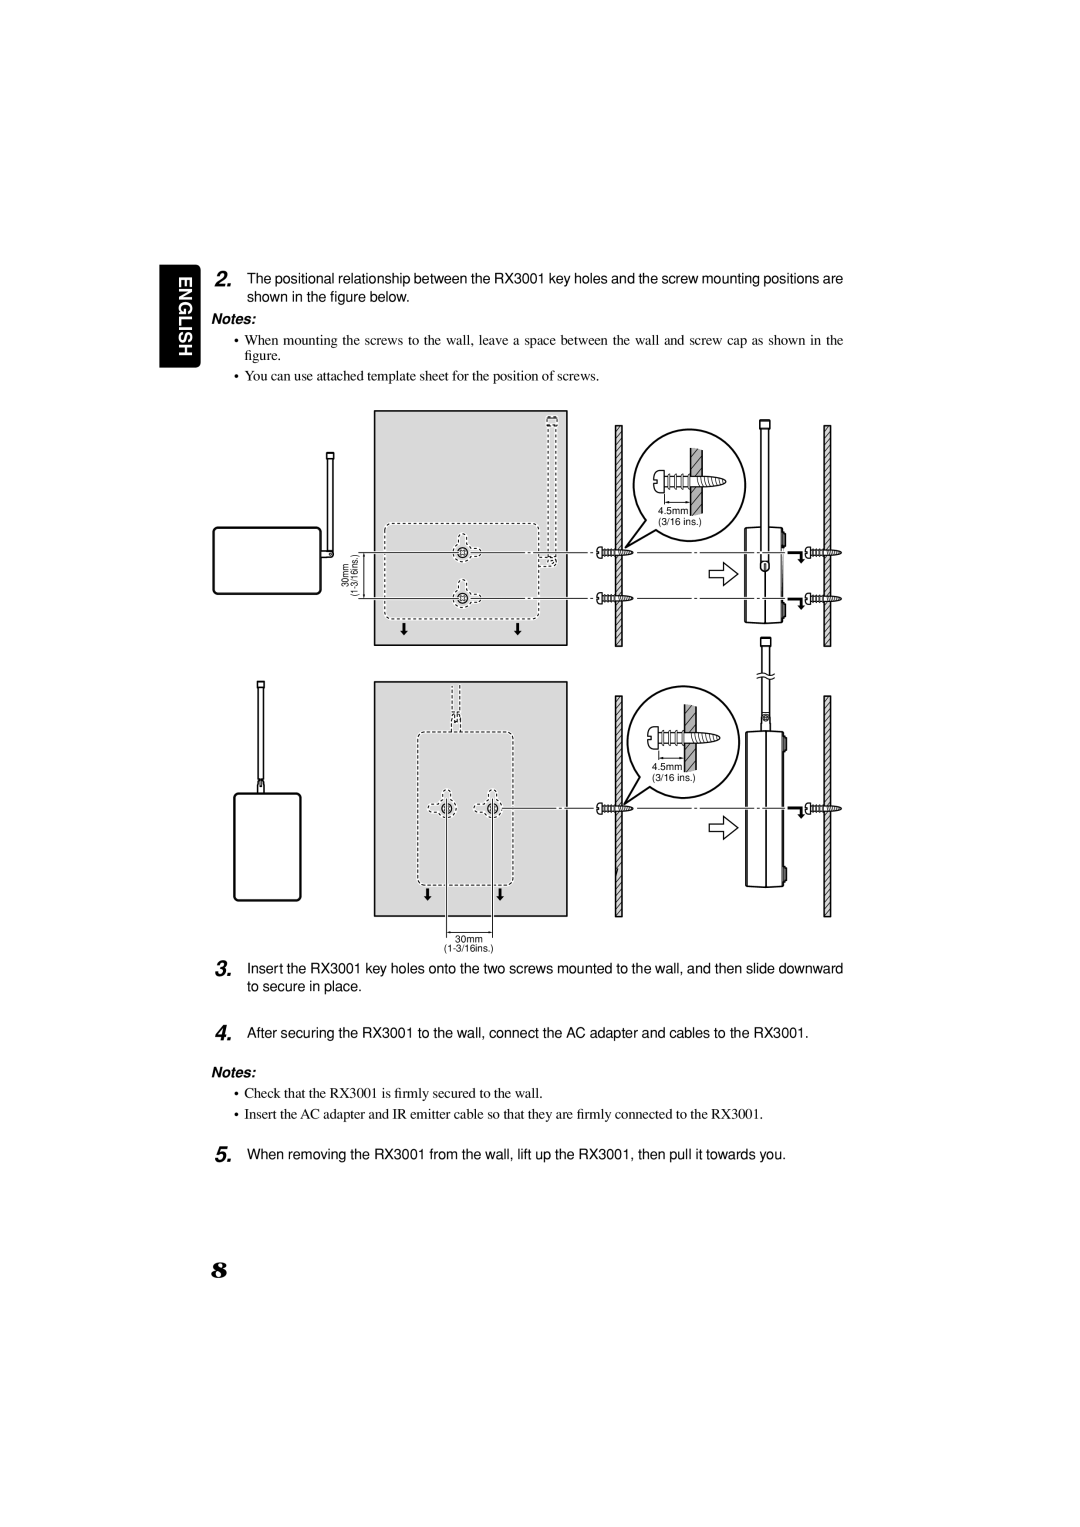
2. The positional relationship between the RX3001 key holes and the screw mounting positions are shown in the figure below.
Notes:
•When mounting the screws to the wall, leave a space between the wall and screw cap as shown in the figure.
•You can use attached template sheet for the position of screws.
| 4.5mm |
| (3/16 ins.) |
30mm | |
| (1 |
4.5mm (3/16 ins.)
3.
4.
30mm
Insert the RX3001 key holes onto the two screws mounted to the wall, and then slide downward to secure in place.
After securing the RX3001 to the wall, connect the AC adapter and cables to the RX3001.
Notes:
•Check that the RX3001 is firmly secured to the wall.
•Insert the AC adapter and IR emitter cable so that they are firmly connected to the RX3001.
5.When removing the RX3001 from the wall, lift up the RX3001, then pull it towards you.
8