INSTALLATION
Install the Hard Drive in a Device Bay
Refer to your computer user’s manual for specific mounting information. Be sure to secure the drive to the device bay with all four screws.
Attach the Interface and Power Cables
Do not force or rock the connectors into their sockets on the hard drive. Push them in straight until they are seated.
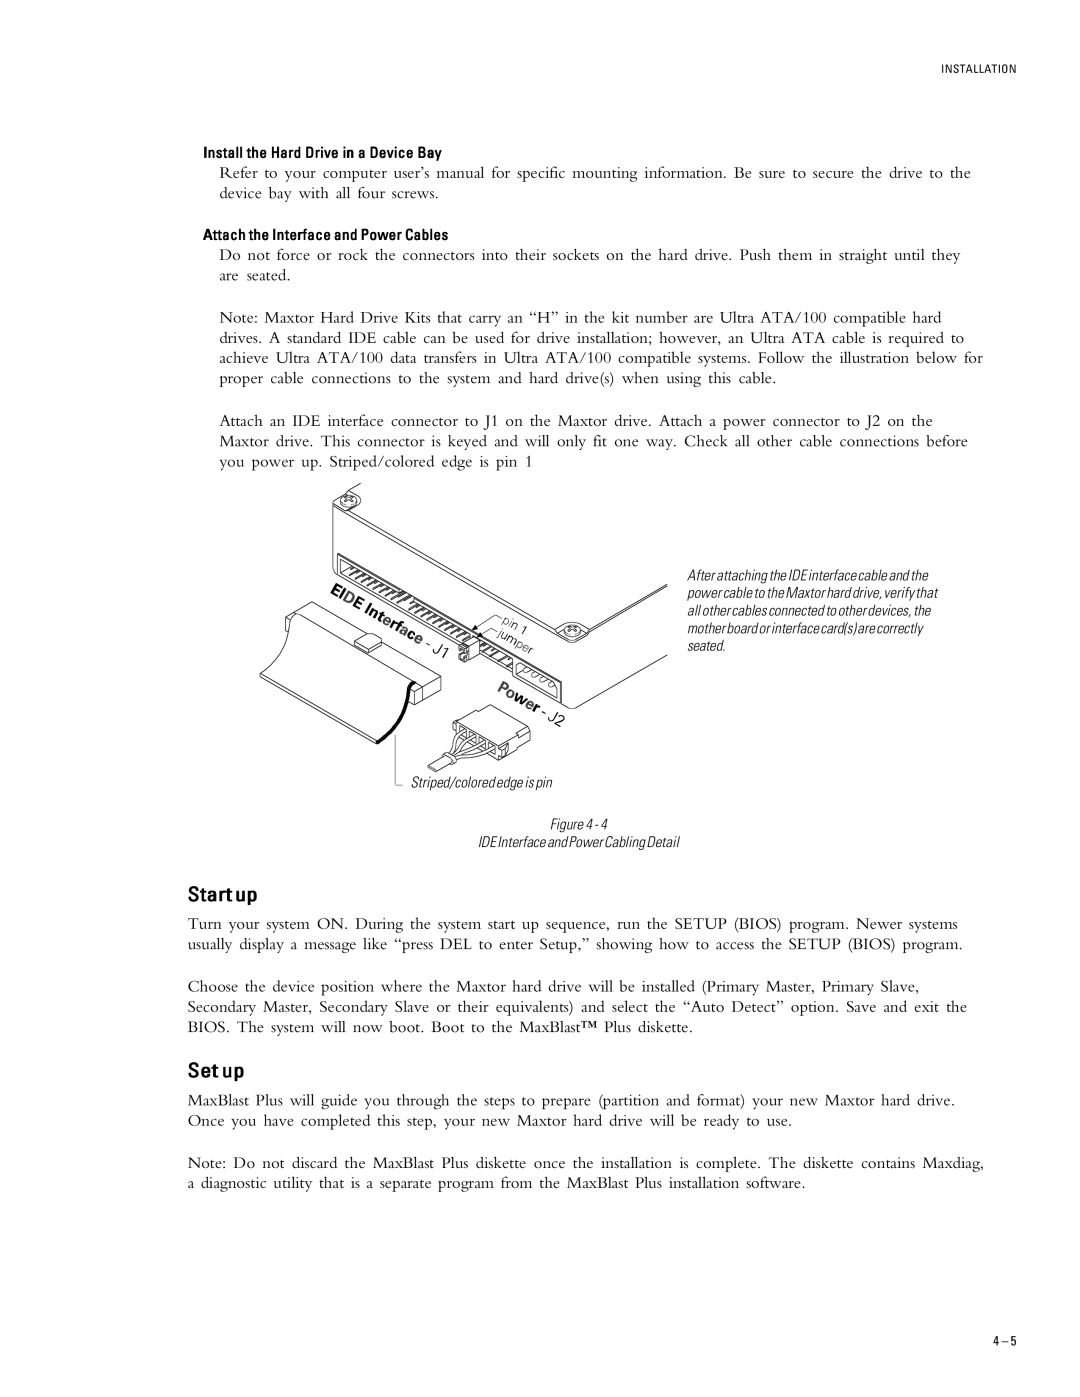
Note: Maxtor Hard Drive Kits that carry an “H” in the kit number are Ultra ATA/100 compatible hard drives. A standard IDE cable can be used for drive installation; however, an Ultra ATA cable is required to achieve Ultra ATA/100 data transfers in Ultra ATA/100 compatible systems. Follow the illustration below for proper cable connections to the system and hard drive(s) when using this cable.
Attach an IDE interface connector to J1 on the Maxtor drive. Attach a power connector to J2 on the Maxtor drive. This connector is keyed and will only fit one way. Check all other cable connections before you power up. Striped/colored edge is pin 1
After attaching the IDE interface cable and the power cable to the Maxtor hard drive, verify that all other cables connected to other devices, the mother board or interface card(s) are correctly seated.
Striped/colored edge is pin
Figure 4 - 4
IDE Interface and Power Cabling Detail
Start up
Turn your system ON. During the system start up sequence, run the SETUP (BIOS) program. Newer systems usually display a message like “press DEL to enter Setup,” showing how to access the SETUP (BIOS) program.
Choose the device position where the Maxtor hard drive will be installed (Primary Master, Primary Slave, Secondary Master, Secondary Slave or their equivalents) and select the “Auto Detect” option. Save and exit the BIOS. The system will now boot. Boot to the MaxBlast™ Plus diskette.
Set up
MaxBlast Plus will guide you through the steps to prepare (partition and format) your new Maxtor hard drive. Once you have completed this step, your new Maxtor hard drive will be ready to use.
Note: Do not discard the MaxBlast Plus diskette once the installation is complete. The diskette contains Maxdiag, a diagnostic utility that is a separate program from the MaxBlast Plus installation software.
4 – 5
