INSTALLATION

Check the appliance is electrically safe and gas sound when you have finished.

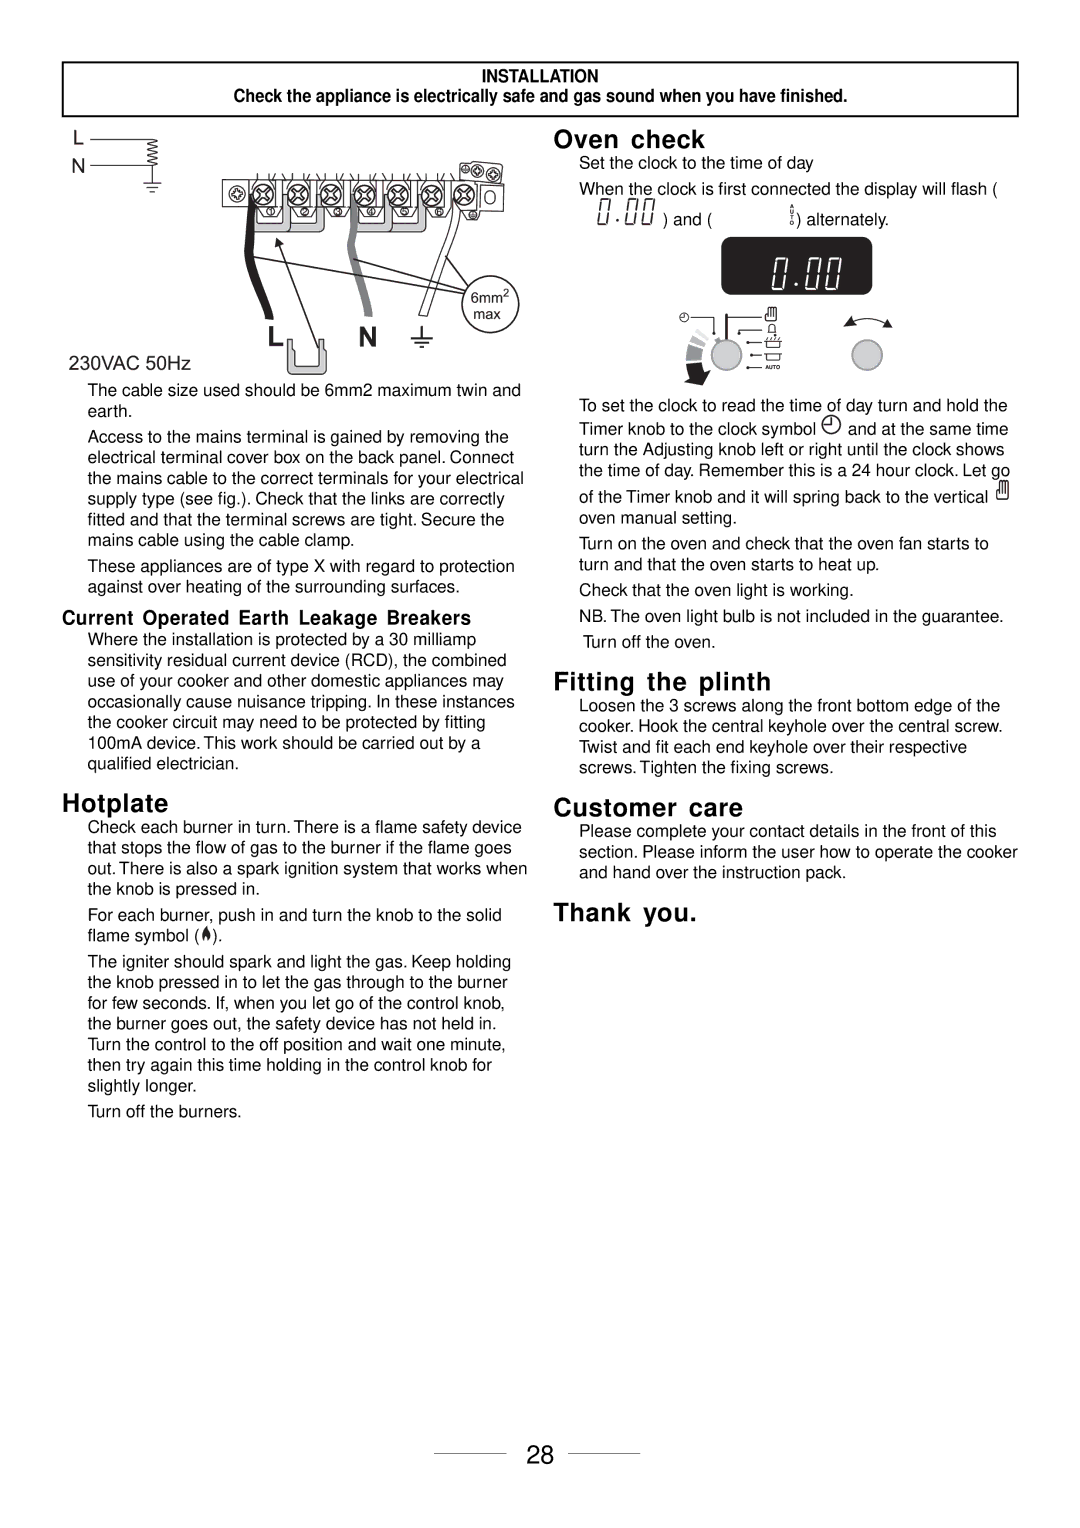
The cable size used should be 6mm2 maximum twin and earth.

Access to the mains terminal is gained by removing the electrical terminal cover box on the back panel. Connect the mains cable to the correct terminals for your electrical supply type (see fig.). Check that the links are correctly fitted and that the terminal screws are tight. Secure the mains cable using the cable clamp.

These appliances are of type X with regard to protection against over heating of the surrounding surfaces.

Current Operated Earth Leakage Breakers

Where the installation is protected by a 30 milliamp sensitivity residual current device (RCD), the combined use of your cooker and other domestic appliances may occasionally cause nuisance tripping. In these instances the cooker circuit may need to be protected by fitting 100mA device. This work should be carried out by a qualified electrician.

Oven check

Set the clock to the time of day

When the clock is first connected the display will flash (

) and ( ) alternately.

To set the clock to read the time of day turn and hold the Timer knob to the clock symbol and at the same time turn the Adjusting knob left or right until the clock shows the time of day. Remember this is a 24 hour clock. Let go

of the Timer knob and it will spring back to the vertical oven manual setting.

Turn on the oven and check that the oven fan starts to turn and that the oven starts to heat up.

Check that the oven light is working.

NB. The oven light bulb is not included in the guarantee.

Turn off the oven.

Fitting the plinth

Loosen the 3 screws along the front bottom edge of the cooker. Hook the central keyhole over the central screw. Twist and fit each end keyhole over their respective screws. Tighten the fixing screws.

Hotplate

Check each burner in turn. There is a flame safety device that stops the flow of gas to the burner if the flame goes out. There is also a spark ignition system that works when the knob is pressed in.

For each burner, push in and turn the knob to the solid flame symbol ().

The igniter should spark and light the gas. Keep holding the knob pressed in to let the gas through to the burner for few seconds. If, when you let go of the control knob, the burner goes out, the safety device has not held in.

Turn the control to the off position and wait one minute, then try again this time holding in the control knob for slightly longer.

Turn off the burners.

Customer care

Please complete your contact details in the front of this section. Please inform the user how to operate the cooker and hand over the instruction pack.

Thank you.

28

Page 28
Image 28
Maytag 110 installation instructions Oven check, Fitting the plinth, Customer care, Thank you

110 specifications

The Maytag 110 series is a line of high-efficiency washing machines known for their robust performance, reliability, and user-friendly features. Designed to meet the demands of modern households, the Maytag 110 stands out due to its powerful cleaning capabilities and advanced technology.

One of the key features of the Maytag 110 is its impressive capacity. With its spacious drum, this washer can accommodate large loads of laundry, making it ideal for families or individuals who require frequent washing. Its efficient design allows users to clean more clothes in fewer cycles, ultimately saving time and energy.

In terms of performance, the Maytag 110 employs a commercial-grade motor which provides consistent and powerful agitation. This motor reduces vibrations and noise during the wash cycle, ensuring a quiet operation. Additionally, the machine features a unique PowerWash cycle that combines extra cleaning action and heated water to tackle tough stains and ensure an impeccable clean.

The Maytag 110 also incorporates advanced washing technology. The Precision Clean wash system optimizes water usage while ensuring maximum cleaning efficiency. This system manages the water levels based on the size of the load, which helps to conserve water while ensuring that each item is thoroughly cleaned.

Moreover, the Maytag 110 is equipped with a variety of wash cycles and settings to accommodate different fabric types and soil levels. Options like Delicate, Heavy Duty, and Quick Wash allow users to customize their washing experience, ensuring the best care for every garment.

Durability is another hallmark of the Maytag brand, and the 110 series is no exception. Constructed with a solid metal frame and a stainless steel wash basket, the unit is designed to withstand the rigors of daily use. The robust build quality is further complemented by a 10-year limited parts warranty, reassuring users of the machine's longevity.

Additional thoughtful features include a lid lock system for safety, LED cycle status indicators, and a large, easy-to-use control panel that simplifies operation. The Maytag 110 also adheres to energy efficiency standards, making it an environmentally friendly choice that can help reduce utility bills.

In summary, the Maytag 110 series offers a powerful, efficient, and durable washing solution. With its combination of advanced technology, user-friendly design, and effective cleaning capabilities, it represents a reliable option for anyone seeking a high-performance washing machine.