240EdwardsStreet,SE Cleveiac_Td,er_ness3ee731?
IMPORTANT: Once adhesive bonds to the door panel, it cannot be removed. Make sure you align filler strip properly as you work towards the bottom of the door.
10.As you work toward the bottom of the door pull tape backing to expose adhesive to door panel.
INSTALLATION OF PERIMETER TRIM
NOTE: Holes must be drilled in the face of the door to mount the lower
11. Carefully cut out refrigerator door template from template sheet. Tape template to the face of the door so that the edges of the template exactly line up with the edges of the door as printed on the template.
12.Drill 5/64" diameter holes through the face of the door where shown on the template. Use care to accu- rately locate the holes.
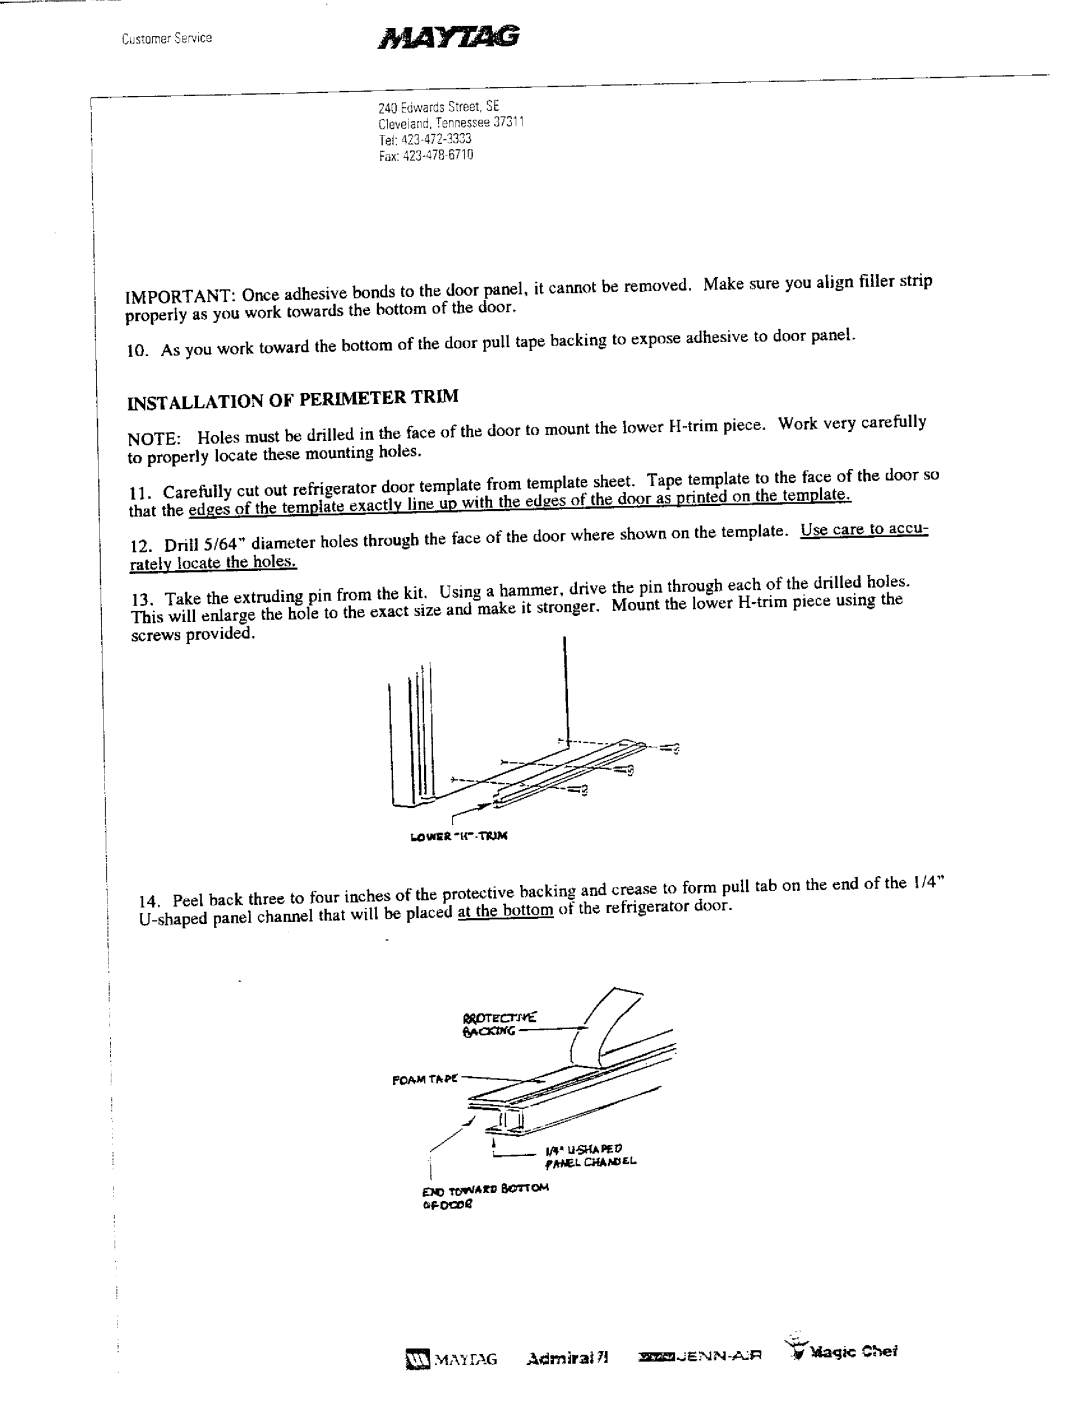
13.Take the extruding pin from the kit. Using a hammer, drive the pin through each of the drilled holes.
This will enlarge the hole to the exact size and make it stronger. Mount the lower
k_ I,IIIIZ "I1" .'['_IN
14, Peel back three to four inches of the protective backing and crease to form pull tab on the end of the 1/4"
_OAM T&PI[