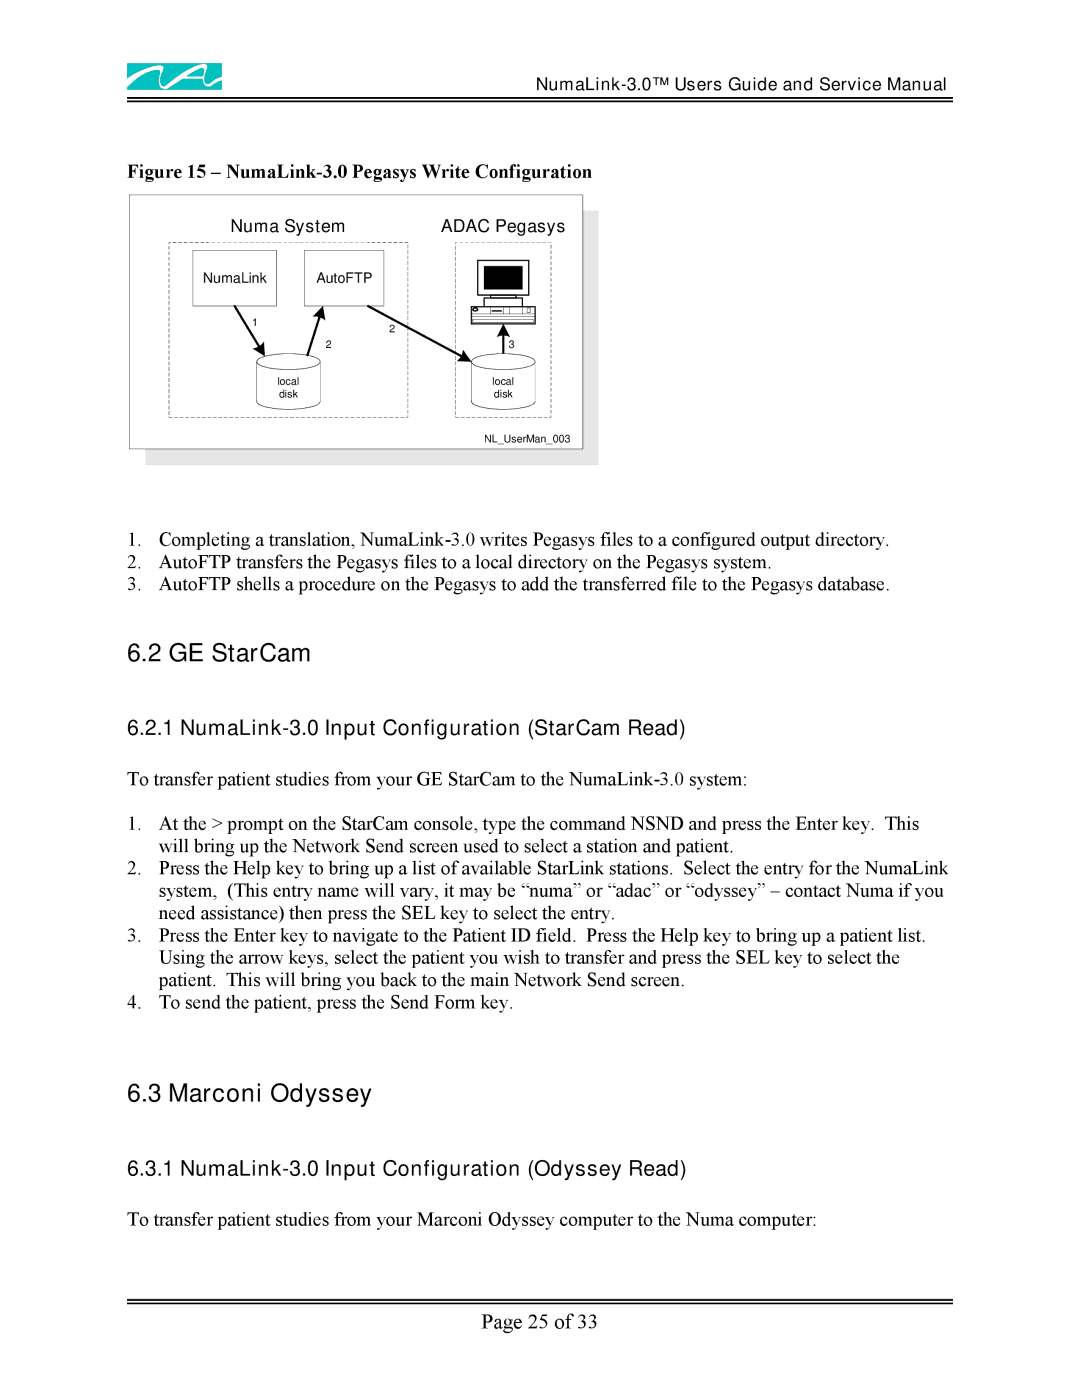
Figure 15 – NumaLink-3.0 Pegasys Write Configuration
Numa System | ADAC Pegasys | |
NumaLink | AutoFTP |
|
1 |
| 2 |
|
| |
| 2 | 3 |
| local | local |
| disk | disk |
|
| NL_UserMan_003 |
1.Completing a translation,
2.AutoFTP transfers the Pegasys files to a local directory on the Pegasys system.
3.AutoFTP shells a procedure on the Pegasys to add the transferred file to the Pegasys database.
6.2 GE StarCam
6.2.1 NumaLink-3.0 Input Configuration (StarCam Read)
To transfer patient studies from your GE StarCam to the
1.At the > prompt on the StarCam console, type the command NSND and press the Enter key. This will bring up the Network Send screen used to select a station and patient.
2.Press the Help key to bring up a list of available StarLink stations. Select the entry for the NumaLink system, (This entry name will vary, it may be “numa” or “adac” or “odyssey” – contact Numa if you need assistance) then press the SEL key to select the entry.
3.Press the Enter key to navigate to the Patient ID field. Press the Help key to bring up a patient list. Using the arrow keys, select the patient you wish to transfer and press the SEL key to select the patient. This will bring you back to the main Network Send screen.
4.To send the patient, press the Send Form key.
6.3 Marconi Odyssey
6.3.1 NumaLink-3.0 Input Configuration (Odyssey Read)
To transfer patient studies from your Marconi Odyssey computer to the Numa computer:
Page 25 of 33