PERFORMING A LEAK TEST
To reduce the risk of serious bodily injury or death:
·Always perform a leak test before each use.
·Never use a match or open flame to test for gas leaks.
·Perform a leak test in a well ventilated area.
·Do not perform a leak test on a grill while it is hot or in use.
·Do not use the LP gas grill if you detect a gas leak that cannot be corrected by using the leak test procedures on following page.
How to perform a leak test:
Supplies Needed for a Leak Test: Clean paint brush, water, and dish washing liquid.
1)Use a 1 pound disposable LP Cylinder.
2)Make sure the control knobs to grill and
accessories are turned to the “off” position.
4)Mix one part of water with one part of dish washing liquid.
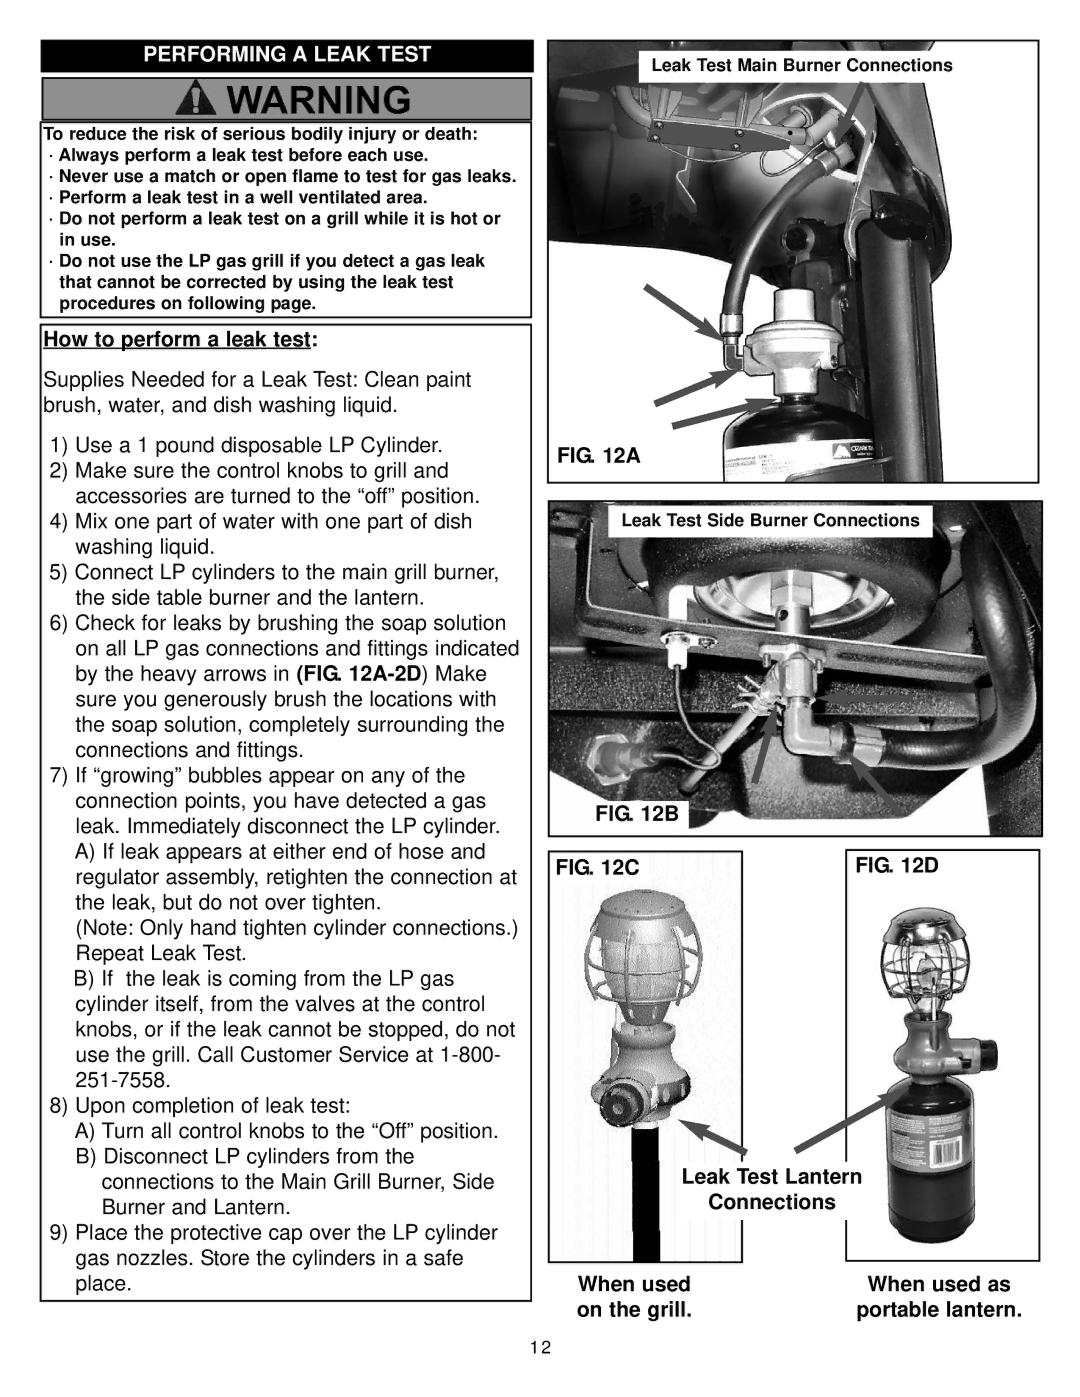
5)Connect LP cylinders to the main grill burner, the side table burner and the lantern.
6)Check for leaks by brushing the soap solution on all LP gas connections and fittings indicated by the heavy arrows in (FIG.
7)If “growing” bubbles appear on any of the connection points, you have detected a gas leak. Immediately disconnect the LP cylinder.
A)If leak appears at either end of hose and regulator assembly, retighten the connection at the leak, but do not over tighten.
(Note: Only hand tighten cylinder connections.) Repeat Leak Test.
B)If the leak is coming from the LP gas cylinder itself, from the valves at the control knobs, or if the leak cannot be stopped, do not use the grill. Call Customer Service at
8)Upon completion of leak test:
A)Turn all control knobs to the “Off” position. B) Disconnect LP cylinders from the
connections to the Main Grill Burner, Side Burner and Lantern.
9)Place the protective cap over the LP cylinder gas nozzles. Store the cylinders in a safe place.
Leak Test Main Burner Connections
FIG. 12A
Leak Test Side Burner Connections
FIG. 12B
| FIG. 12C |
|
|
| FIG. 12D |
|
|
|
|
|
|
|
|
|
|
|
|
|
|
|
Leak Test Lantern
Connections
When used | When used as |
on the grill. | portable lantern. |
12
