To reduce the risk of serious bodily injury or death:
·Use only 1 pound LP cylinder with Side Burner.
·Remove plastic Side burner cover before lighting the Side burner to prevent an explosion from gas
·Make sure there are no obstructions to the flow of combustion and ventilation air to the side burner.
·During failed lighting attempts, or if the side burner goes out during the cooking process, turn control knob “Off” to dissipate any accumulation of gas. Wait five minutes before repeating lighting procedure.
·To avoid burns, keeps hands and fingers away from the burner ring when manually lighting with a match.
IGNITION LIGHTING THE SIDE BURNER
1.Remove Side Burner Cover if on.
2.Important: Make sure Side Burner Control Knob is turned “Off” first.
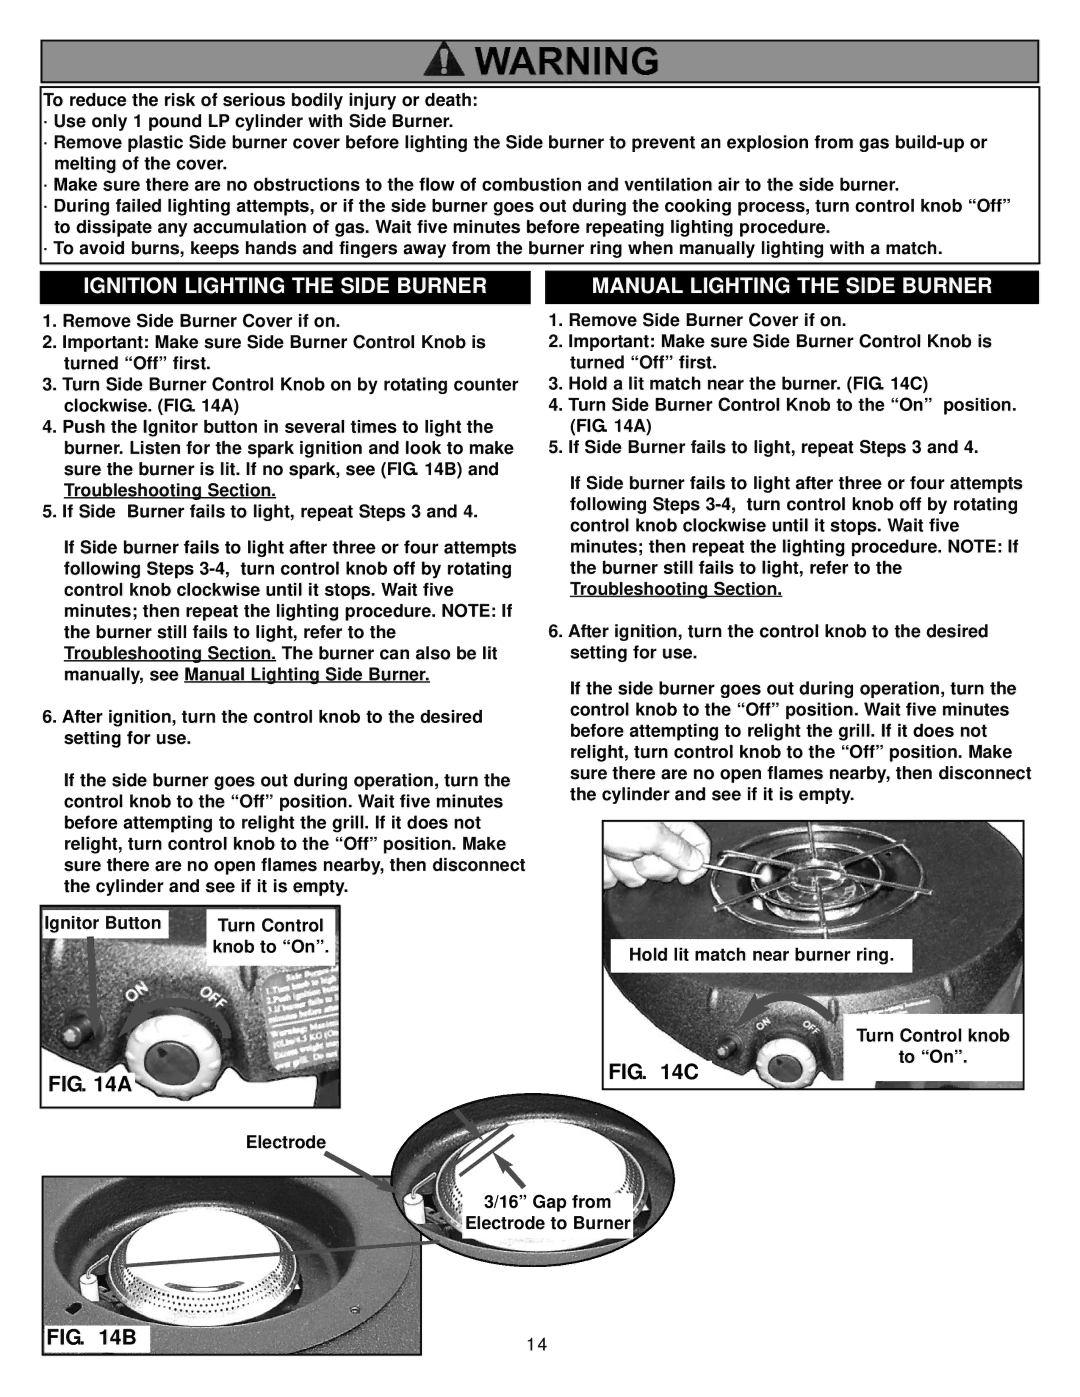
3.Turn Side Burner Control Knob on by rotating counter clockwise. (FIG. 14A)
4.Push the Ignitor button in several times to light the burner. Listen for the spark ignition and look to make sure the burner is lit. If no spark, see (FIG. 14B) and Troubleshooting Section.
5.If Side Burner fails to light, repeat Steps 3 and 4.
If Side burner fails to light after three or four attempts following Steps
6.After ignition, turn the control knob to the desired setting for use.
If the side burner goes out during operation, turn the control knob to the “Off” position. Wait five minutes before attempting to relight the grill. If it does not relight, turn control knob to the “Off” position. Make sure there are no open flames nearby, then disconnect the cylinder and see if it is empty.
Ignitor Button |
| Turn Control |
|
| knob to “On”. |
| ||
|
|
|
MANUAL LIGHTING THE SIDE BURNER
1.Remove Side Burner Cover if on.
2.Important: Make sure Side Burner Control Knob is turned “Off” first.
3.Hold a lit match near the burner. (FIG. 14C)
4.Turn Side Burner Control Knob to the “On” position. (FIG. 14A)
5.If Side Burner fails to light, repeat Steps 3 and 4.
If Side burner fails to light after three or four attempts following Steps
6.After ignition, turn the control knob to the desired setting for use.
If the side burner goes out during operation, turn the control knob to the “Off” position. Wait five minutes before attempting to relight the grill. If it does not relight, turn control knob to the “Off” position. Make sure there are no open flames nearby, then disconnect the cylinder and see if it is empty.
Hold lit match near burner ring.
Turn Control knob
FIG. 14A
FIG. 14C
to “On”.
|
| Electrode |
|
| 3/16” Gap from |
|
| Electrode to Burner |
FIG. | 14B | 14 |