Leg Lock Assembly Instructions for Open/Close Leg
(Note: Use these instructions with Step 2 on page 6.)
To reduce the risk of a cut or pinching injury:
·Wear protective gloves when handling parts that have sharp edges.
·When opening legs, keep hands and fingers away from the three body leg mount areas to avoid pinching.
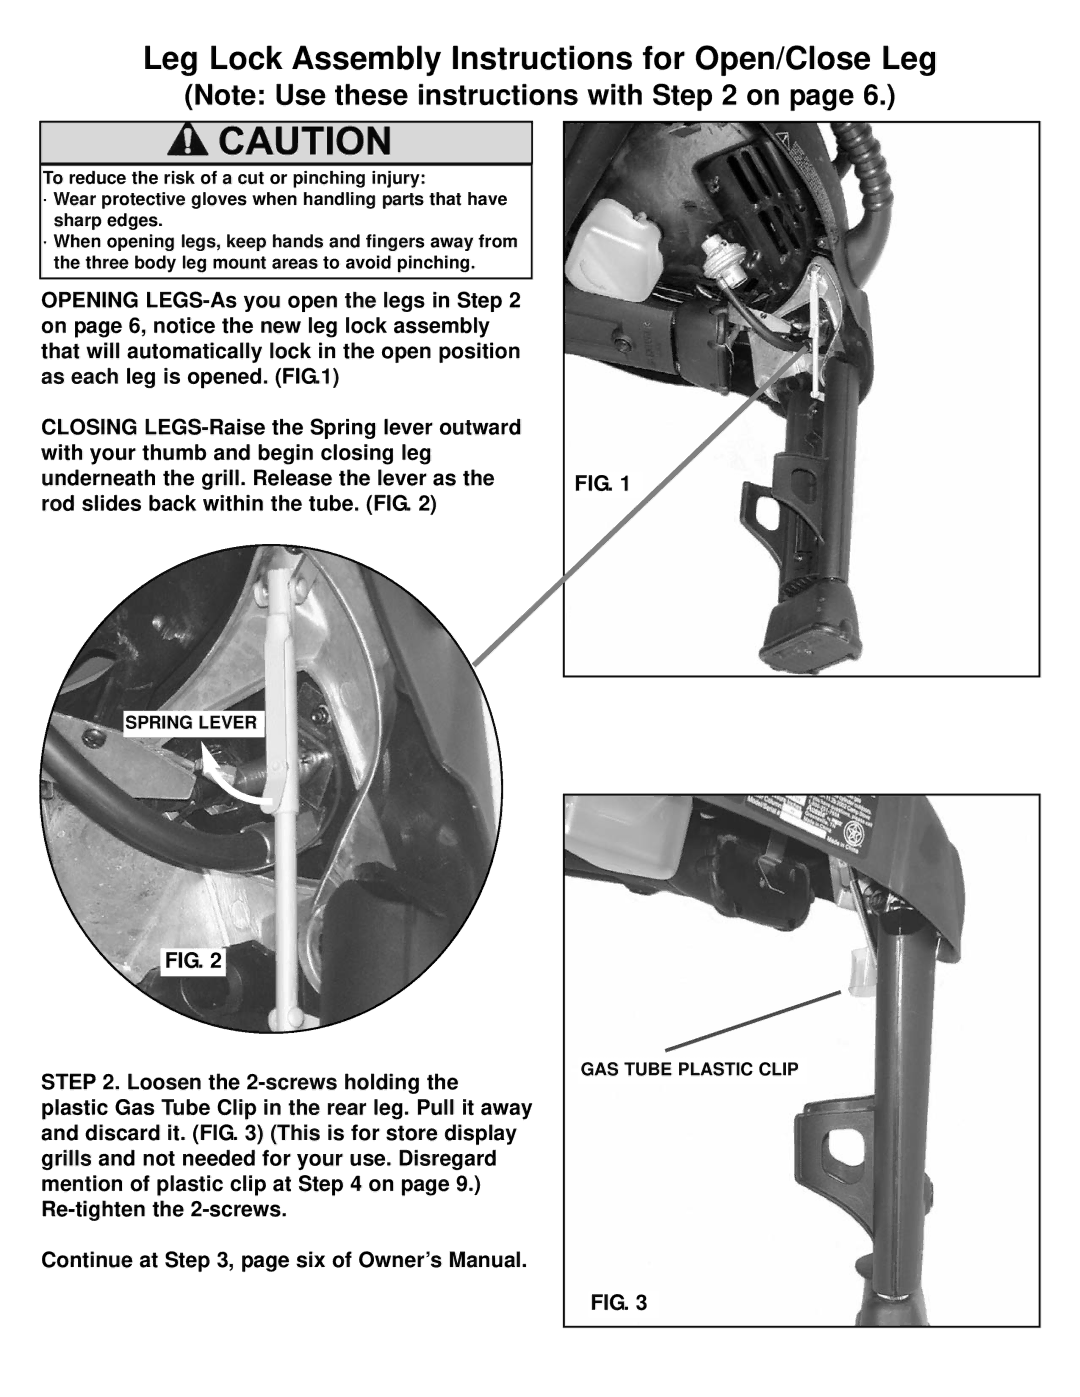
OPENING LEGS-As you open the legs in Step 2 on page 6, notice the new leg lock assembly that will automatically lock in the open position as each leg is opened. (FIG.1)
CLOSING LEGS-Raise the Spring lever outward with your thumb and begin closing leg underneath the grill. Release the lever as the rod slides back within the tube. (FIG. 2)
SPRING LEVER
FIG. 2
STEP 2. Loosen the 2-screws holding the plastic Gas Tube Clip in the rear leg. Pull it away and discard it. (FIG. 3) (This is for store display grills and not needed for your use. Disregard mention of plastic clip at Step 4 on page 9.) Re-tighten the 2-screws.
Continue at Step 3, page six of Owner’s Manual.
GAS TUBE PLASTIC CLIP
FIG. 3

