
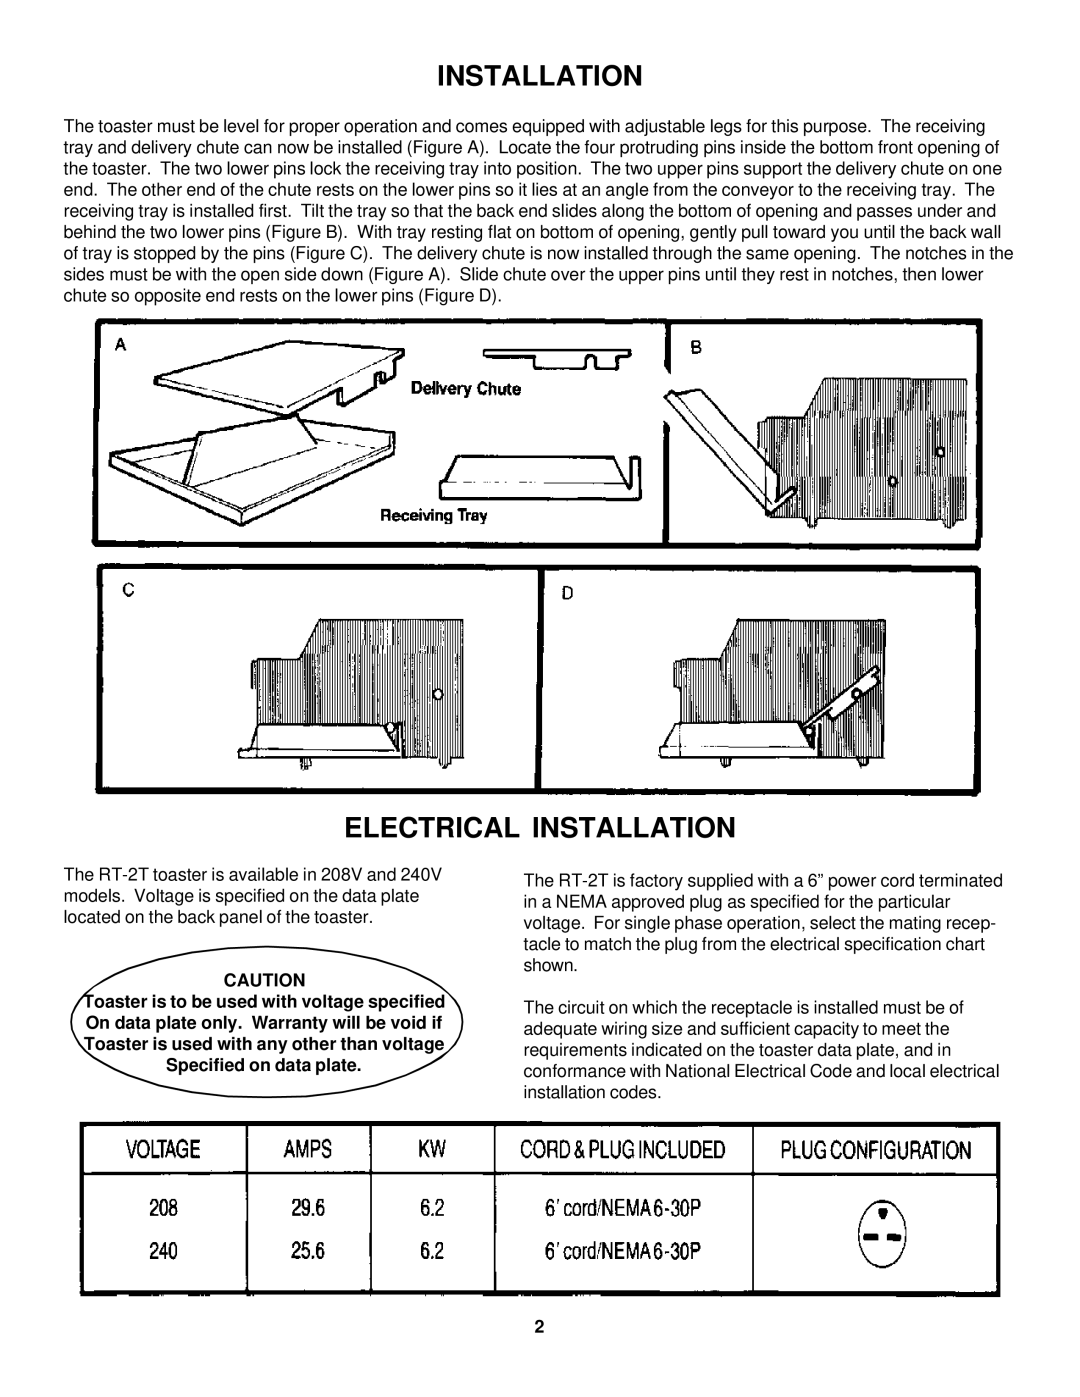
RT-2T specifications
The Merco Savory RT-2T is a high-performance countertop steamer designed to meet the rigorous demands of commercial kitchens. This innovative piece of equipment is engineered to enhance food preparation efficiency while preserving the natural flavors, textures, and nutrients of ingredients. With its sleek design and advanced features, the RT-2T is perfect for restaurants, cafes, and catering operations that prioritize quality and speed.One of the standout features of the Merco Savory RT-2T is its dual-tank steam system. This allows for consistent and uniform heating, ensuring that food is cooked evenly without compromising moisture content. The dual-tank design also helps prevent flavor transfer between different dishes, making it ideal for preparing a variety of menu items simultaneously. With a capacity suitable for multiple dishes, operators can streamline their cooking processes and reduce wait times for customers.
The RT-2T incorporates advanced digital controls, enabling precise temperature adjustments and cooking times. The intuitive interface allows chefs to program different cooking cycles, which can be saved for future use, thus ensuring repeatability in the kitchen. This technology minimizes food waste and maximizes efficiency, allowing staff to focus on their culinary creativity.
For safety, the Merco Savory RT-2T is fitted with an automatic shut-off feature and a safety drain system, which reduces the risk of overheating and simplifies cleaning. Its stainless steel construction ensures durability and resilience in the fast-paced kitchen environment. The exterior is easy to clean and maintain, providing a hygienic cooking environment that meets industry standards.
Energy efficiency is another hallmark of the RT-2T. Designed to operate with minimal energy consumption, it helps businesses reduce operational costs while still delivering high-quality cooking results. The steamer heats up quickly, allowing chefs to start cooking almost immediately, which is essential during peak service times.
In summary, the Merco Savory RT-2T is an exceptional countertop steamer that combines advanced technology with user-friendly features. Its dual-tank steam system, digital controls, and durable construction make it an invaluable asset in any commercial kitchen. With the RT-2T, chefs can elevate their food offerings while optimizing their workflow, resulting in satisfied customers and a thriving culinary business.