APPENDIX B – IR SETUP COMMANDS
IR REMOTE TEACHING FUNCTIONS
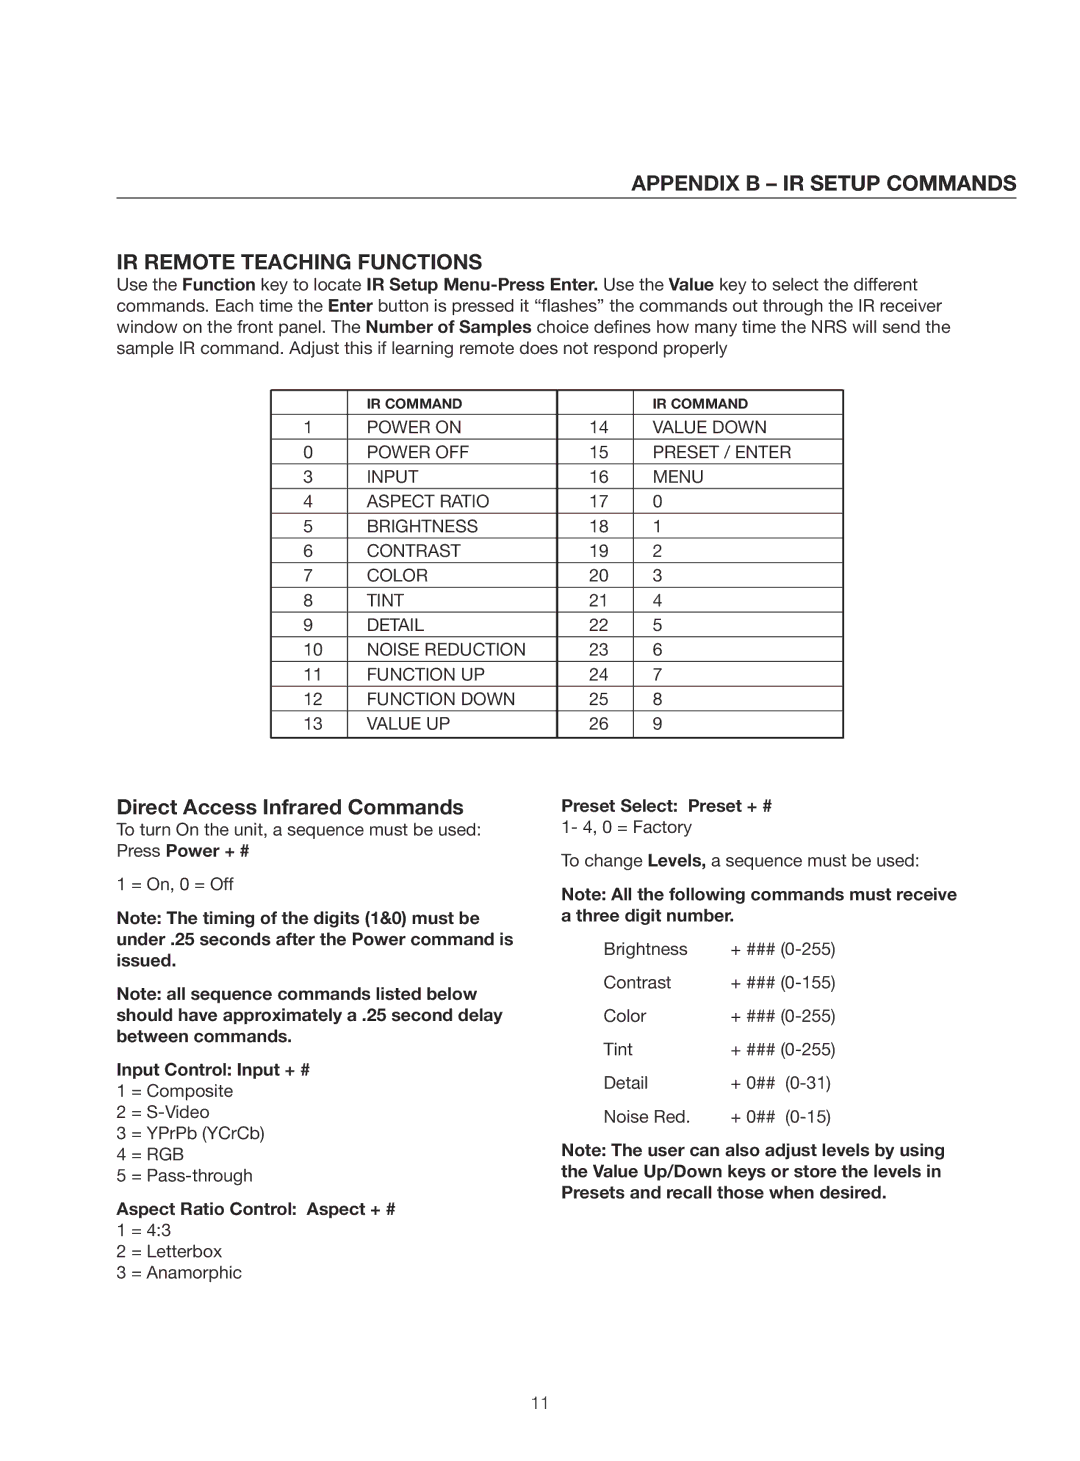
Use the Function key to locate IR Setup
| IR COMMAND |
| IR COMMAND |
|
|
|
|
1 | POWER ON | 14 | VALUE DOWN |
0 | POWER OFF | 15 | PRESET / ENTER |
3 | INPUT | 16 | MENU |
4 | ASPECT RATIO | 17 | 0 |
5 | BRIGHTNESS | 18 | 1 |
6 | CONTRAST | 19 | 2 |
7 | COLOR | 20 | 3 |
8 | TINT | 21 | 4 |
9 | DETAIL | 22 | 5 |
10 | NOISE REDUCTION | 23 | 6 |
11 | FUNCTION UP | 24 | 7 |
12 | FUNCTION DOWN | 25 | 8 |
13 | VALUE UP | 26 | 9 |
|
|
|
|
Direct Access Infrared Commands
To turn On the unit, a sequence must be used: Press Power + #
1 = On, 0 = Off
Note: The timing of the digits (1&0) must be under .25 seconds after the Power command is issued.
Note: all sequence commands listed below should have approximately a .25 second delay between commands.
Input Control: Input + #
1 = Composite
2 =
3 = YPrPb (YCrCb)
4 = RGB
5 =
Aspect Ratio Control: Aspect + # 1 = 4:3
2 = Letterbox
3 = Anamorphic
Preset Select: Preset + #
1- 4, 0 = Factory
To change Levels, a sequence must be used:
Note: All the following commands must receive a three digit number.
Brightness | + ### | |
Contrast | + ### | |
Color | + ### | |
Tint | + ### | |
Detail | + 0## | |
Noise Red. | + 0## | |
Note: The user can also adjust levels by using the Value Up/Down keys or store the levels in Presets and recall those when desired.
11