INSTALLATION
|
|
|
|
|
|
|
|
|
1 | 2 | 3 |
| 5 | ||||
|
|
|
|
|
| 4 |
| |
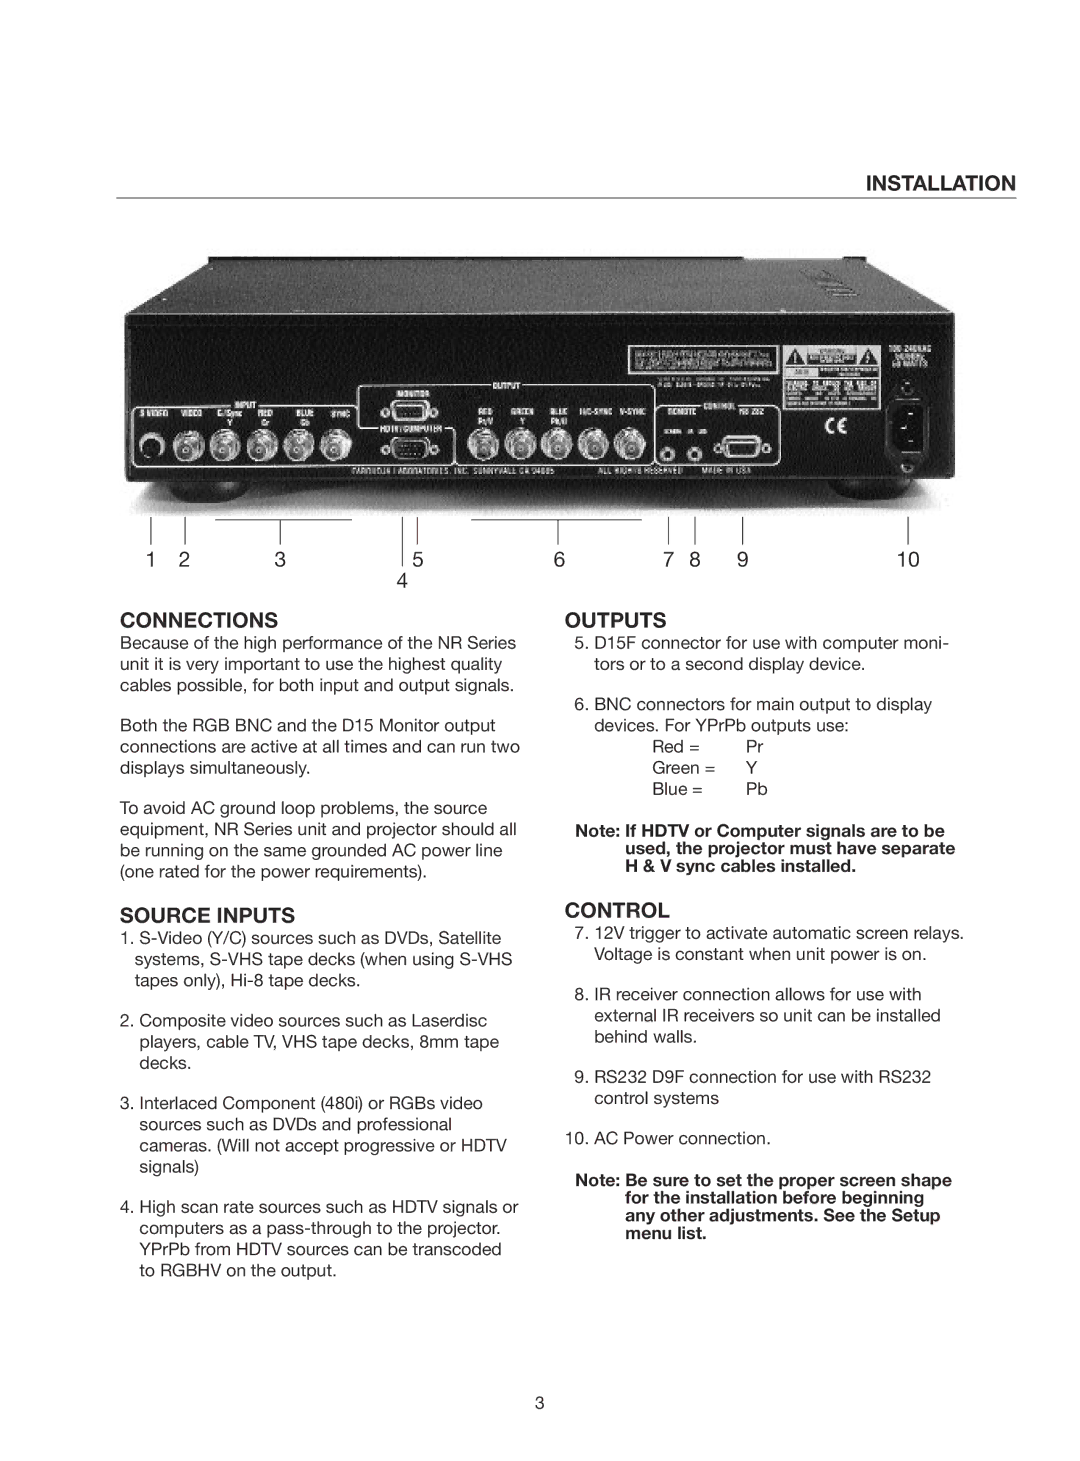
CONNECTIONS
Because of the high performance of the NR Series unit it is very important to use the highest quality cables possible, for both input and output signals.
Both the RGB BNC and the D15 Monitor output connections are active at all times and can run two displays simultaneously.
To avoid AC ground loop problems, the source equipment, NR Series unit and projector should all be running on the same grounded AC power line (one rated for the power requirements).
6 | 7 | 8 | 9 | 10 |
OUTPUTS
15. D15F connector for use with computer moni- tors or to a second display device.
16. BNC connectors for main output to display devices. For YPrPb outputs use:
Red = | Pr |
Green = | Y |
Blue = | Pb |
Note: If HDTV or Computer signals are to be used, the projector must have separate H & V sync cables installed.
SOURCE INPUTS
1.
2.Composite video sources such as Laserdisc players, cable TV, VHS tape decks, 8mm tape decks.
3.Interlaced Component (480i) or RGBs video sources such as DVDs and professional cameras. (Will not accept progressive or HDTV signals)
4.High scan rate sources such as HDTV signals or computers as a
CONTROL
17. 12V trigger to activate automatic screen relays. Voltage is constant when unit power is on.
18. IR receiver connection allows for use with external IR receivers so unit can be installed behind walls.
19. RS232 D9F connection for use with RS232 control systems
10. AC Power connection.
Note: Be sure to set the proper screen shape for the installation before beginning any other adjustments. See the Setup menu list.
3