SETUP
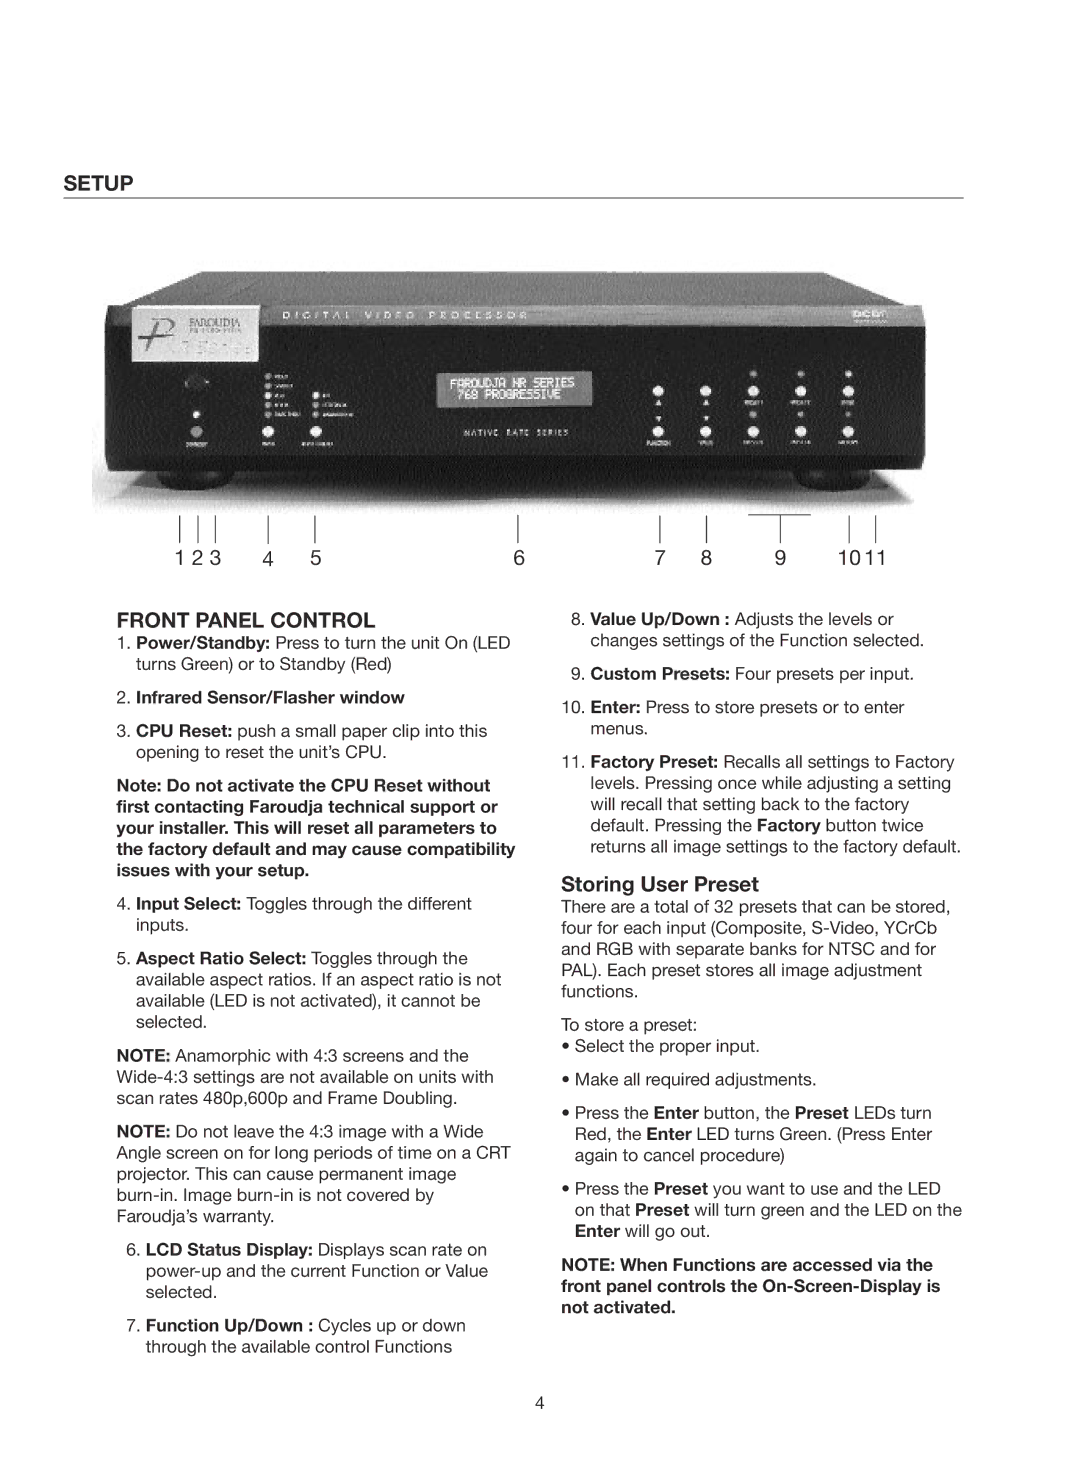
1 2 3 | 4 | 5 | 6 |
FRONT PANEL CONTROL
1.Power/Standby: Press to turn the unit On (LED turns Green) or to Standby (Red)
2.Infrared Sensor/Flasher window
3.CPU Reset: push a small paper clip into this opening to reset the unit’s CPU.
Note: Do not activate the CPU Reset without first contacting Faroudja technical support or your installer. This will reset all parameters to the factory default and may cause compatibility issues with your setup.
4.Input Select: Toggles through the different inputs.
5.Aspect Ratio Select: Toggles through the available aspect ratios. If an aspect ratio is not available (LED is not activated), it cannot be selected.
NOTE: Anamorphic with 4:3 screens and the
NOTE: Do not leave the 4:3 image with a Wide Angle screen on for long periods of time on a CRT projector. This can cause permanent image
16. LCD Status Display: Displays scan rate on
17. Function Up/Down : Cycles up or down through the available control Functions
7 | 8 | 9 | 10 11 |
18. Value Up/Down : Adjusts the levels or changes settings of the Function selected.
19. Custom Presets: Four presets per input.
10.Enter: Press to store presets or to enter menus.
11.Factory Preset: Recalls all settings to Factory levels. Pressing once while adjusting a setting will recall that setting back to the factory default. Pressing the Factory button twice returns all image settings to the factory default.
Storing User Preset
There are a total of 32 presets that can be stored, four for each input (Composite,
To store a preset:
•Select the proper input.
•Make all required adjustments.
•Press the Enter button, the Preset LEDs turn Red, the Enter LED turns Green. (Press Enter again to cancel procedure)
•Press the Preset you want to use and the LED on that Preset will turn green and the LED on the Enter will go out.
NOTE: When Functions are accessed via the front panel controls the
4