INSTALLATION
|
|
|
|
|
|
|
|
|
1 | 2 | 3 |
| 5 | ||||
|
|
|
|
|
| 4 |
| |
UNPACKING
Remove the NR Series unit from the shipping con- tainer and examine it for any signs of shipping damage or missing items (check inventory list below). All shipping materials should be saved if the unit is to be moved or returned for service.
INSTALLATION
The processor can be either placed on a table or rack mounted. If the rack mounting installation kit is used, the rack mount ears are mounted by using 3 screws. It will be necessary to support the rear of the unit if it will be shipped in the rack by using rack support rails supplied by the rack manufac- turer.
VENTILATION
6 | 7 | 8 | 9 | 10 |
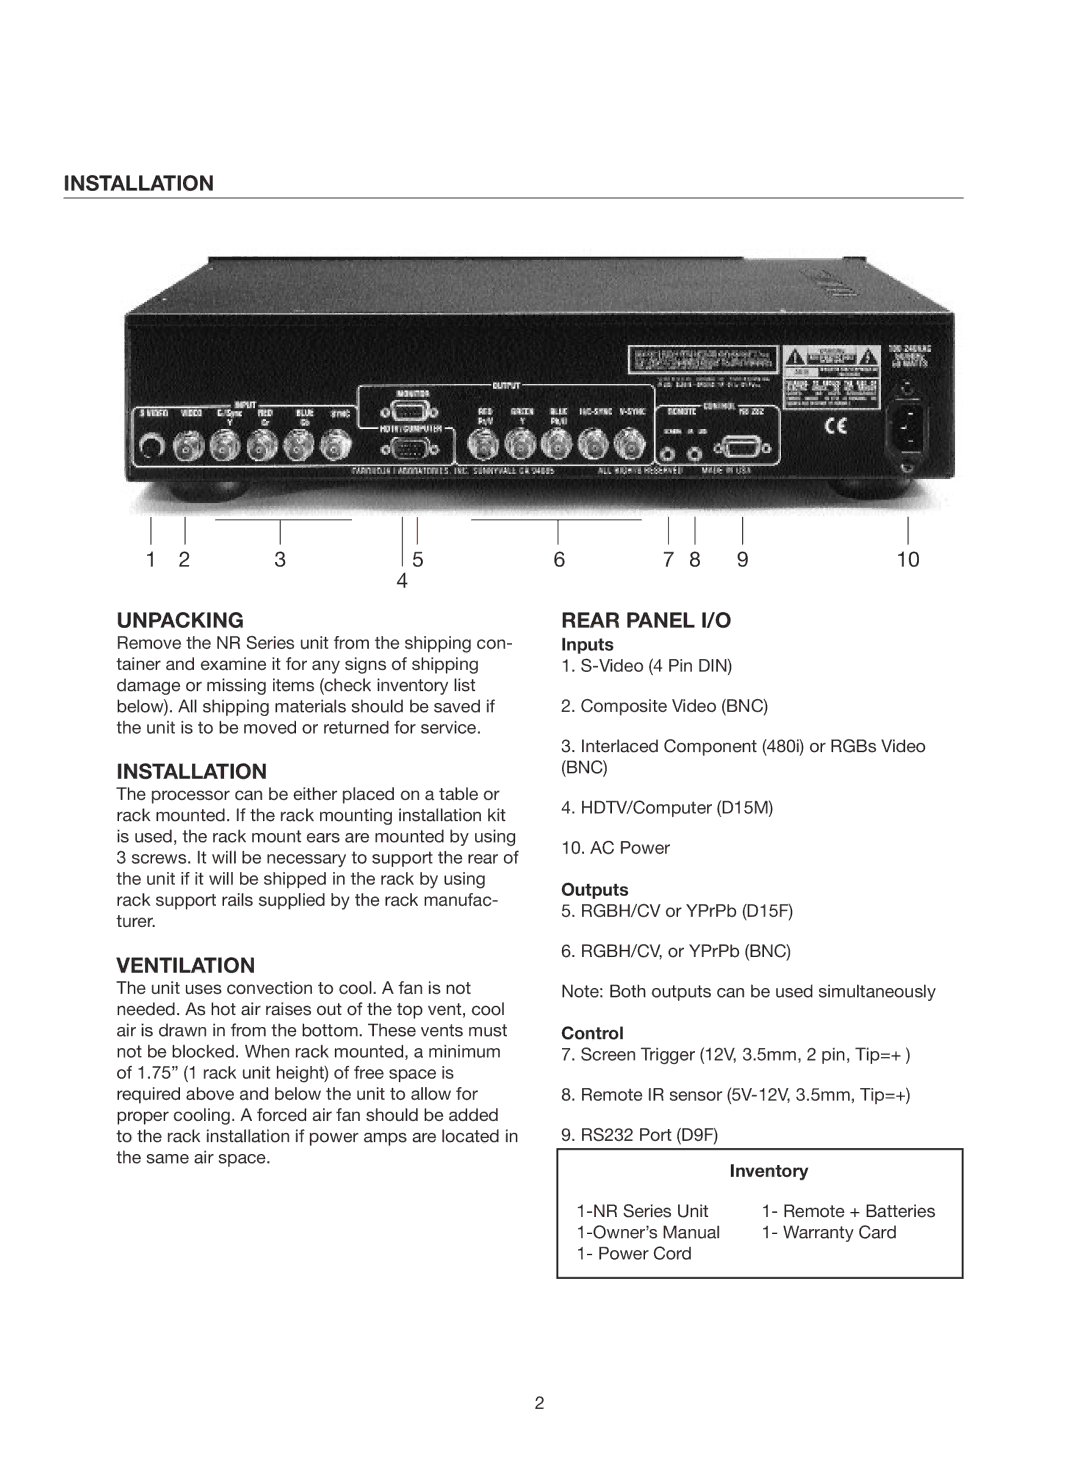
REAR PANEL I/O
Inputs
1.
2.Composite Video (BNC)
3.Interlaced Component (480i) or RGBs Video (BNC)
4.HDTV/Computer (D15M)
10. AC Power
Outputs
5.RGBH/CV or YPrPb (D15F)
6.RGBH/CV, or YPrPb (BNC)
The unit uses convection to cool. A fan is not needed. As hot air raises out of the top vent, cool air is drawn in from the bottom. These vents must not be blocked. When rack mounted, a minimum of 1.75” (1 rack unit height) of free space is required above and below the unit to allow for proper cooling. A forced air fan should be added to the rack installation if power amps are located in the same air space.
Note: Both outputs can be used simultaneously
Control
7.Screen Trigger (12V, 3.5mm, 2 pin, Tip=+ )
8.Remote IR sensor
9.RS232 Port (D9F)
| Inventory |
1- Remote + Batteries | |
1- Warranty Card | |
1- Power Cord |
|
|
|
2