1.1 Wall mounting
Mounting the plasma monitor on a wall
1.To mount the plasma monitor on a wall, first remove the stand (Fig. 1) by unscre- wing the four screws (M5 x 20) which hold it to the monitor and pulling the stand off.
The plasma monitor can be mounted on a wall with or without the loudspeakers attached to it.
2.The wall mounting bracket is secured to the wall with four wall plugs (Ø10 x 50) and four screws (Ø7 x 60) as shown in Fig. 2.
First select the position for the monitor. Hold the mounting bracket in a horizontal position against the wall and mark the positions of the four mounting holes on the wall. Drill four holes for the plastic wall plugs, insert the plugs and secure the mounting bracket to the wall with four screws (Ø7 x 60).
3.Lift the plasma monitor and engage the two suspension screws on the rear of the monitor with the matching holes in the wall mounting bracket.
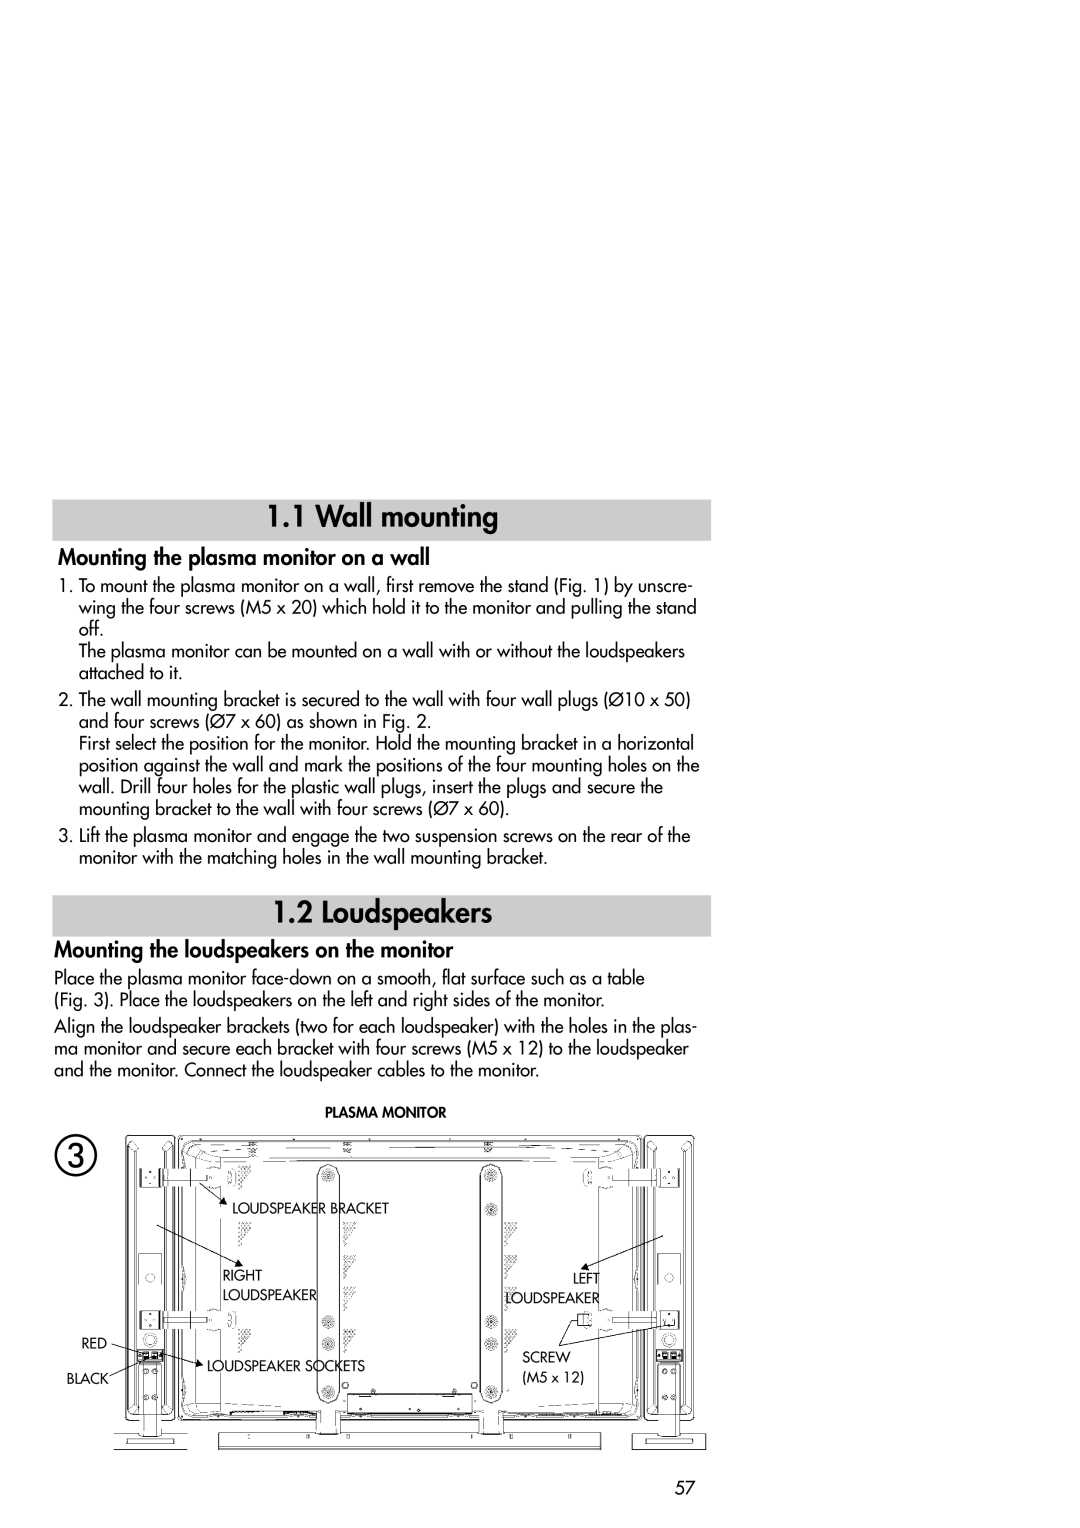
1.2 Loudspeakers
Mounting the loudspeakers on the monitor
Place the plasma monitor
Align the loudspeaker brackets (two for each loudspeaker) with the holes in the plas- ma monitor and secure each bracket with four screws (M5 x 12) to the loudspeaker and the monitor. Connect the loudspeaker cables to the monitor.
PLASMA MONITOR
LOUDSPEAKER BRACKET |
| |
RIGHT | LEFT | |
LOUDSPEAKER | LOUDSPEAKER | |
RED | SCREW | |
LOUDSPEAKER SOCKETS | ||
(M5 x 12) | ||
BLACK |
57