Meyer Sound Matrix3 manual Service and Troubleshooting, Calibration, Problem Solution

Models: Matrix3

1 32
Download 32 pages 47.68 Kb
Page 29
Image 29

Service and Troubleshooting

Service 29

Calibration 29

When power is first applied to the CueMixer, it runs through a self-test. The LEDs turn on one row at a time starting with the bottom row and working to the top. All fader motors are cycled and then moved to the 1/3rd travel position. There are no fuses or user serviceable parts inside. If you are having trouble please contact LCS Series Technical Support. Moving a fader or pressing a button on the CueMixer, will cause the appropriate Receive LED on the front of the LX-300 Communication Synchronization display to light while the control is being moved. If you do not see a response on the LX-300, check your cable.

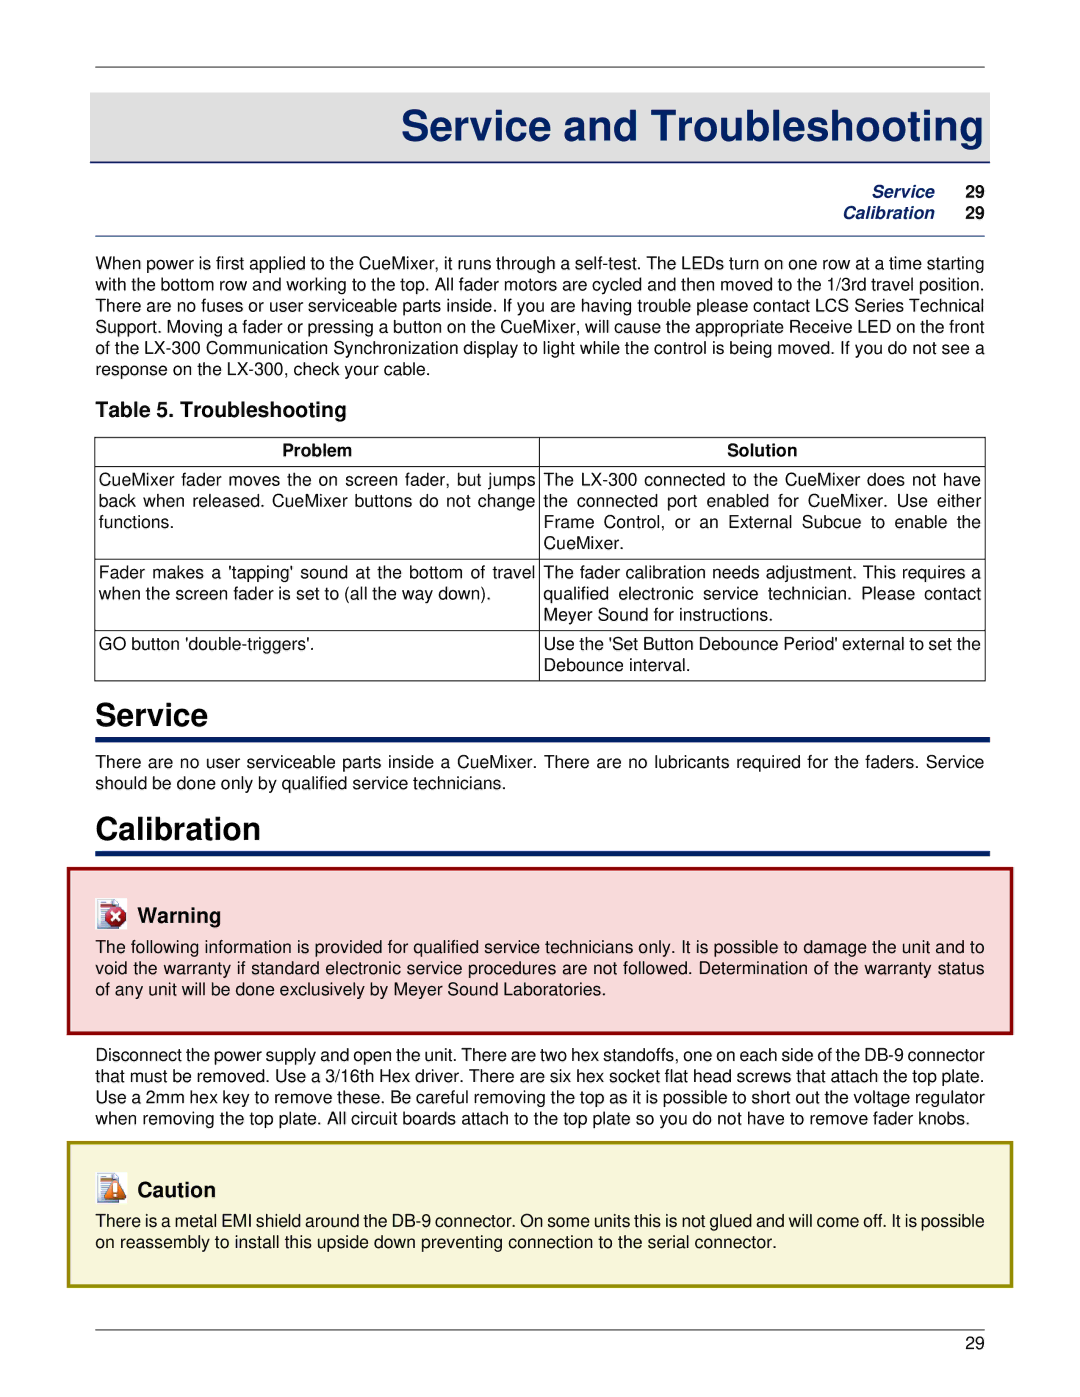
Table 5. Troubleshooting

Problem

Solution

CueMixer fader moves the on screen fader, but jumps back when released. CueMixer buttons do not change functions.

Fader makes a 'tapping' sound at the bottom of travel when the screen fader is set to (all the way down).

GO button 'double-triggers'.

The LX-300 connected to the CueMixer does not have the connected port enabled for CueMixer. Use either Frame Control, or an External Subcue to enable the CueMixer.

The fader calibration needs adjustment. This requires a qualified electronic service technician. Please contact Meyer Sound for instructions.

Use the 'Set Button Debounce Period' external to set the Debounce interval.

Service

There are no user serviceable parts inside a CueMixer. There are no lubricants required for the faders. Service should be done only by qualified service technicians.

Calibration

Warning

The following information is provided for qualified service technicians only. It is possible to damage the unit and to void the warranty if standard electronic service procedures are not followed. Determination of the warranty status of any unit will be done exclusively by Meyer Sound Laboratories.

Disconnect the power supply and open the unit. There are two hex standoffs, one on each side of the DB-9 connector that must be removed. Use a 3/16th Hex driver. There are six hex socket flat head screws that attach the top plate. Use a 2mm hex key to remove these. Be careful removing the top as it is possible to short out the voltage regulator when removing the top plate. All circuit boards attach to the top plate so you do not have to remove fader knobs.

Caution

There is a metal EMI shield around the DB-9 connector. On some units this is not glued and will come off. It is possible on reassembly to install this upside down preventing connection to the serial connector.

29

Page 29
Image 29
Meyer Sound Matrix3 manual Service and Troubleshooting, Calibration, Problem Solution