Transport Buttons
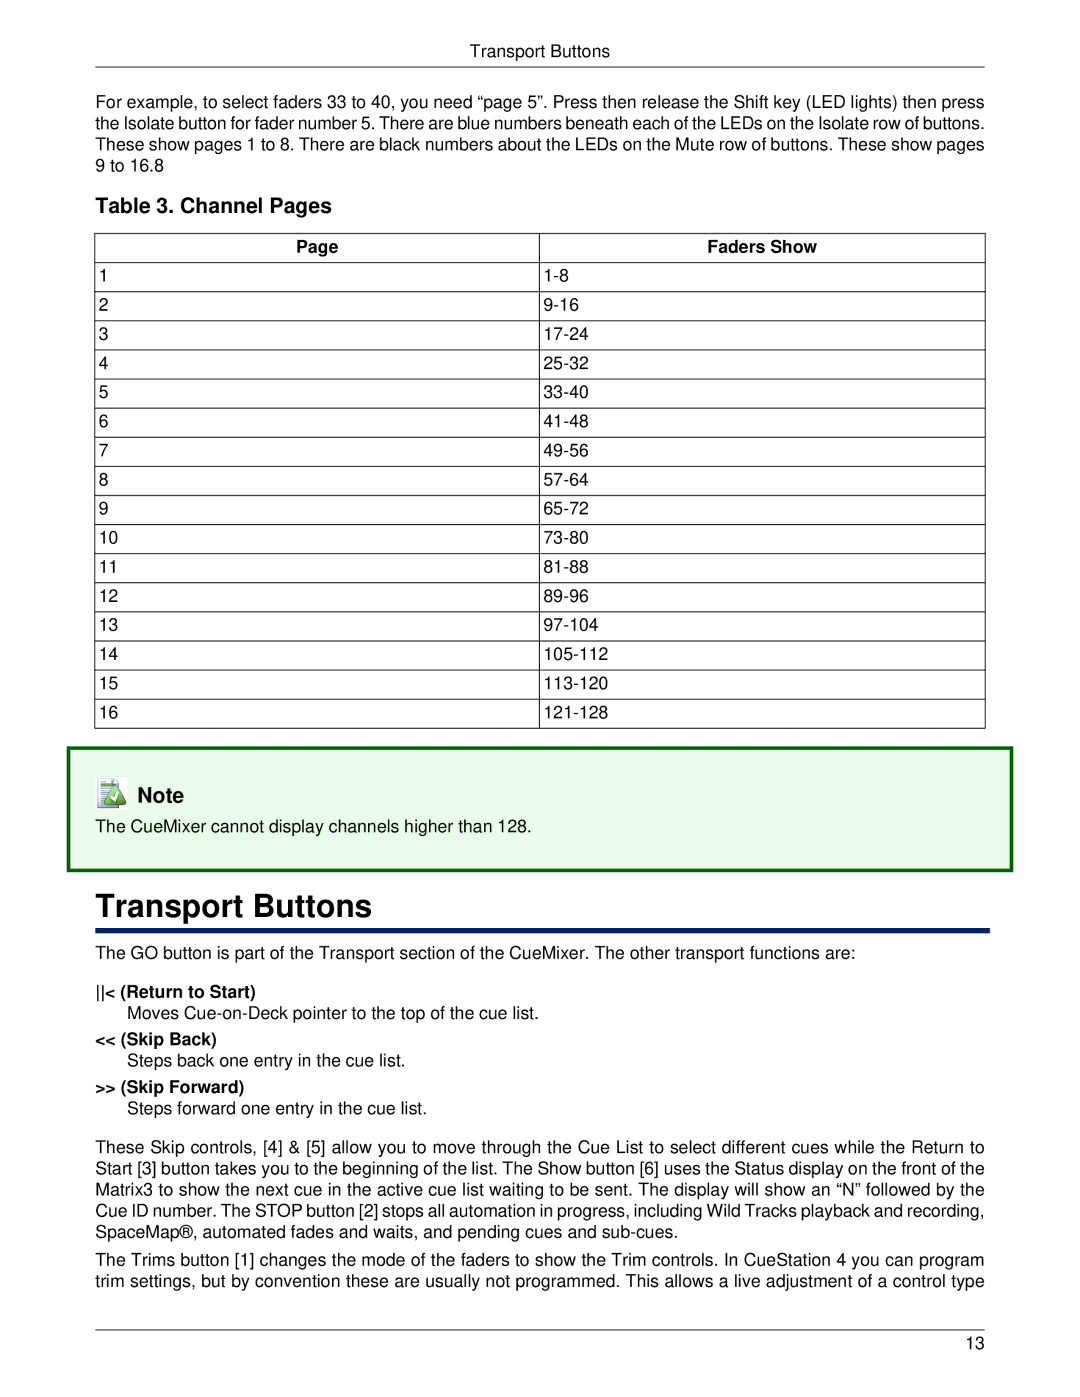
For example, to select faders 33 to 40, you need “page 5”. Press then release the Shift key (LED lights) then press the Isolate button for fader number 5. There are blue numbers beneath each of the LEDs on the Isolate row of buttons. These show pages 1 to 8. There are black numbers about the LEDs on the Mute row of buttons. These show pages 9 to 16.8
Table 3. Channel Pages
Page | Faders Show |
1 | |
2 | |
3 | |
4 | |
5 | |
6 | |
7 | |
8 | |
9 | |
10 | |
11 | |
12 | |
13 | |
14 | |
15 | |
16 |
![]() Note
Note
The CueMixer cannot display channels higher than 128.
Transport Buttons
The GO button is part of the Transport section of the CueMixer. The other transport functions are:
< (Return to Start)
Moves
<< (Skip Back)
Steps back one entry in the cue list.
>> (Skip Forward)
Steps forward one entry in the cue list.
These Skip controls, [4] & [5] allow you to move through the Cue List to select different cues while the Return to Start [3] button takes you to the beginning of the list. The Show button [6] uses the Status display on the front of the Matrix3 to show the next cue in the active cue list waiting to be sent. The display will show an “N” followed by the Cue ID number. The STOP button [2] stops all automation in progress, including Wild Tracks playback and recording, SpaceMap®, automated fades and waits, and pending cues and
The Trims button [1] changes the mode of the faders to show the Trim controls. In CueStation 4 you can program trim settings, but by convention these are usually not programmed. This allows a live adjustment of a control type
13