First Steps
To work with the Virtual CD program, you need to begin by creating a virtual CD. Then you will insert this new virtual CD into a virtual CD drive.
"All roads lead to Rome..."
There are a number of ways to start Virtual CD, which means you can customise your use according to your personal preferences. When you want to create or insert a virtual CD, you can begin by run- ning either the Start Wizard or the Management program, by clicking on the
The examples given here use only one method each time a particular function is described. See the
Creating a Virtual CD
Insert the original CD from which you want to create a virtual image into your CD drive. Make sure the CD is not scratched or dirty.
Wait a few seconds for Windows to detect the CD.
Note: Make sure the CD is not accessed by any other program while you are making the virtual CD. Close the programs – such as the Windows CD Player – in your Autostart group.
(The first time you start Virtual CD, by clicking on its icon on your desktop, a Wizard starts that offers to help you create a virtual CD. See below for details about selecting a source CD.)
7
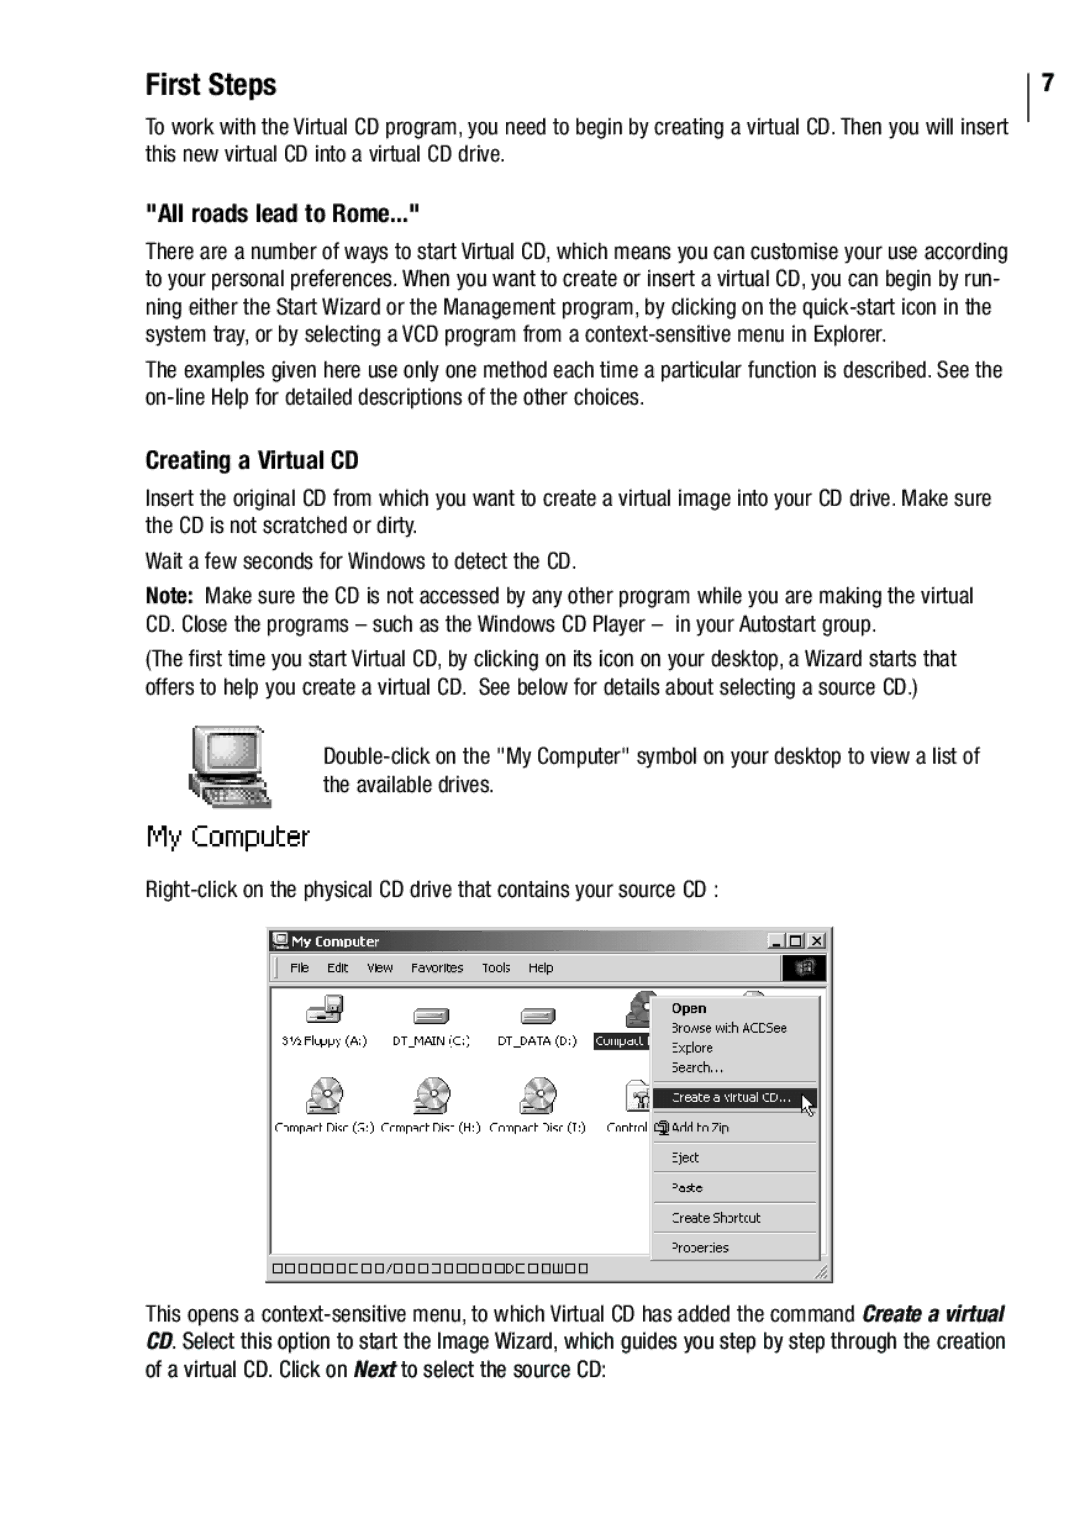
This opens a
