
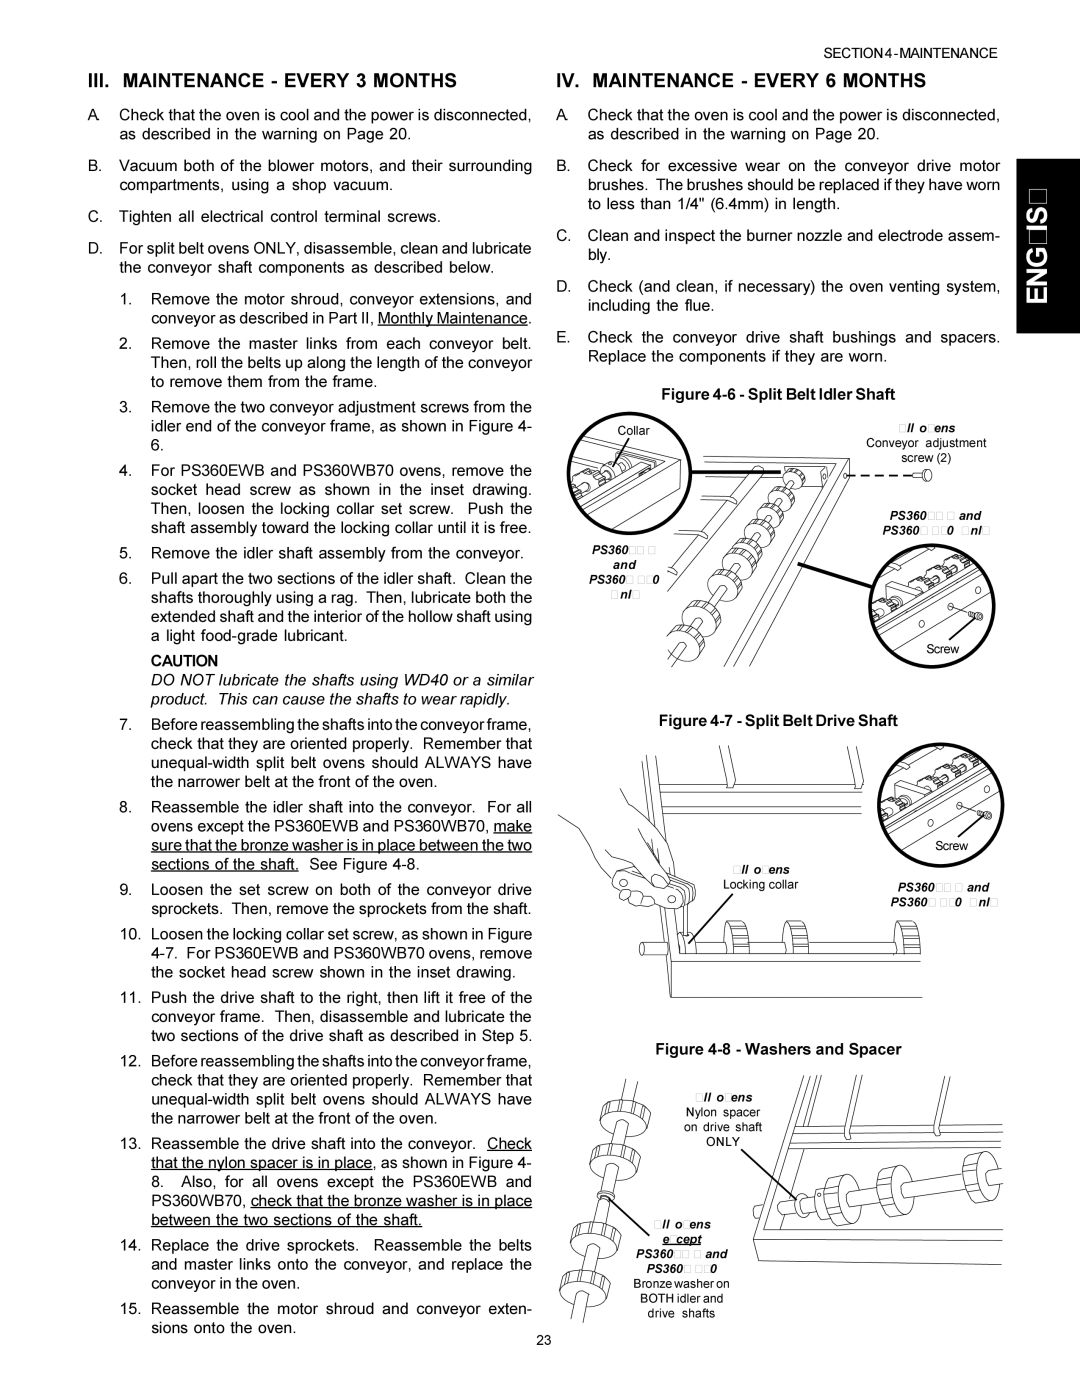
PS300F specifications
The Middleby Marshall PS300F is an advanced pizza oven designed for high-volume operations while ensuring consistent quality and superior performance. This innovative oven combines cutting-edge technology with user-friendly features, making it an ideal choice for restaurants, pizzerias, and foodservice operations that demand efficiency and speed.One of the standout features of the PS300F is its patented airflow technology. This system is designed to circulate hot air evenly throughout the cooking chamber, which helps create a perfectly baked pizza with a crispy crust and thoroughly cooked toppings. The even heat distribution ensures that every inch of the pizza receives the same level of cooking, reducing the chances of hot or cold spots that can affect the overall quality.
The PS300F is equipped with a double-deck design, allowing for increased production capacity without requiring additional floor space. Each deck can accommodate multiple pizzas at once, making it an ideal choice for busy establishments where speed is crucial. Operators can load pizzas into both decks simultaneously, significantly reducing cooking times during peak hours.
Another key characteristic of the PS300F is its digital control panel. This user-friendly interface allows operators to set precise cooking times and temperatures, ensuring optimal results every time. The oven also features programmable settings, enabling users to save specific cooking parameters for different types of pizzas, simplifying the process during high-volume service.
Energy efficiency is another important consideration in the design of the PS300F. The oven is constructed with high-quality insulation to minimize heat loss, contributing to lower energy consumption. This makes it not only an environmentally friendly option but also a cost-effective choice for businesses looking to reduce their utility bills.
Durability is a hallmark of the Middleby Marshall brand, and the PS300F exemplifies this commitment to quality. Built with robust materials and designed to withstand the rigors of a busy kitchen, this oven promises longevity and reliable performance.
In conclusion, the Middleby Marshall PS300F is a top-tier pizza oven that brings together innovative technology, efficiency, and durability. Its advanced features make it an excellent investment for any foodservice operation focused on delivering high-quality pizzas in a fast-paced environment. With its combination of performance and ease of use, the PS300F is poised to enhance any culinary experience.