B. Air Fingers Disassembly For Cleaning
1.As the air fingers are removed use a felt pen to mark all parts of the fingers. This includes the finger manifold, inner plate and the outer plate (refer to Figure
|
|
|
|
|
T1 |
| T2 |
| T3 |
|
|
|
| B3 |
B1 |
| B2 |
| |
|
|
|
|
|
Standard Fingers
2. Remove air fingers.
NOTE:Some oven users require a custom finger arrange- ment where the quantity of air fingers may vary.
You can remove top and bottom fingers from each or either end. It is highly recommended that each finger be marked before removing so it is placed in exactly the same position when reassembled (refer to step 1).
Remove the air fingers, pull the finger at the back side - pull straight out.
Figure
3.With air fingers out, place them in an upright position to remove the outer plate.
4.Gently step on the lip of the finger and pull the outer plate off.
SECTION 4
MAINTENANCE
Figure
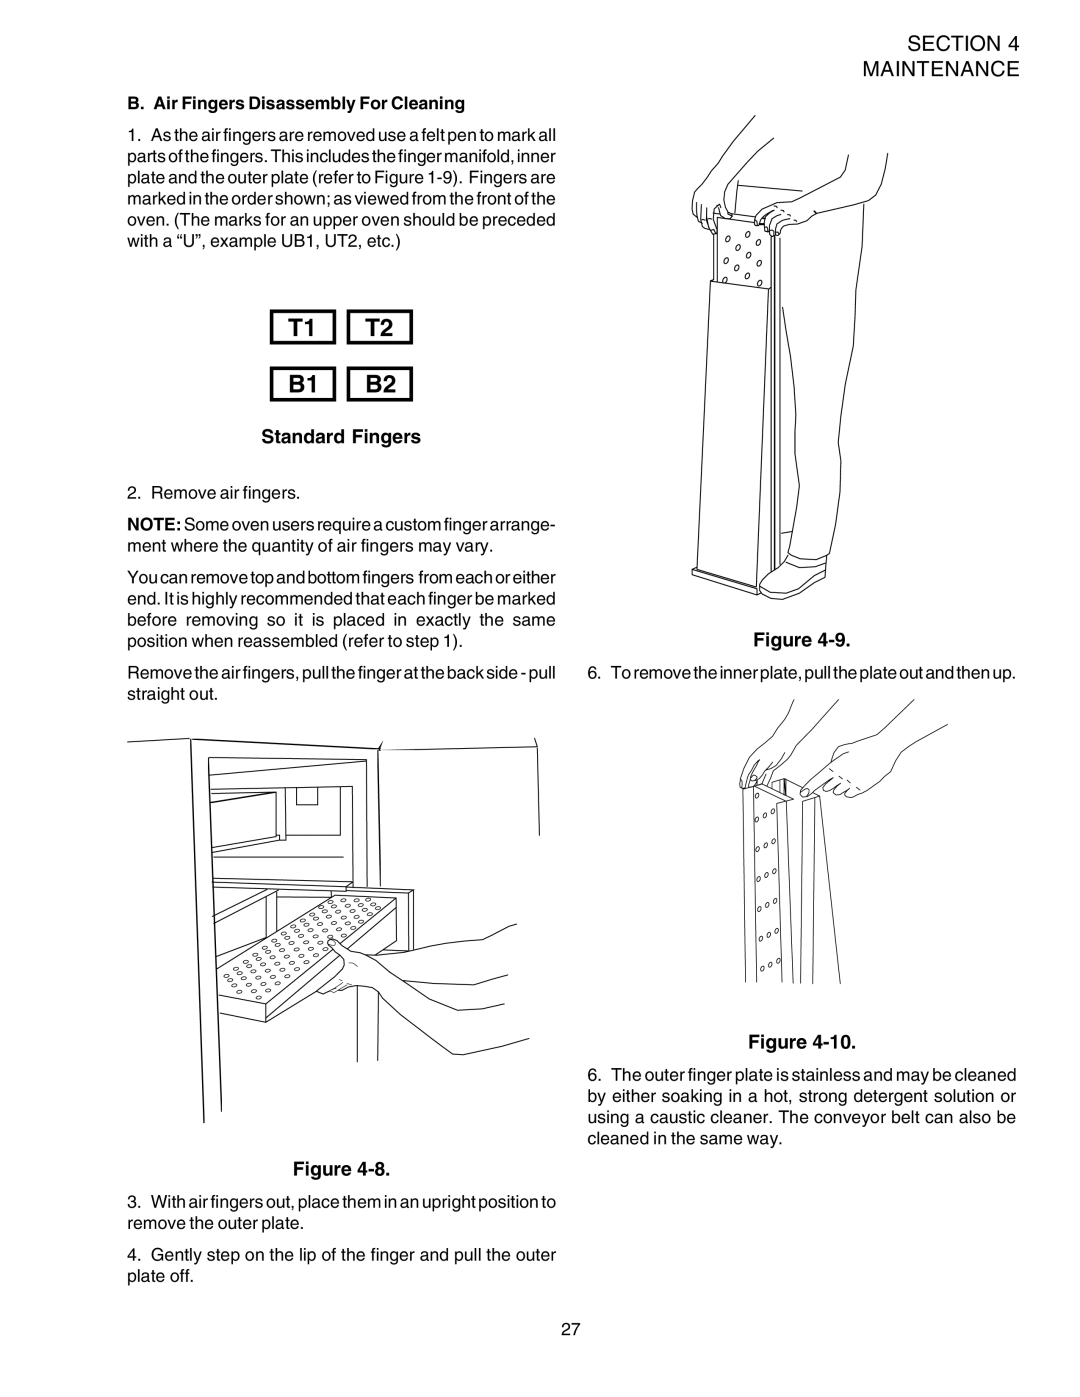
6. To remove the inner plate, pull the plate out and then up.
Figure
6.The outer finger plate is stainless and may be cleaned by either soaking in a hot, strong detergent solution or using a caustic cleaner. The conveyor belt can also be cleaned in the same way.
27