5-5. Installing Ether Cylinder (Optional Ether Starting Aid)
1
![]() 2
2
3
4
5
6
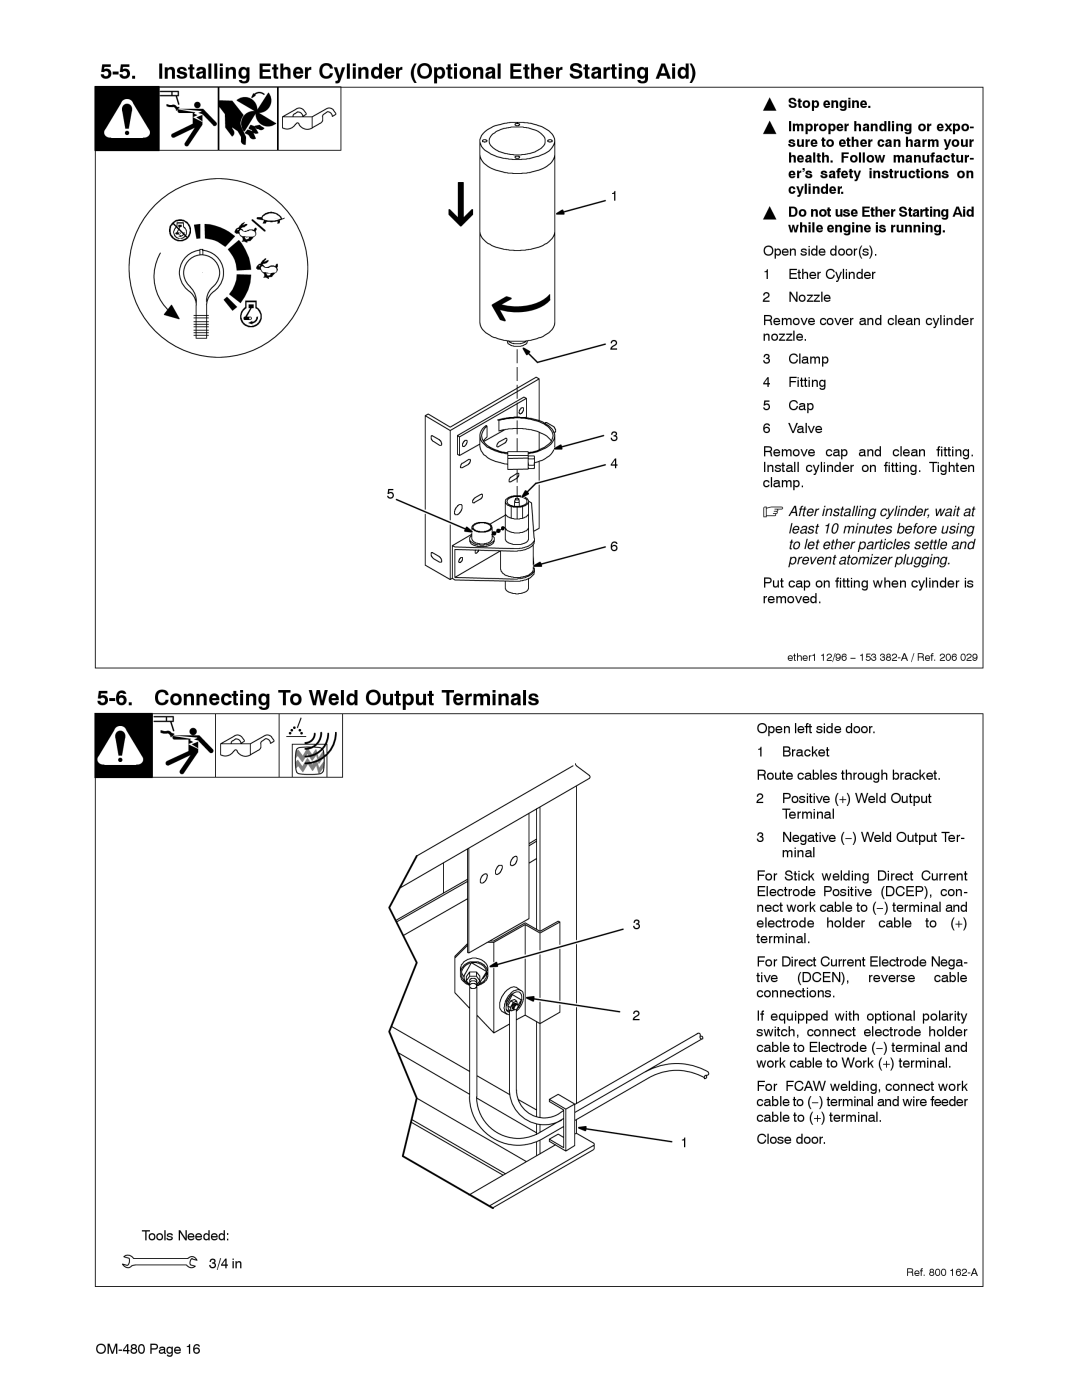
YStop engine.
YImproper handling or expo- sure to ether can harm your health. Follow manufactur- er’s safety instructions on cylinder.
YDo not use Ether Starting Aid while engine is running.
Open side door(s).
1Ether Cylinder
2Nozzle
Remove cover and clean cylinder nozzle.
3Clamp
4Fitting
5Cap
6Valve
Remove cap and clean fitting. Install cylinder on fitting. Tighten clamp.
.After installing cylinder, wait at
least 10 minutes before using to let ether particles settle and prevent atomizer plugging.
Put cap on fitting when cylinder is removed.
ether1 12/96 − 153
5-6. Connecting To Weld Output Terminals
3
2
Open left side door.
1 Bracket
Route cables through bracket. 2 Positive (+) Weld Output
|
| Terminal |
|
| 3 | Negative (−) Weld Output Ter- | |
|
| minal |
|
| For Stick welding Direct Current | ||
| Electrode Positive (DCEP), con- | ||
| nect work cable to (−) terminal and | ||
| electrode holder cable to (+) | ||
| terminal. |
| |
| For Direct Current Electrode Nega- | ||
| tive | (DCEN), | reverse cable |
| connections. |
| |
| If equipped with optional polarity | ||
| switch, connect | electrode holder | |
| cable to Electrode (−) terminal and | ||
| work cable to Work (+) terminal. | ||
| For FCAW welding, connect work | ||
| cable to (−) terminal and wire feeder | ||
| cable to (+) terminal. | ||
1 | Close door. |
| |
Tools Needed:
3/4 in | Ref. 800 |
|