How to set the menus (continued)
 Inputting numbers
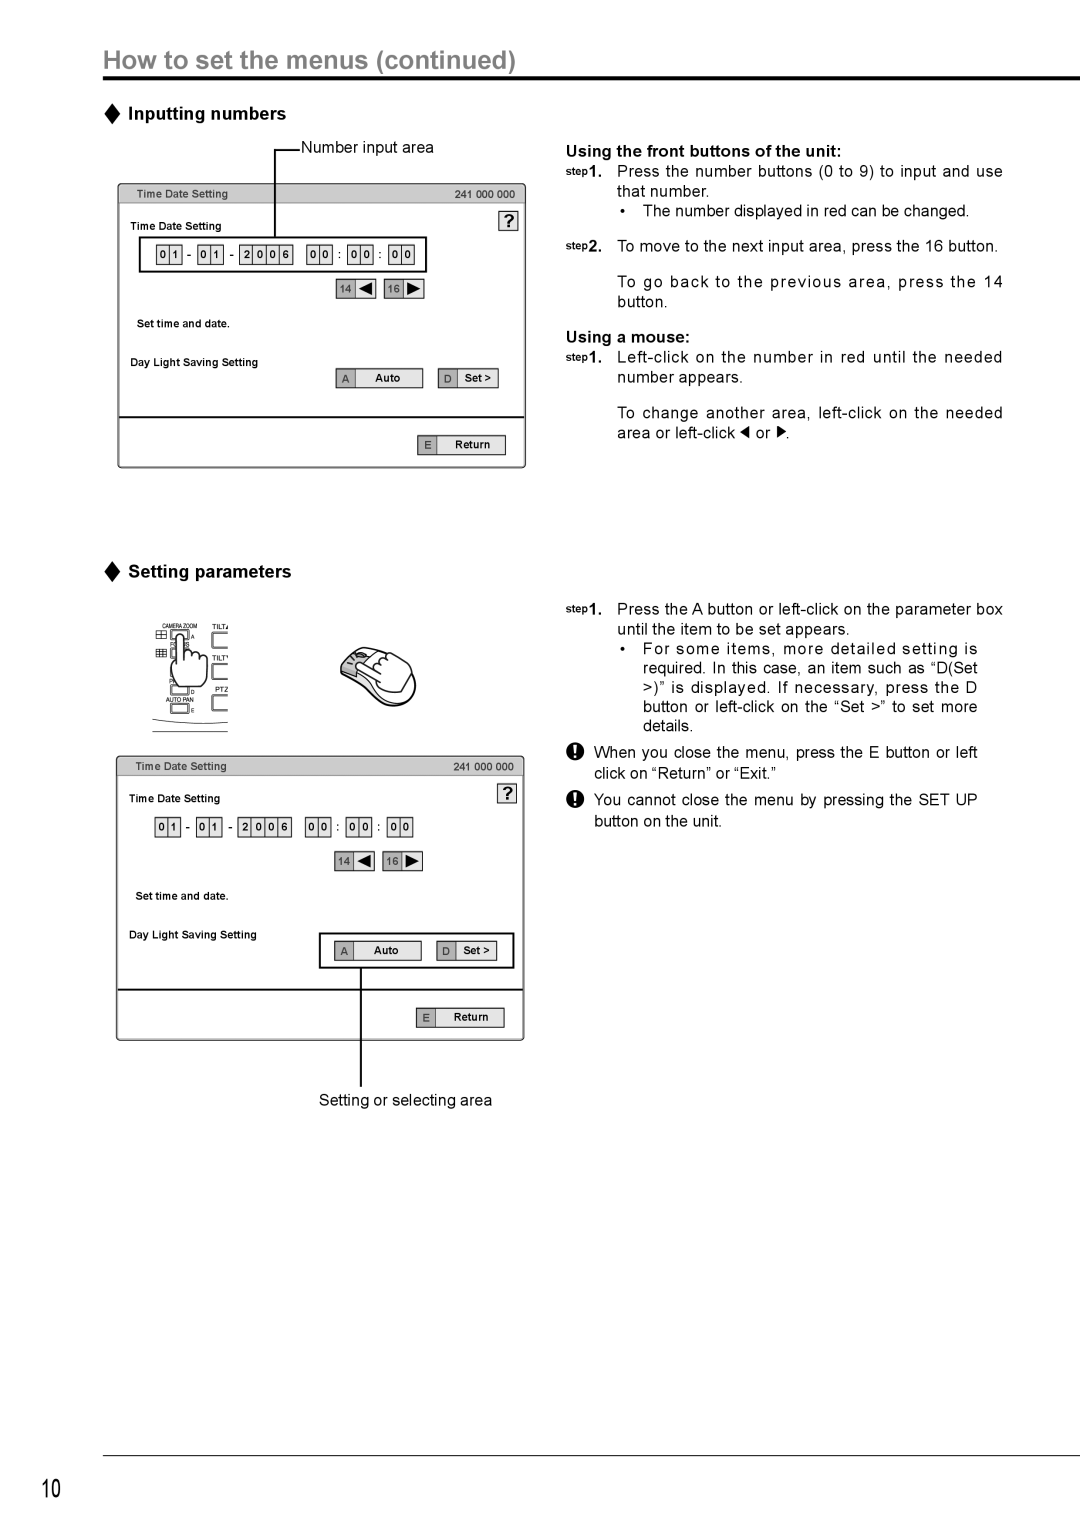
Number input area |
| |
Time Date Setting |
| 241 000 000 |
Time Date Setting |
| ? |
0 1 - 0 1 - 2 0 0 6 0 0 : 0 0 : 0 0 |
| |
14 | 16 |
|
Set time and date. |
|
|
Day Light Saving Setting |
|
|
A | Auto | D Set > |
| E | Return |
Using the front buttons of the unit:
step1. Press the number buttons (0 to 9) to input and use that number.
•The number displayed in red can be changed.
step2. To move to the next input area, press the 16 button.
To go back to the previous area, press the 14 button.
Using a mouse:
step1.
To change another area, ![]() or
or ![]() .
.
 Setting parameters
Time Date Setting |
|
| 241 000 000 |
Time Date Setting |
|
| ? |
0 1 - 0 1 - 2 0 0 6 | 0 0 : 0 0 : 0 0 |
| |
| 14 | 16 |
|
Set time and date. |
|
|
|
Day Light Saving Setting |
|
|
|
| A | Auto | D Set > |
|
| E | Return |
Setting or selecting area
step1. Press the A button or
•For some items, more detailed setting is required. In this case, an item such as “D(Set >)” is displayed. If necessary, press the D button or
When you close the menu, press the E button or left click on “Return” or “Exit.”
You cannot close the menu by pressing the SET UP button on the unit.
10