Using the basic multiplexer functions
 Basic multiplexer functions
This function is used to activate multiplexer functions using the buttons on the front panel.
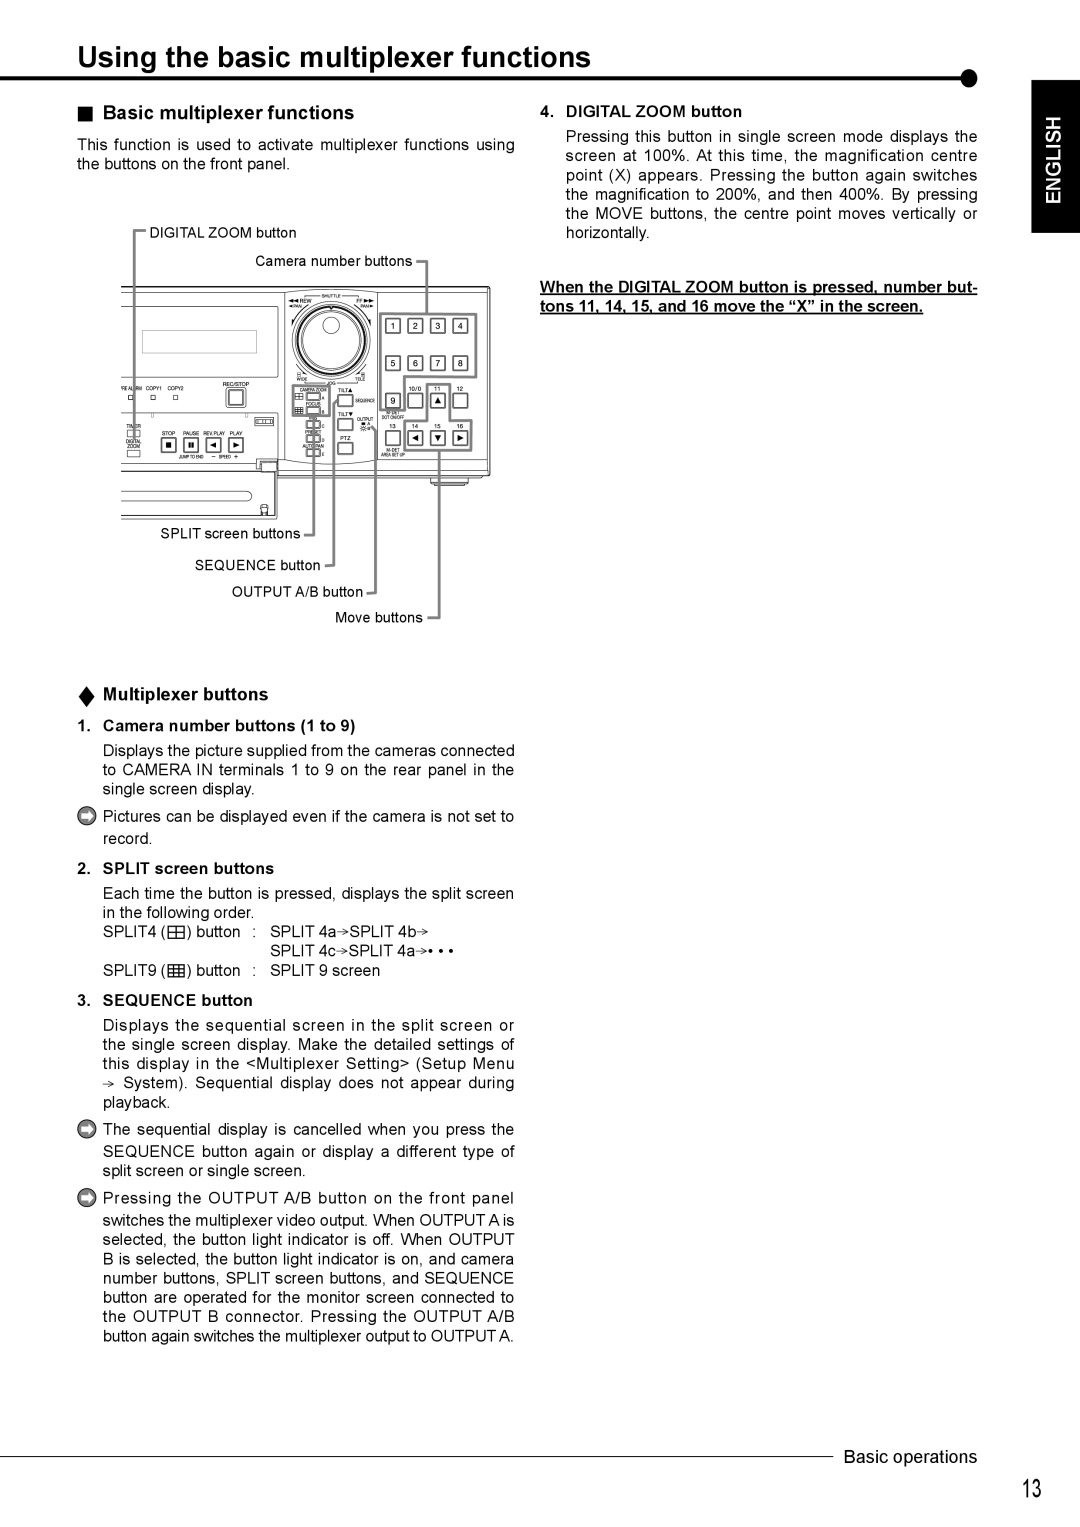
DIGITAL ZOOM button
Camera number buttons
4.DIGITAL ZOOM button
Pressing this button in single screen mode displays the screen at 100%. At this time, the magnification centre point (X) appears. Pressing the button again switches the magnification to 200%, and then 400%. By pressing the MOVE buttons, the centre point moves vertically or horizontally.
ENGLISH
When the DIGITAL ZOOM button is pressed, number but- tons 11, 14, 15, and 16 move the “X” in the screen.
SPLIT screen buttons
SEQUENCE button
OUTPUT A/B button
Move buttons
 Multiplexer buttons
1.Camera number buttons (1 to 9)
Displays the picture supplied from the cameras connected to CAMERA IN terminals 1 to 9 on the rear panel in the single screen display.
![]() Pictures can be displayed even if the camera is not set to record.
Pictures can be displayed even if the camera is not set to record.
2. SPLIT screen buttons
Each time the button is pressed, displays the split screen in the following order.
SPLIT4 ( | ) button | : | SPLIT 4a | SPLIT 4b |
|
|
| SPLIT 4c | SPLIT 4a • • • |
SPLIT9 ( | ) button | : | SPLIT 9 screen | |
3.SEQUENCE button
Displays the sequential screen in the split screen or the single screen display. Make the detailed settings of this display in the <Multiplexer Setting> (Setup Menu ![]() System). Sequential display does not appear during playback.
System). Sequential display does not appear during playback.
![]() The sequential display is cancelled when you press the
The sequential display is cancelled when you press the
SEQUENCE button again or display a different type of split screen or single screen.
![]() Pressing the OUTPUT A/B button on the front panel
Pressing the OUTPUT A/B button on the front panel
switches the multiplexer video output. When OUTPUT A is selected, the button light indicator is off. When OUTPUT B is selected, the button light indicator is on, and camera number buttons, SPLIT screen buttons, and SEQUENCE button are operated for the monitor screen connected to the OUTPUT B connector. Pressing the OUTPUT A/B button again switches the multiplexer output to OUTPUT A.
Basic operations
13