Gigabit
Before You Install the Switch...
When you choose a location for the Switch, observe the following guidelines:
•Make sure that the Switch will be accessible and that the cables can be easily connected.
•Keep cabling away from sources of electrical noise, power lines, and fluorescent lighting fixtures.
•Position the Switch away from sources of water and moisture.
Placement Options
Before connecting cables to the Switch, first you will physically install the Switch.
There are two ways to place the Switch. The first way is to place it horizontally on a surface, so it sits on its four rubber feet. The second way is to mount it on a wall. The
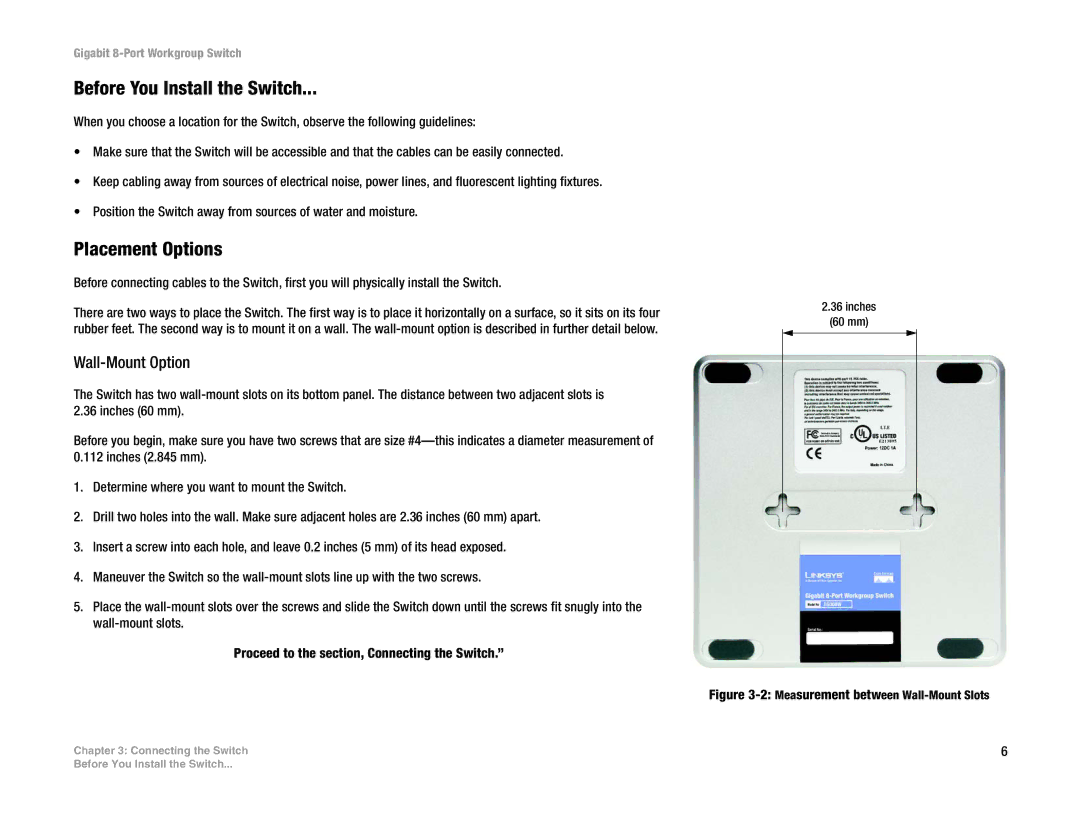
Wall-Mount Option
The Switch has two
Before you begin, make sure you have two screws that are size
1.Determine where you want to mount the Switch.
2.Drill two holes into the wall. Make sure adjacent holes are 2.36 inches (60 mm) apart.
3.Insert a screw into each hole, and leave 0.2 inches (5 mm) of its head exposed.
4.Maneuver the Switch so the
5.Place the
Proceed to the section, Connecting the Switch.”
Chapter 3: Connecting the Switch
2.36inches
(60 mm)
Figure 3-2: Measurement between Wall-Mount Slots
6
Before You Install the Switch...