4. Advance Menu
FUNCTION | DESCRIPTION | |
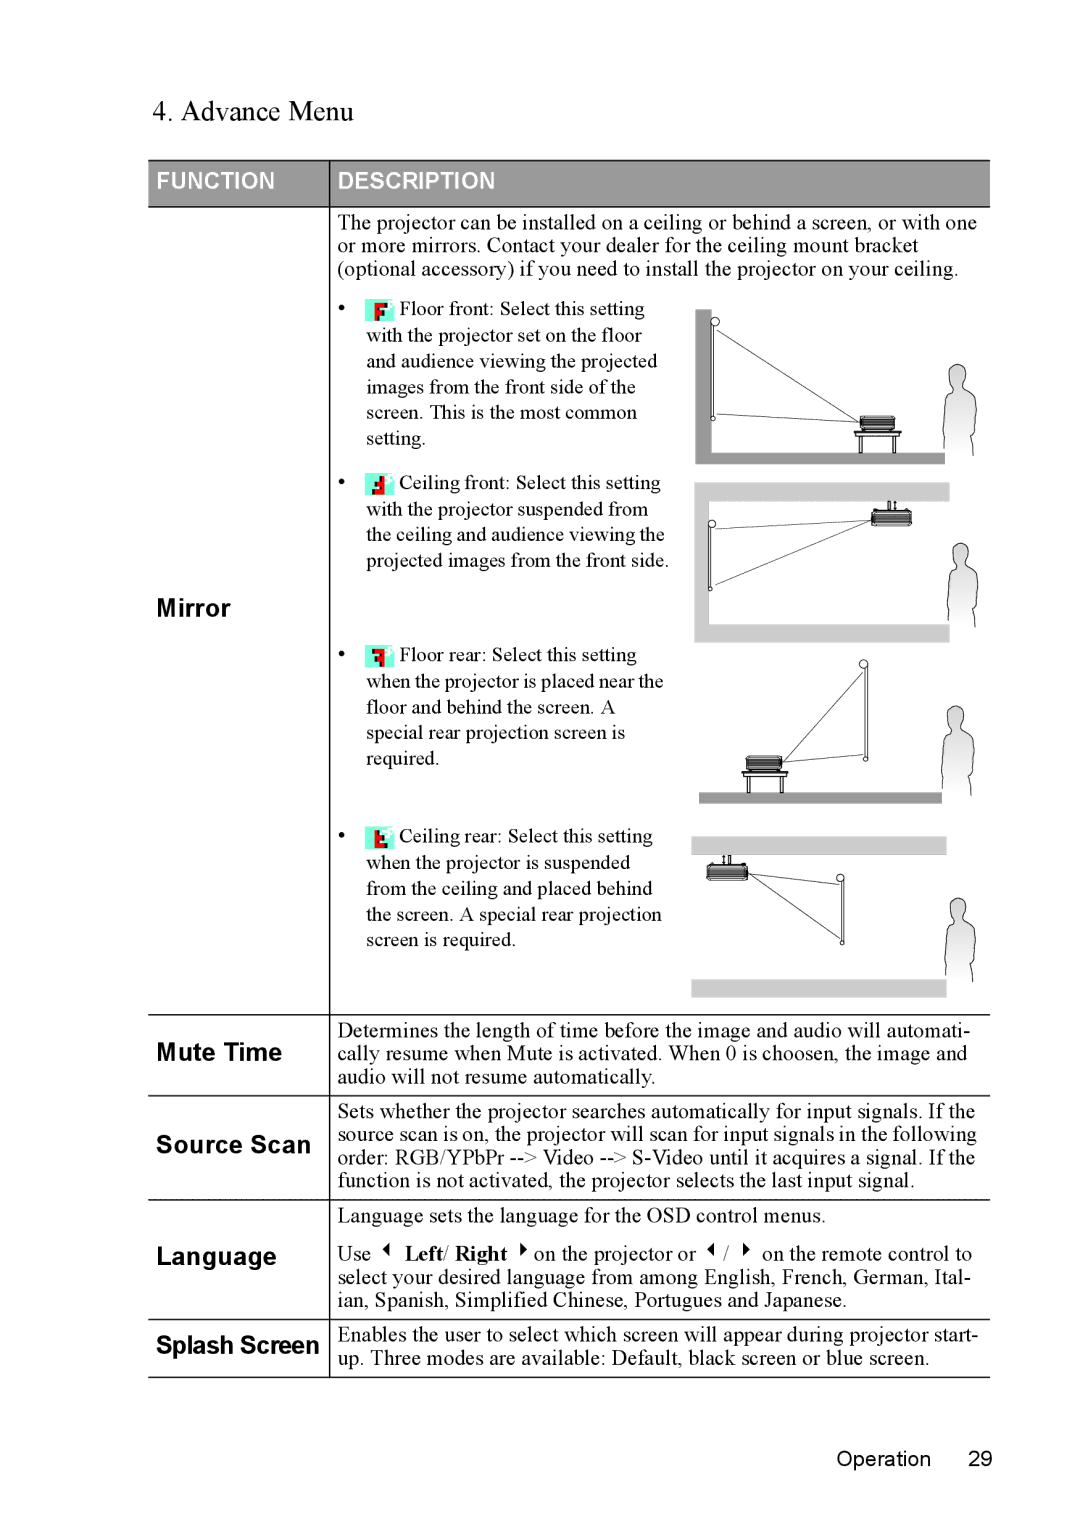
| The projector can be installed on a ceiling or behind a screen, or with one | |
| or more mirrors. Contact your dealer for the ceiling mount bracket | |
| (optional accessory) if you need to install the projector on your ceiling. | |
| • | Floor front: Select this setting |
|
| with the projector set on the floor |
|
| and audience viewing the projected |
|
| images from the front side of the |
|
| screen. This is the most common |
|
| setting. |
| • | Ceiling front: Select this setting |
|
| with the projector suspended from |
|
| the ceiling and audience viewing the |
|
| projected images from the front side. |
Mirror
•Floor rear: Select this setting when the projector is placed near the
floor and behind the screen. A special rear projection screen is required.
•Ceiling rear: Select this setting
when the projector is suspended from the ceiling and placed behind the screen. A special rear projection screen is required.
Mute Time | Determines the length of time before the image and audio will automati- |
cally resume when Mute is activated. When 0 is choosen, the image and | |
| audio will not resume automatically. |
| Sets whether the projector searches automatically for input signals. If the |
Source Scan | source scan is on, the projector will scan for input signals in the following |
order: RGB/YPbPr | |
| function is not activated, the projector selects the last input signal. |
| Language sets the language for the OSD control menus. |
Language | Use 3 Left/ Right 4on the projector or 3/ 4 on the remote control to |
| select your desired language from among English, French, German, Ital- |
| ian, Spanish, Simplified Chinese, Portugues and Japanese. |
Splash Screen | Enables the user to select which screen will appear during projector start- |
up. Three modes are available: Default, black screen or blue screen. |
Operation 29