2a. WARNING: Do not straighten bent supply tubes until
step 4. | SINK | |
| ||
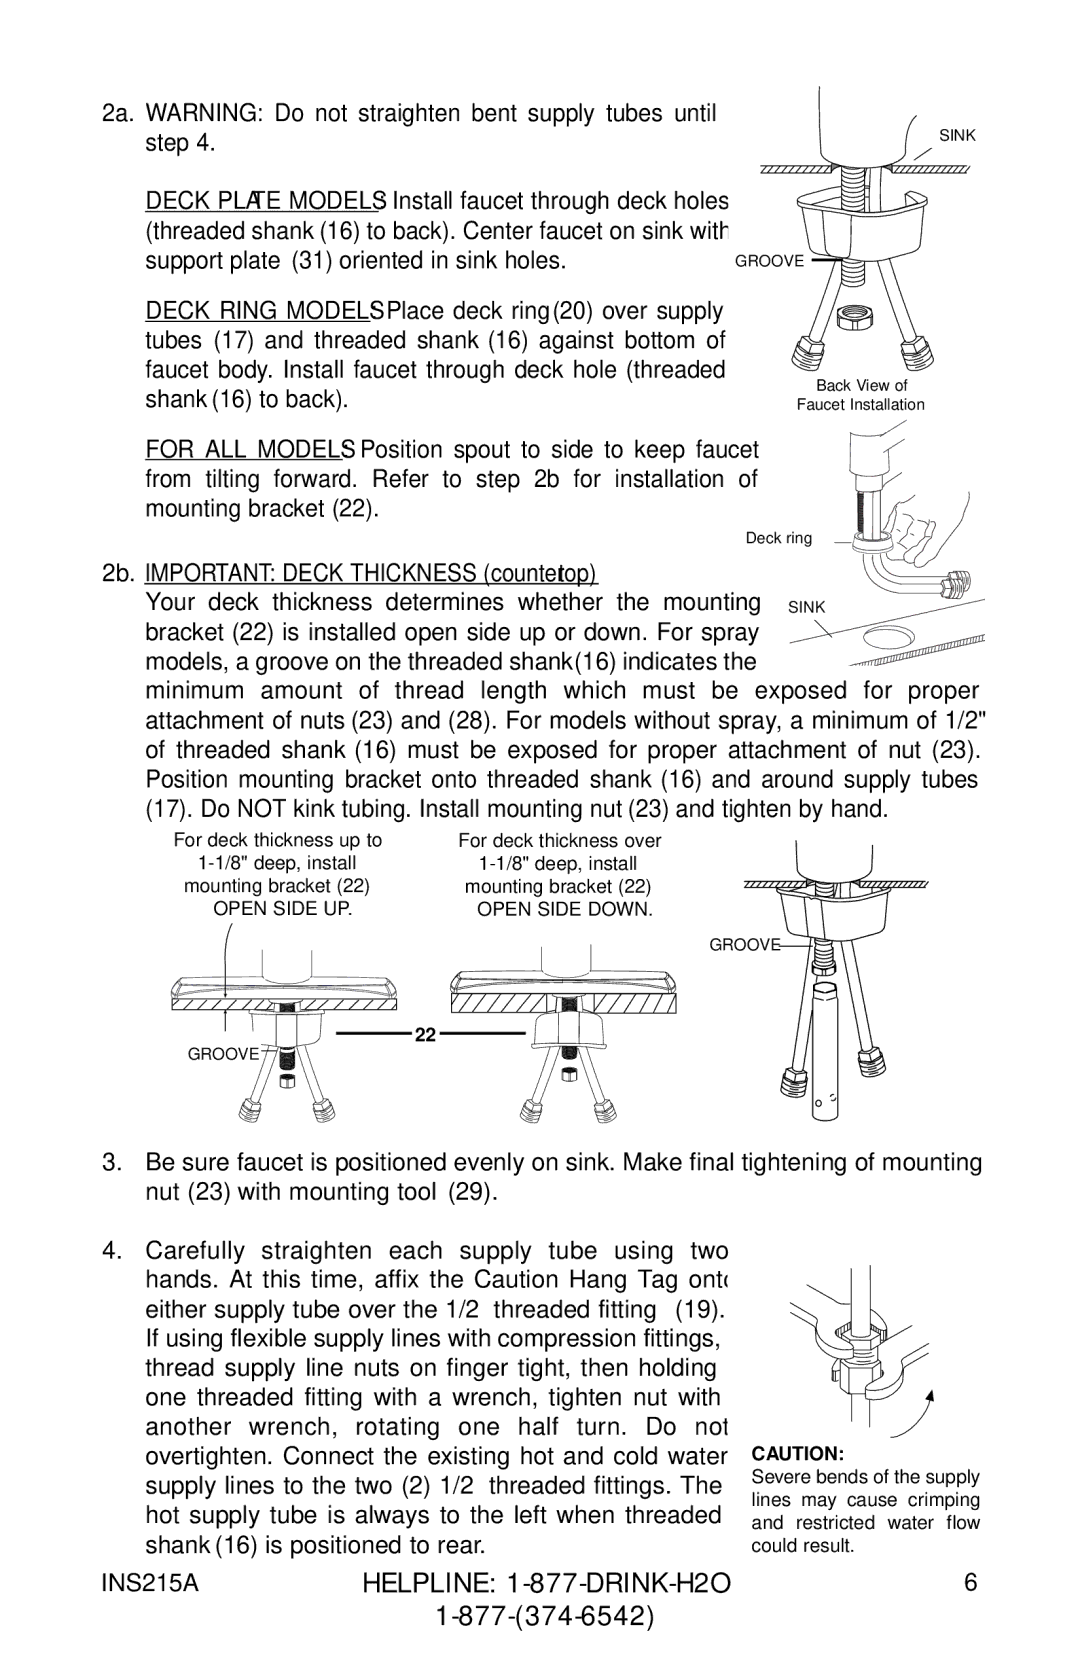
DECK PLATE MODELS: Install faucet through deck holes |
| |
(threaded shank (16) to back). Center faucet on sink with |
| |
support plate (31) oriented in sink holes. | GROOVE | |
DECK RING MODELS: Place deck ring (20) over supply |
| |
tubes (17) and threaded shank (16) against bottom of |
| |
faucet body. Install faucet through deck hole (threaded | Back View of | |
shank (16) to back). | ||
Faucet Installation |
FOR ALL MODELS: Position spout to side to keep faucet from tilting forward. Refer to step 2b for installation of mounting bracket (22).
DeckDECKringRING
2b. IMPORTANT: DECK THICKNESS (countertop)
Your deck thickness determines whether the mounting bracket (22) is installed open side up or down. For spray models, a groove on the threaded shank (16) indicates the
minimum amount of thread length which must be exposed for proper attachment of nuts (23) and (28). For models without spray, a minimum of 1/2" of threaded shank (16) must be exposed for proper attachment of nut (23). Position mounting bracket onto threaded shank (16) and around supply tubes (17). Do NOT kink tubing. Install mounting nut (23) and tighten by hand.
For deck thickness up to | For deck thickness over |
mounting bracket (22) | mounting bracket (22) |
OPEN SIDE UP. | OPEN SIDE DOWN. |
GROOVE ➤
22
GROOVE ➤![]()
3.Be sure faucet is positioned evenly on sink. Make final tightening of mounting nut (23) with mounting tool (29).
4.Carefully straighten each supply tube using two hands. At this time, affix the Caution Hang Tag onto either supply tube over the 1/2” threaded fitting (19). If using flexible supply lines with compression fittings, thread supply line nuts on finger tight, then holding one threaded fitting with a wrench, tighten nut with another wrench, rotating one half turn. Do not overtighten. Connect the existing hot and cold water supply lines to the two (2) 1/2” threaded fittings. The hot supply tube is always to the left when threaded shank (16) is positioned to rear.
INS215A | HELPLINE: |
|
CAUTION:
Severe bends of the supply lines may cause crimping and restricted water flow could result.
6