LOG PLACEMENT
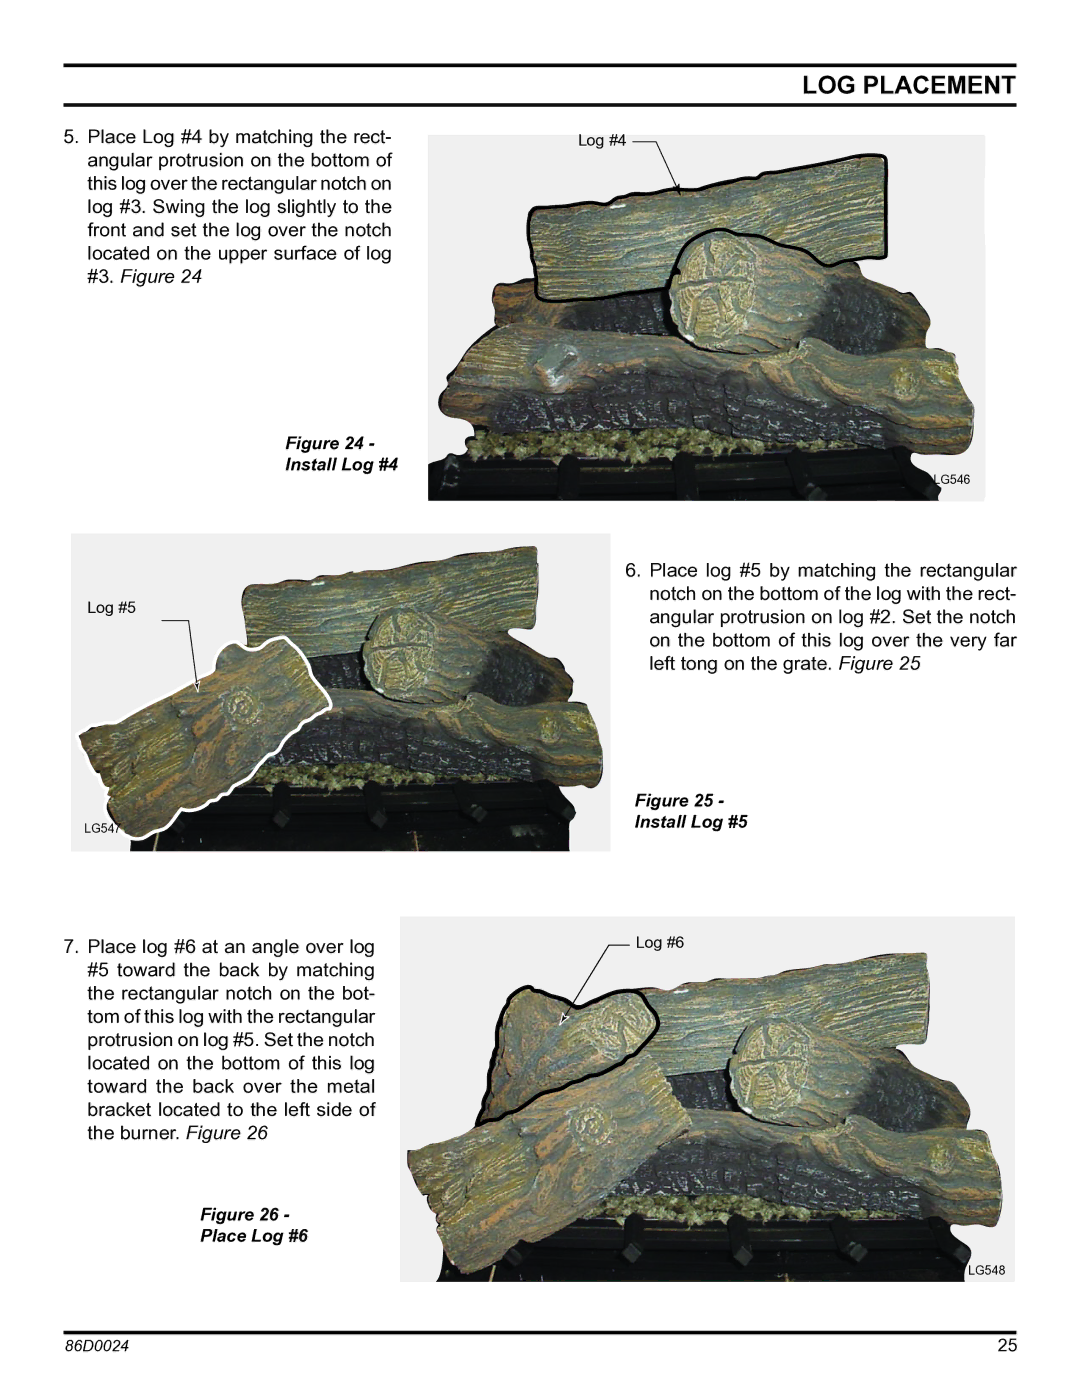
5.Place Log #4 by matching the rect- angular protrusion on the bottom of this log over the rectangular notch on log #3. Swing the log slightly to the front and set the log over the notch located on the upper surface of log #3. Figure 24
Figure 24 -
Install Log #4
Log #5
LG547
7.Place log #6 at an angle over log #5 toward the back by matching the rectangular notch on the bot- tom of this log with the rectangular protrusion on log #5. Set the notch located on the bottom of this log toward the back over the metal bracket located to the left side of the burner. Figure 26
Figure 26 -
Place Log #6
Log #4
LG546
6.Place log #5 by matching the rectangular notch on the bottom of the log with the rect- angular protrusion on log #2. Set the notch on the bottom of this log over the very far left tong on the grate. Figure 25
Figure 25 -
Install Log #5
Log #6
LG548
86D0024 | 25 |