Charging the Module | |
| Important: Charge the Bluetooth module for 2.5 hours before using it the |
| first time. |
To charge the module: | |
1 | Plug the charger plug into a electrical wall outlet. |
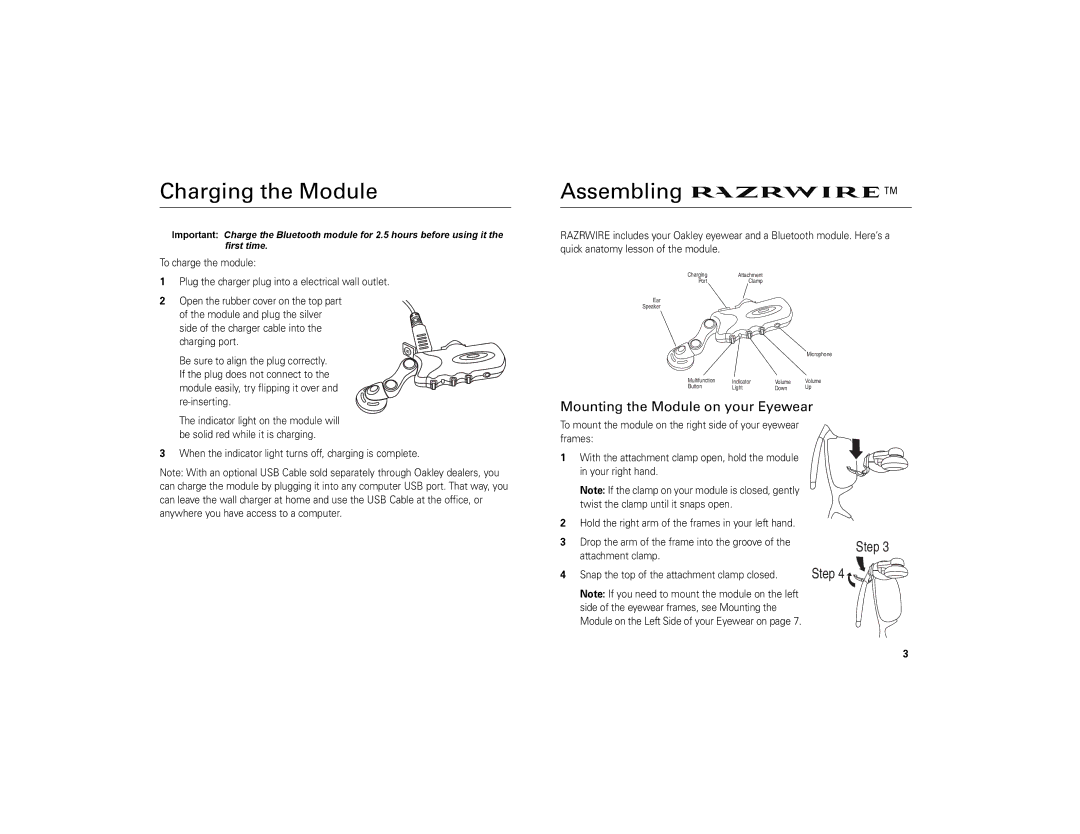
2 | Open the rubber cover on the top part |
| of the module and plug the silver |
| side of the charger cable into the |
| charging port. |
| Be sure to align the plug correctly. |
| If the plug does not connect to the |
| module easily, try flipping it over and |
| |
| The indicator light on the module will |
Assembling |
|
| ™ |
|
|
| |
RAZRWIRE includes your Oakley eyewear and a Bluetooth module. Here’s a | |||
quick anatomy lesson of the module. |
|
|
|
Charging | Attachment |
|
|
Port | Clamp |
|
|
Ear |
|
|
|
Speaker |
|
|
|
|
|
| Microphone |
Multifunction | Indicator | Volume | Volume |
Button | Light | Down | Up |
Mounting the Module on your Eyewear | |||
| be solid red while it is charging. |
3 | When the indicator light turns off, charging is complete. |
Note: With an optional USB Cable sold separately through Oakley dealers, you | |
can charge the module by plugging it into any computer USB port. That way, you | |
can leave the wall charger at home and use the USB Cable at the office, or | |
anywhere you have access to a computer. | |
To mount the module on the right side of your eyewear | |
frames: | |
1 | With the attachment clamp open, hold the module |
| in your right hand. |
| Note: If the clamp on your module is closed, gently |
| twist the clamp until it snaps open. |
2 | Hold the right arm of the frames in your left hand. |
3 | Drop the arm of the frame into the groove of the |
| attachment clamp. |
4 | Snap the top of the attachment clamp closed. |
| Note: If you need to mount the module on the left |
| side of the eyewear frames, see Mounting the |
| Module on the Left Side of your Eyewear on page 7. |
Step 3 Step 4 ![]()
3
