2 and 4 Channel Models
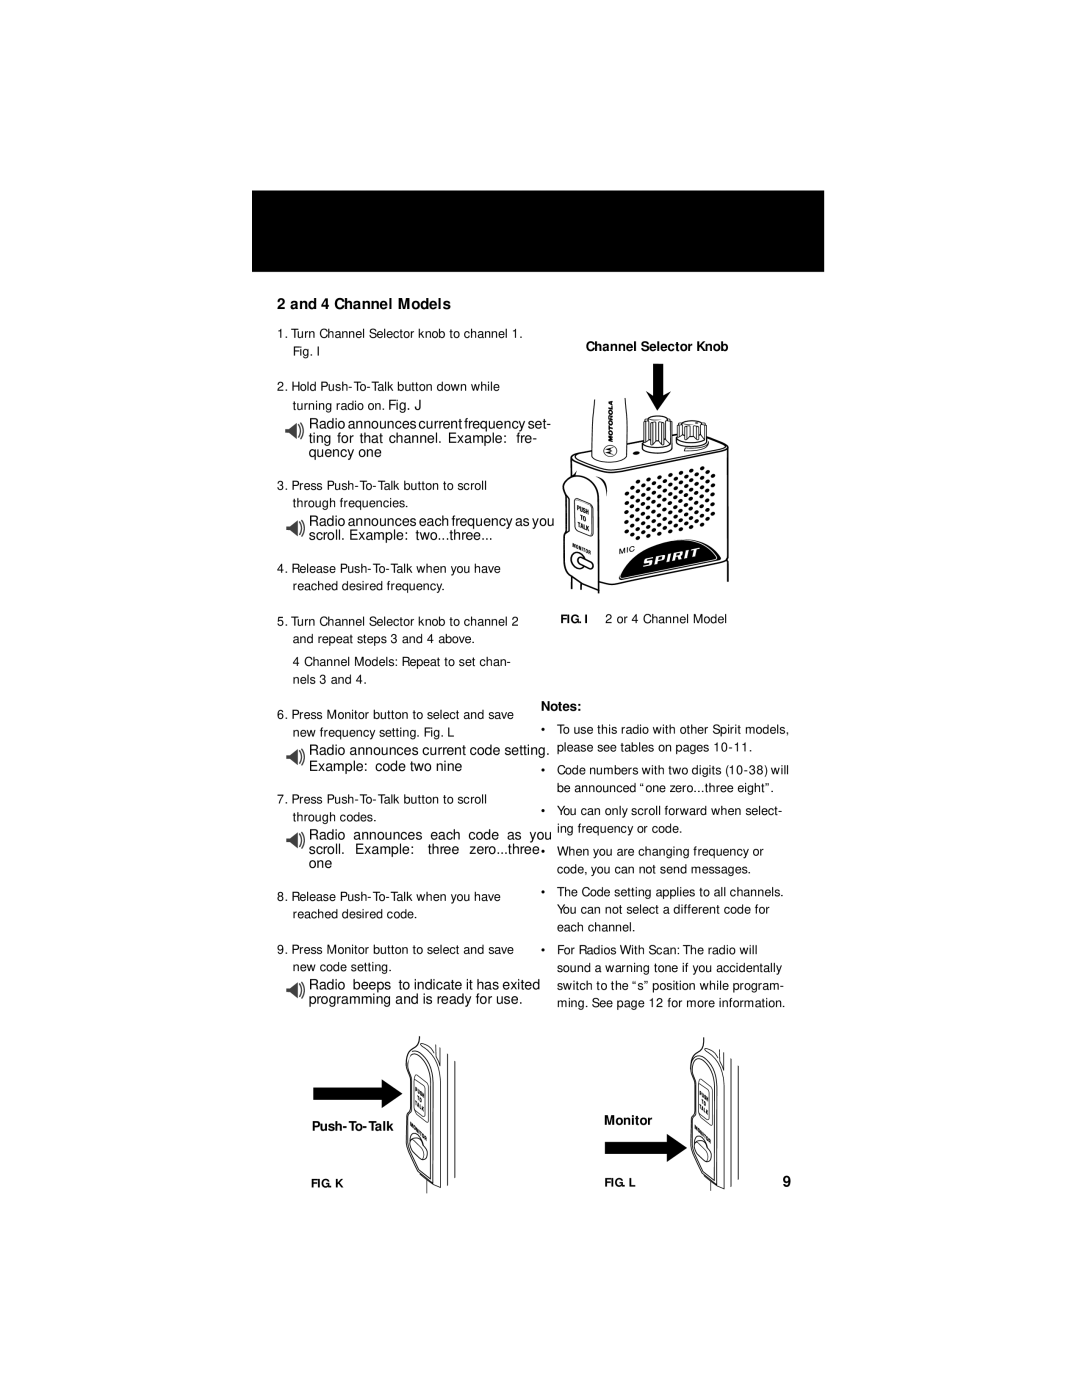
1. Turn Channel Selector knob to channel 1. | Channel Selector Knob |
Fig. I |
2.Hold
Radio announces current frequency set- ting for that channel. Example: “fre- quency one”
3.Press Push-To-Talk button to scroll through frequencies.
Radio announces each frequency as you scroll. Example: “two...three...”
4.Release
5.Turn Channel Selector knob to channel 2 and repeat steps 3 and 4 above.
4 Channel Models: Repeat to set chan- nels 3 and 4.
6.Press Monitor button to select and save new frequency setting. Fig. L
Radio announces current code setting. Example: “code two nine”
7.Press Push-To-Talk button to scroll through codes.
Radio announces each code as you scroll. Example: “three zero...three one”
8.Release
9.Press Monitor button to select and save new code setting.
Radio “beeps” to indicate it has exited programming and is ready for use.
FIG. I 2 or 4 Channel Model
Notes:
•To use this radio with other Spirit models, please see tables on pages
•Code numbers with two digits
•You can only scroll forward when select- ing frequency or code.
•When you are changing frequency or code, you can not send messages.
•The Code setting applies to all channels. You can not select a different code for each channel.
•For Radios With Scan: The radio will sound a warning tone if you accidentally switch to the “s” position while program- ming. See page 12 for more information.
FIG. K
Monitor
FIG. L
9
