maintenance
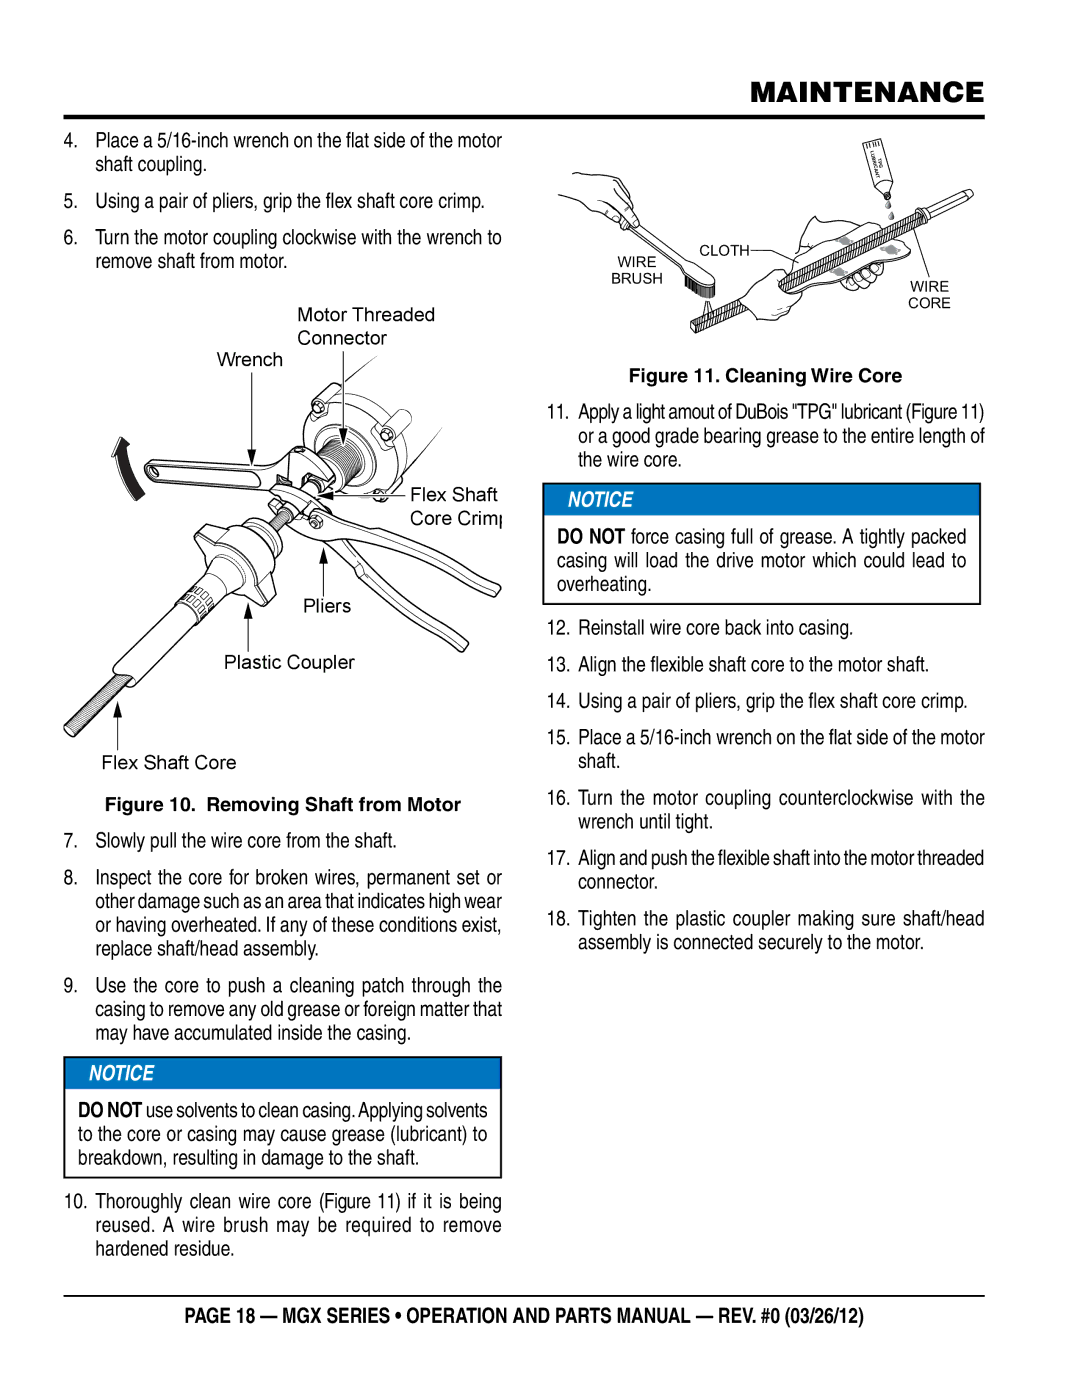
4.Place a
5.Using a pair of pliers, grip the flex shaft core crimp.
6.Turn the motor coupling clockwise with the wrench to remove shaft from motor.
Motor Threaded
Connector
Wrench
![]()
![]()
![]()
![]()
![]()
![]()
![]()
![]()
![]()
![]()
![]()
![]()
![]()
![]()
![]()
![]()
![]()
![]()
![]()
![]()
![]()
![]()
![]()
![]()
![]()
![]()
![]()
![]()
![]() Flex Shaft
Flex Shaft ![]()
![]()
![]()
![]()
![]()
![]()
![]()
![]()
![]()
![]()
![]()
![]()
![]()
![]()
![]()
![]()
![]() Core Crimp
Core Crimp
Pliers
Plastic Coupler
Flex Shaft Core
Figure 10. Removing Shaft from Motor
7.Slowly pull the wire core from the shaft.
8.Inspect the core for broken wires, permanent set or other damage such as an area that indicates high wear or having overheated. If any of these conditions exist, replace shaft/head assembly.
9.Use the core to push a cleaning patch through the casing to remove any old grease or foreign matter that may have accumulated inside the casing.
![]()
![]() NOTICE
NOTICE
DO NOT use solvents to clean casing. Applying solvents to the core or casing may cause grease (lubricant) to breakdown, resulting in damage to the shaft.
10.Thoroughly clean wire core (Figure 11) if it is being reused. A wire brush may be required to remove hardened residue.
LUBRICAG
TP
NT
CLOTH
WIRE
BRUSH
WIRE
CORE
Figure 11. Cleaning Wire Core
11.Apply a light amout of DuBois "TPG" lubricant (Figure 11) or a good grade bearing grease to the entire length of the wire core.
![]() NOTICE
NOTICE
DO NOT force casing full of grease. A tightly packed casing will load the drive motor which could lead to overheating.
12.Reinstall wire core back into casing.
13.Align the flexible shaft core to the motor shaft.
14.Using a pair of pliers, grip the flex shaft core crimp.
15.Place a
16.Turn the motor coupling counterclockwise with the wrench until tight.
17.Align and push the flexible shaft into the motor threaded connector.
18.Tighten the plastic coupler making sure shaft/head assembly is connected securely to the motor.
page 18 — MGX Series • operation and parts manual — rev. #0 (03/26/12)