EMBER BED BULB REPLACEMENT
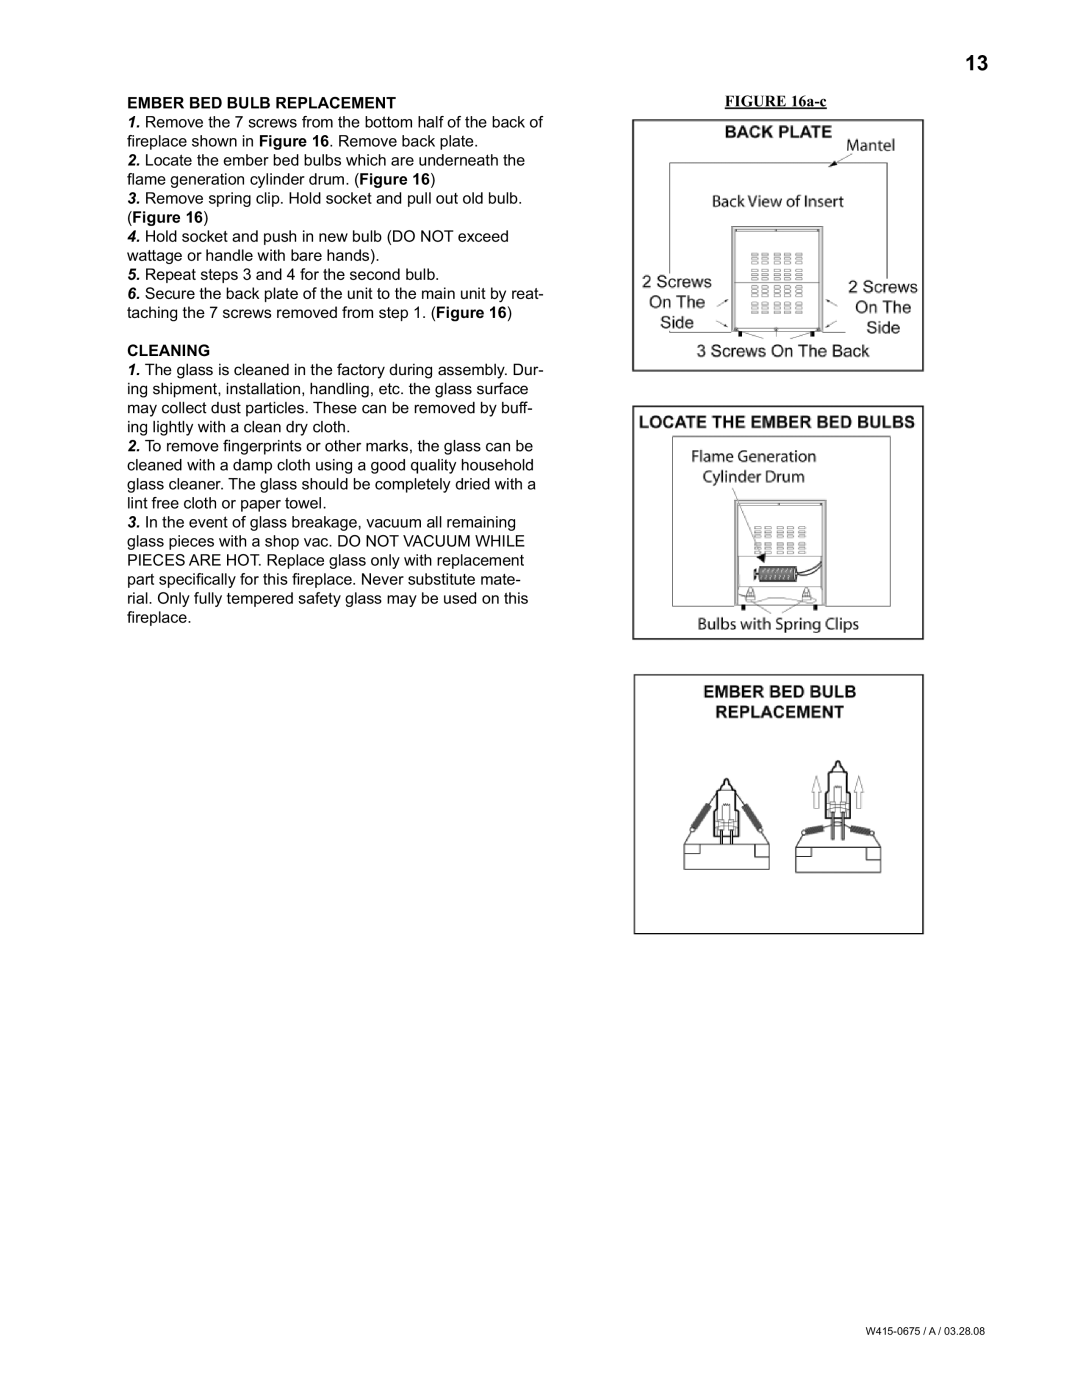
1.Remove the 7 screws from the bottom half of the back of fi replace shown in Figure 16. Remove back plate.
2.Locate the ember bed bulbs which are underneath the
fl ame generation cylinder drum. (Figure 16)
3.Remove spring clip. Hold socket and pull out old bulb. (Figure 16)
4.Hold socket and push in new bulb (DO NOT exceed wattage or handle with bare hands).
5.Repeat steps 3 and 4 for the second bulb.
6.Secure the back plate of the unit to the main unit by reat- taching the 7 screws removed from step 1. (Figure 16)
CLEANING
1.The glass is cleaned in the factory during assembly. Dur- ing shipment, installation, handling, etc. the glass surface may collect dust particles. These can be removed by buff- ing lightly with a clean dry cloth.
2.To remove fi ngerprints or other marks, the glass can be cleaned with a damp cloth using a good quality household glass cleaner. The glass should be completely dried with a lint free cloth or paper towel.
3.In the event of glass breakage, vacuum all remaining glass pieces with a shop vac. DO NOT VACUUM WHILE PIECES ARE HOT. Replace glass only with replacement part specifi cally for this fi replace. Never substitute mate- rial. Only fully tempered safety glass may be used on this fi replace.
13
