HANDLE WITH CARE
Use care when handling or transporting your grill to prevent damage and misalignment of internal components. Although this grill has been designed with mobility in mind, rough handling or abuse will result in damage to internal components, preventing your grill from operating properly.
LEAK TESTING INSTRUCTIONS
DO NOT USE A FLAME TO LEAK TEST.
LEAK TESTING: This must be done before initial use, annually and whenever any gas components are replaced or serviced. No smoking while performing this test, and remove all sources of ignition. See Leak Testing Diagram for areas to check.
1.Connect the 1 lb cylinder to the grill regulator, or if using the optional supply hose, connect it between the cylinder valve and the grill regulator. Ensure the grill regulator is in the “LOCK OFF” position, turn the cylinder valve on.
2.Brush a half and half solution of liquid soap and water onto the joint between the regulator and the 1 lb cylinder. When using the optional supply hose, brush the solution onto the connections at each end of the hose.
3.Bubbles will indicate a gas leak. Either tighten the loose joint or replace the part with one recommended by the dealer.
4.If the leak cannot be stopped, disconnect the 1 lb cylinder, or shut off the cylinder valve on the 20 lb cylinder, disconnect it and have the barbecue inspected by your gas supplier or dealer. Do not use the appliance until the leak has been corrected.
5.Turn off gas supply.
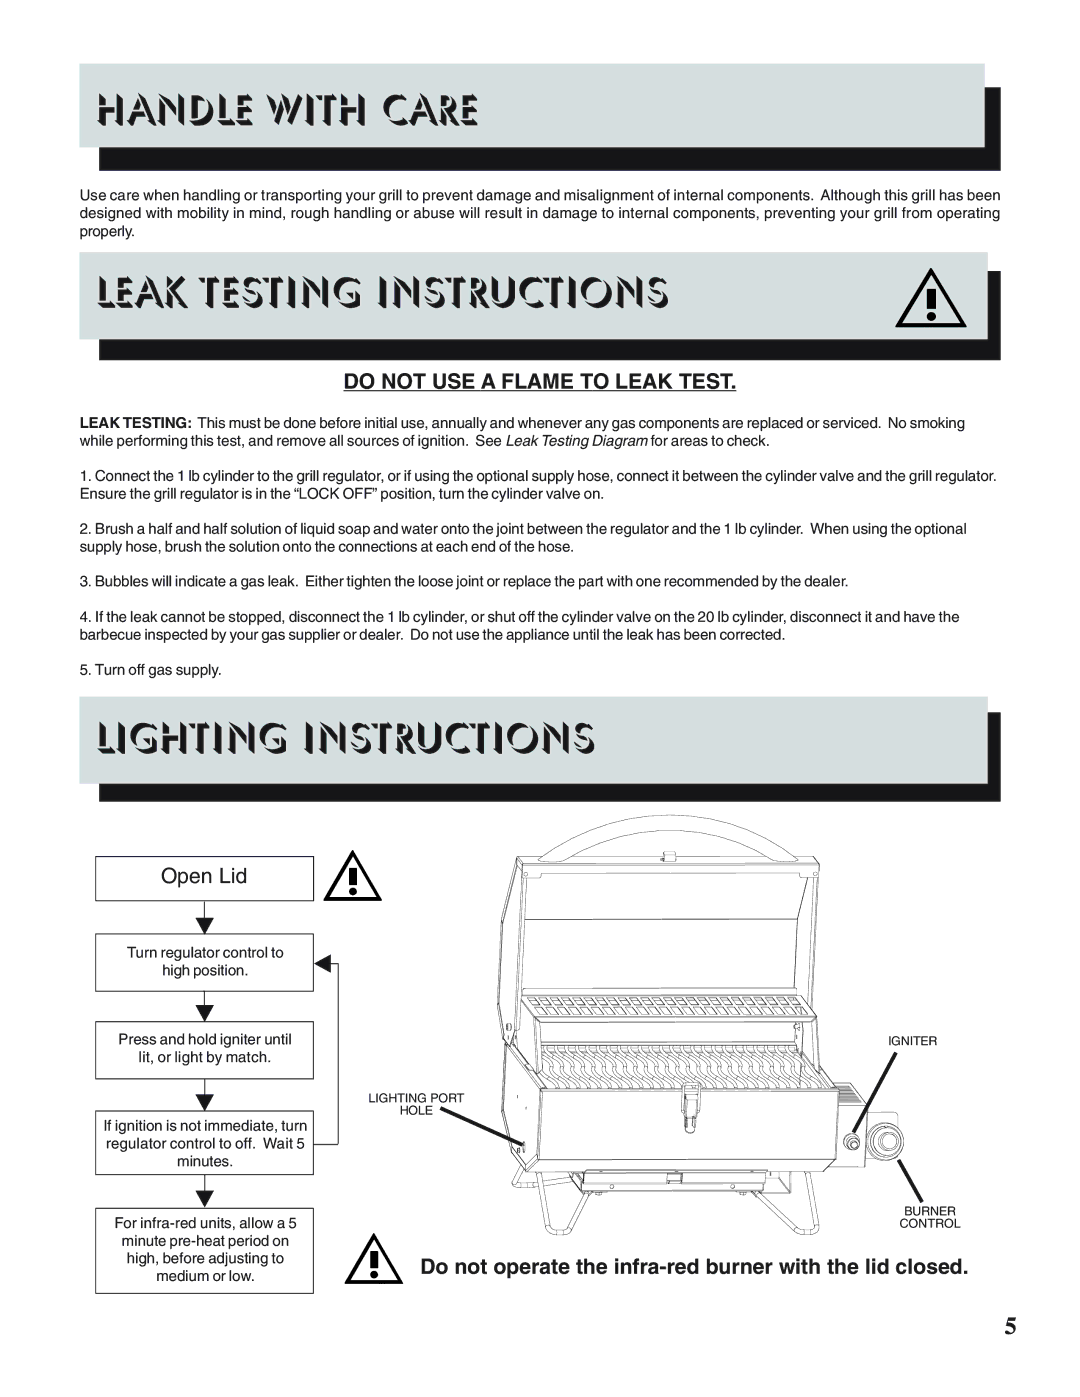
LIGHTING INSTRUCTIONS
Open Lid
Turn regulator control to
high position.
Press and hold igniter until
lit, or light by match.
If ignition is not immediate, turn regulator control to off. Wait 5 minutes.
For
IGNITER
LIGHTING PORT
HOLE
BURNER
CONTROL
Do not operate the
5