Section 8
CE Bilge Discharge Filter
Your boat may be equipped with a
CE bilge discharge filter cartridge XOil™ replacement should be part of a regular maintenance program to prevent oily, contaminated bilge from passing through the deck outlet fitting into the environment. The period between cartridge replacements will depend on the condition of the bilge. Always replace the cartridge immediately after there has been a great amount of oil or other contaminants spilled into the bilge.
Cartridge Replacement
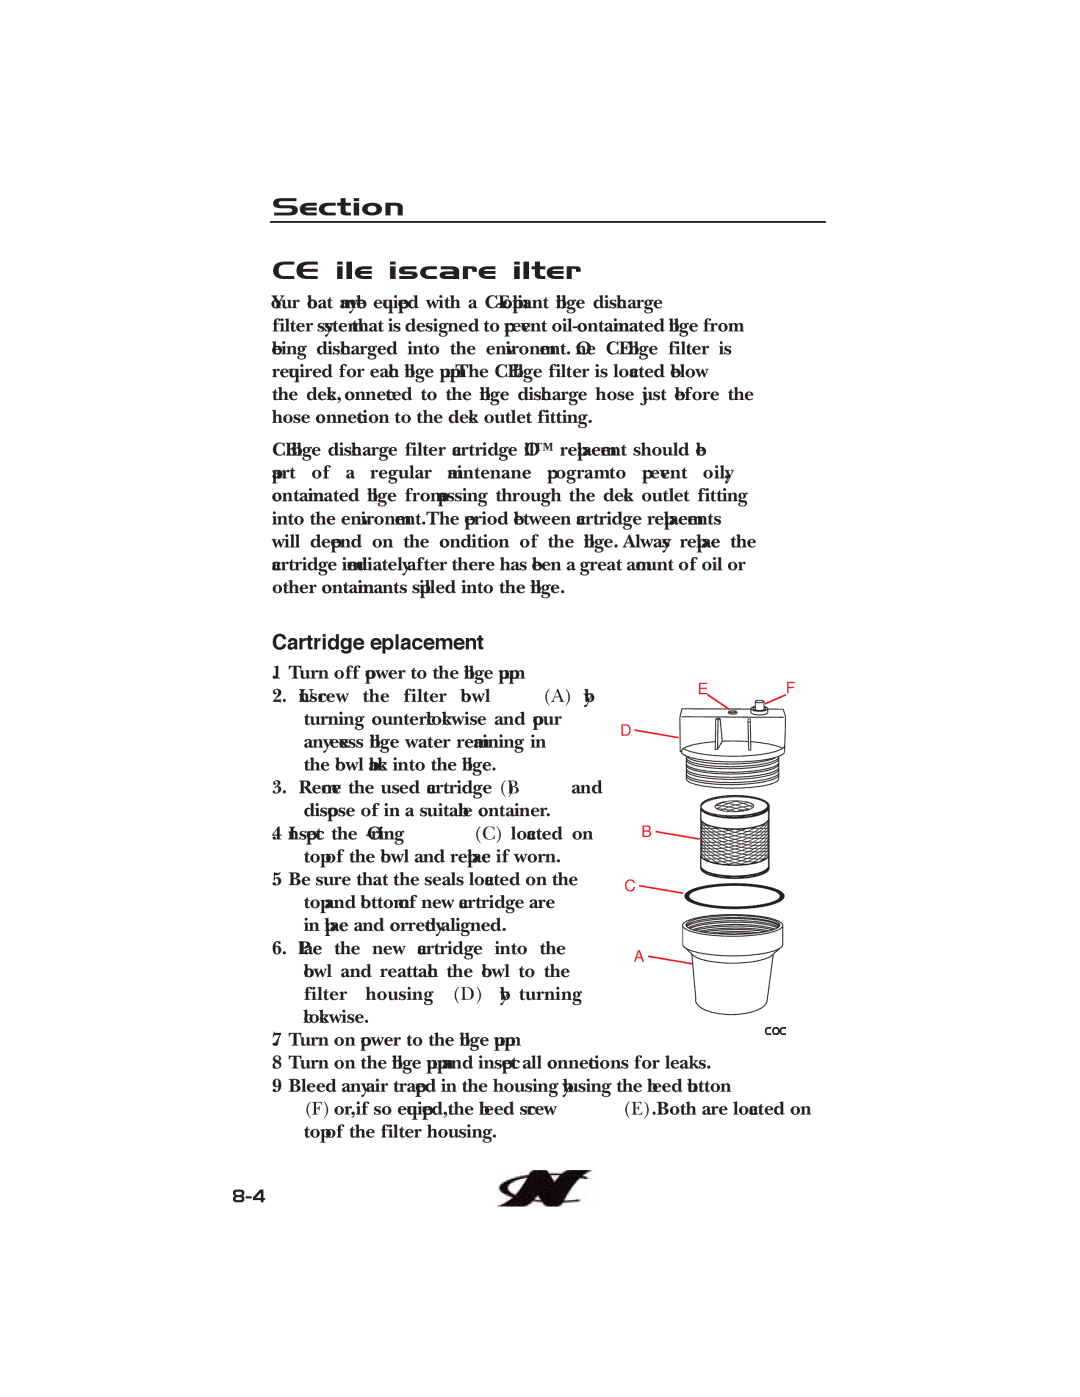
1. | Turn off power to the bilge pump. | E | F | |
2. | Unscrew the filter bowl (A) by | |||
|
| |||
| turning counterclockwise and pour | D |
| |
| any excess bilge water remaining in |
|
| |
| the bowl back into the bilge. |
|
| |
3. | Remove the used cartridge (B) and |
|
| |
| dispose of in a suitable container. |
|
| |
4. | Inspect the | B |
| |
| top of the bowl and replace if worn. |
|
| |
5. | Be sure that the seals located on the | C |
| |
| top and bottom of new cartridge are |
|
| |
| in place and correctly aligned. |
|
| |
6. | Place the new cartridge into the | A |
| |
| bowl and reattach the bowl to the |
| ||
|
|
| ||
| filter housing (D) by turning |
|
| |
| clockwise. |
| CORC0241 | |
7. | Turn on power to the bilge pump. |
| ||
|
| |||
8. | Turn on the bilge pump and inspect all connections for leaks. | |||
9. | Bleed any air trapped in the housing by using the bleed button | |||
| (F) or, if so equipped, the bleed screw (E). Both are located on | |||
| top of the filter housing. |
|
| |