Navini Networks, Inc. | Ripwave Modem User Guide |
Installing &
Charging the
Battery
2.4 GHz Battery
The battery pack is an option and is not included with the unit. To order a battery for the Ripwave Modem, contact your Service Provider or the vendor from whom you purchased the Modem.
The battery pack is installed in the bottom of the Ripwave Modem. The battery compartment of the 2.4 GHz Ripwave Modem varies from the 2.3, 2.5, and 2.6 GHz models. To install and charge or remove the battery pack, follow the steps based on your model.
Step Action | Illustration |
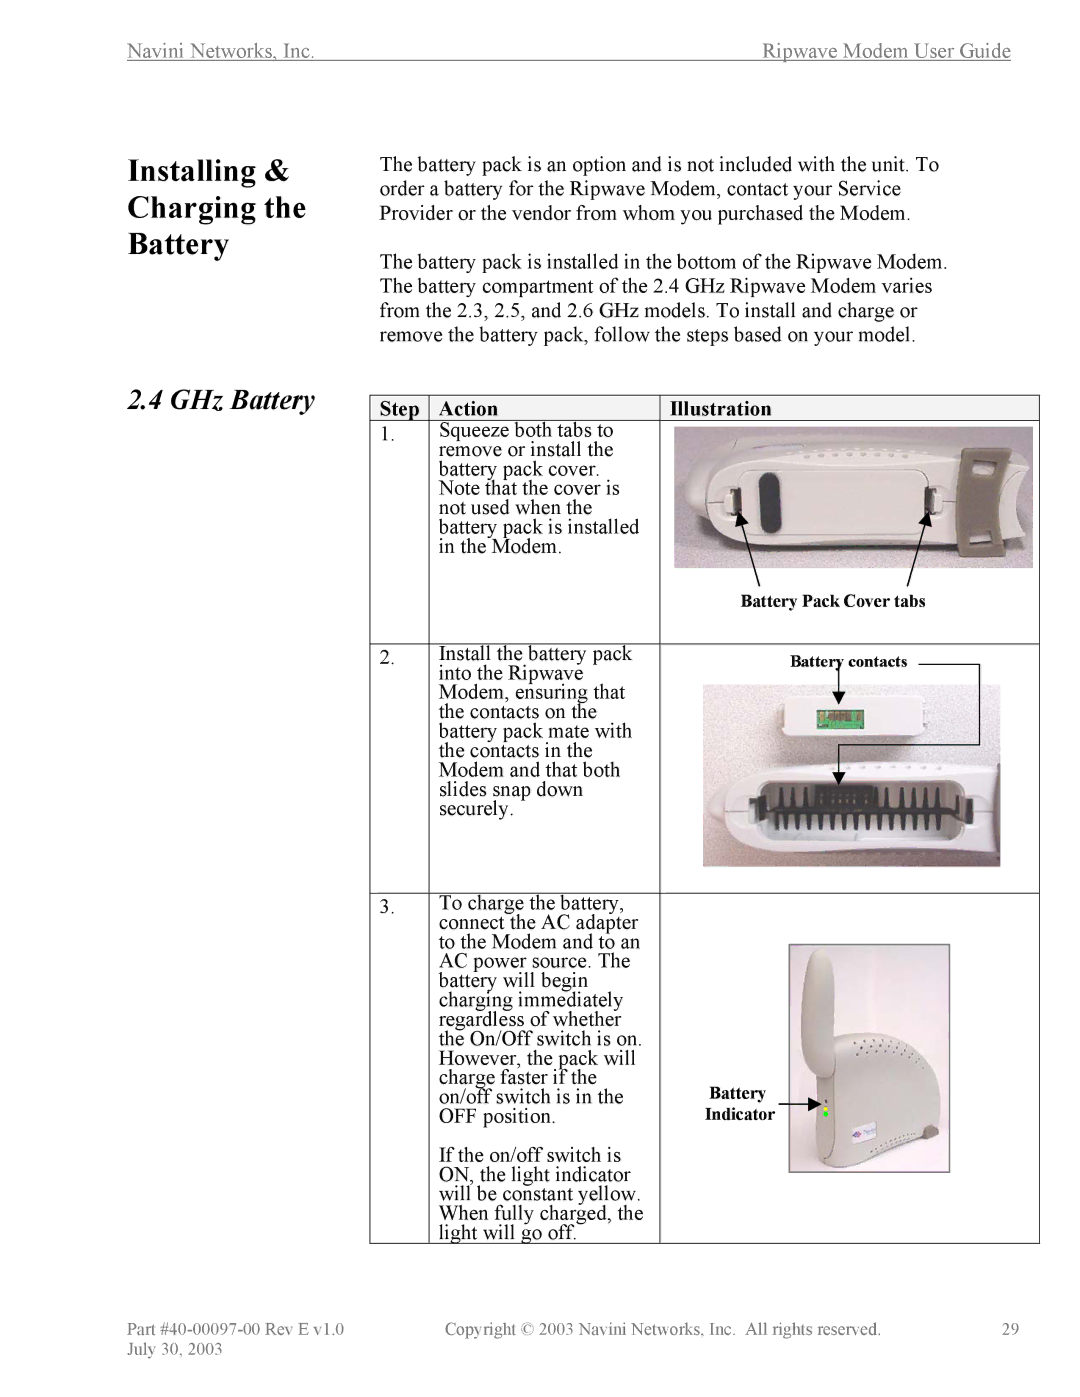
1.Squeeze both tabs to remove or install the battery pack cover.
Note that the cover is not used when the battery pack is installed in the Modem.
|
| Battery Pack Cover tabs | |||
|
|
|
|
|
|
2. | Install the battery pack | Battery | contacts |
|
|
| into the Ripwave |
|
|
|
|
| Modem, ensuring that |
|
|
|
|
|
|
|
|
| |
| the contacts on the |
|
|
|
|
| battery pack mate with |
|
|
|
|
| the contacts in the |
|
|
|
|
|
|
|
|
| |
| Modem and that both |
|
|
|
|
|
|
|
|
| |
| slides snap down |
|
|
|
|
| securely. |
|
|
|
|
|
|
|
|
|
|
|
3. | To charge the battery, |
|
|
|
|
|
| connect the AC adapter |
|
|
|
|
|
| to the Modem and to an |
|
|
|
|
|
| AC power source. The |
|
|
|
|
|
| battery will begin |
|
|
|
|
|
| charging immediately |
|
|
|
|
|
| regardless of whether |
|
|
|
|
|
| the On/Off switch is on. |
|
|
|
|
|
| However, the pack will |
|
|
|
|
|
| charge faster if the | Battery |
| .. . |
| |
| on/off switch is in the |
|
| |||
| OFF position. | Indicator |
|
|
| |
| If the on/off switch is |
|
|
|
|
|
| ON, the light indicator |
|
|
|
|
|
|
|
|
|
|
| |
| will be constant yellow. |
|
|
|
|
|
| When fully charged, the |
|
|
|
|
|
| light will go off. |
|
|
|
|
|
Part | Copyright © 2003 Navini Networks, Inc. All rights reserved. | 29 |
July 30, 2003 |
|
|