TagA | Tile Matrix | Tile Matrix demonstrates multiple screens. This feature provides a single large screen |
|
| using up to 25 monitors. It will be able to divide up to 5 each H and V. |
|
| This requires you to feed the PC output into each of the monitors through a distributor. |
|
| ENABLE: Select ÒONÓ, the monitor will expand the selected position. |
|
| H MONITOR: Select number of horizontal divide. |
|
| V MONITOR: Select number of vertical divide. |
|
| MONITOR No: Select a position to expand the screen. |
|
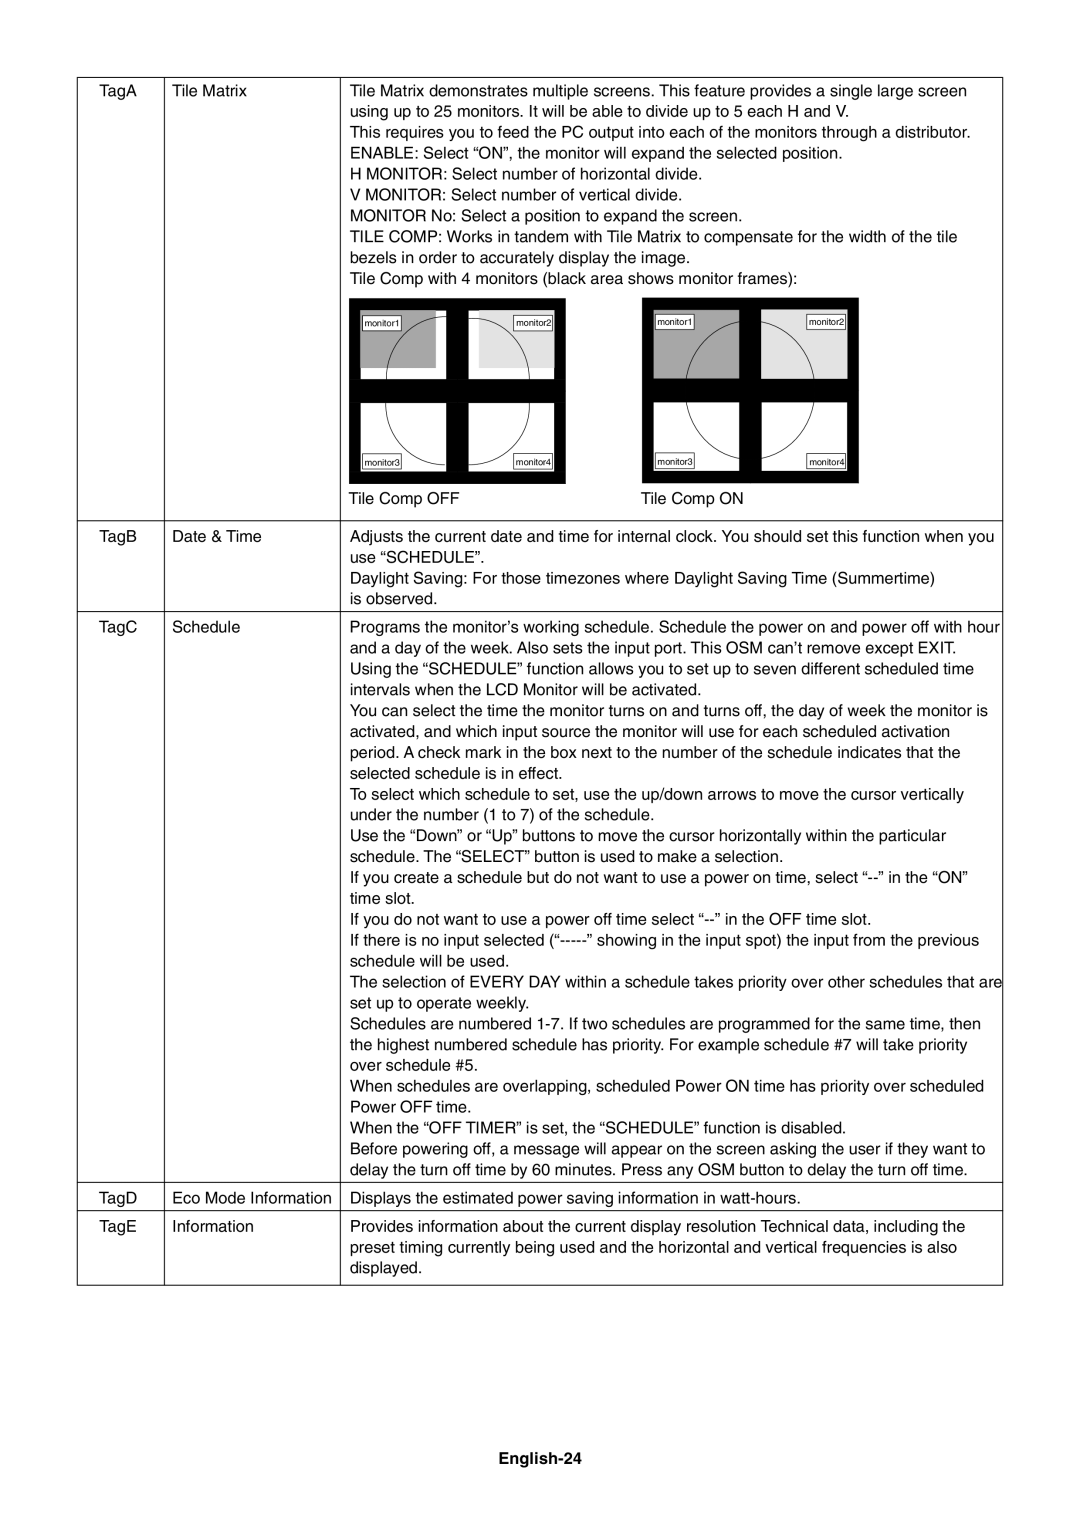
| TILE COMP: Works in tandem with Tile Matrix to compensate for the width of the tile |
|
| bezels in order to accurately display the image. |
|
| Tile Comp with 4 monitors (black area shows monitor frames): |
monitor1 | monitor2 | monitor1 | monitor2 |
|
|
|
|
|
|
|
|
|
|
|
|
|
|
|
|
|
|
|
|
| monitor3 |
|
|
| monitor4 |
|
|
| monitor3 |
|
|
| monitor4 |
|
|
|
|
|
|
|
|
|
|
|
|
|
|
|
|
|
|
|
|
|
| Tile Comp OFF |
|
| Tile Comp ON |
|
|
| |||||||||
|
|
|
|
|
|
|
|
|
|
|
|
|
|
|
|
|
|
TagB | Date & Time | Adjusts the current date and time for internal clock. You should set this function when you | |||||||||||||||
|
| use ÒSCHEDULEÓ. |
|
|
|
|
|
|
|
|
|
|
| ||||
|
| Daylight Saving: For those timezones where Daylight Saving Time (Summertime) | |||||||||||||||
|
| is observed. |
|
|
|
|
|
|
|
|
|
|
| ||||
|
|
|
|
|
|
|
|
|
|
|
|
|
|
|
|
|
|
TagC | Schedule | Programs the monitorÕs working schedule. Schedule the power on and power off with hour | |||||||||||||||
|
| and a day of the week. Also sets the input port. This OSM canÕt remove except EXIT. | |||||||||||||||
|
| Using the ÒSCHEDULEÓ function allows you to set up to seven different scheduled time | |||||||||||||||
|
| intervals when the LCD Monitor will be activated. |
|
|
| ||||||||||||
|
| You can select the time the monitor turns on and turns off, the day of week the monitor is | |||||||||||||||
|
| activated, and which input source the monitor will use for each scheduled activation | |||||||||||||||
|
| period. A check mark in the box next to the number of the schedule indicates that the | |||||||||||||||
|
| selected schedule is in effect. |
|
|
|
|
|
|
|
|
| ||||||
|
| To select which schedule to set, use the up/down arrows to move the cursor vertically | |||||||||||||||
|
| under the number (1 to 7) of the schedule. |
|
|
| ||||||||||||
|
| Use the ÒDownÓ or ÒUpÓ buttons to move the cursor horizontally within the particular | |||||||||||||||
|
| schedule. The ÒSELECTÓ button is used to make a selection. |
|
|
| ||||||||||||
|
| If you create a schedule but do not want to use a power on time, select | |||||||||||||||
|
| time slot. |
|
|
|
|
|
|
|
|
|
|
| ||||
|
| If you do not want to use a power off time select | |||||||||||||||
|
| If there is no input selected | |||||||||||||||
|
| schedule will be used. |
|
|
|
|
|
|
|
|
|
|
| ||||
|
| The selection of EVERY DAY within a schedule takes priority over other schedules that are | |||||||||||||||
|
| set up to operate weekly. |
|
|
|
|
|
|
|
|
| ||||||
|
| Schedules are numbered | |||||||||||||||
|
| the highest numbered schedule has priority. For example schedule #7 will take priority | |||||||||||||||
|
| over schedule #5. |
|
|
|
|
|
|
|
|
|
|
| ||||
|
| When schedules are overlapping, scheduled Power ON time has priority over scheduled | |||||||||||||||
|
| Power OFF time. |
|
|
|
|
|
|
|
|
|
|
| ||||
|
| When the ÒOFF TIMERÓ is set, the ÒSCHEDULEÓ function is disabled. | |||||||||||||||
|
| Before powering off, a message will appear on the screen asking the user if they want to | |||||||||||||||
|
| delay the turn off time by 60 minutes. Press any OSM button to delay the turn off time. | |||||||||||||||
|
|
|
|
|
|
|
|
|
|
|
|
|
|
|
|
|
|
TagD | Eco Mode Information | Displays the estimated power saving information in |
|
|
| ||||||||||||
|
|
|
|
|
|
|
|
|
|
|
|
|
|
|
|
|
|
TagE | Information | Provides information about the current display resolution Technical data, including the | |||||||||||||||
|
| preset timing currently being used and the horizontal and vertical frequencies is also | |||||||||||||||
|
| displayed. |
|
|
|
|
|
|
|
|
|
|
| ||||