English
Figure C.3 | Figure C.4 |
7.Hold all cables firmly and place the cable cover onto the stand (Figure D.1). To remove the cable cover, lift the cover off as shown in Figure D.2.
8.Connect one end of the power cord to the AC inlet on the back of the monitor and the other end to the power outlet.
NOTE: Please refer to Caution section of this manual for proper selection of AC power cord.
Figure D.1 | Figure D.2 |
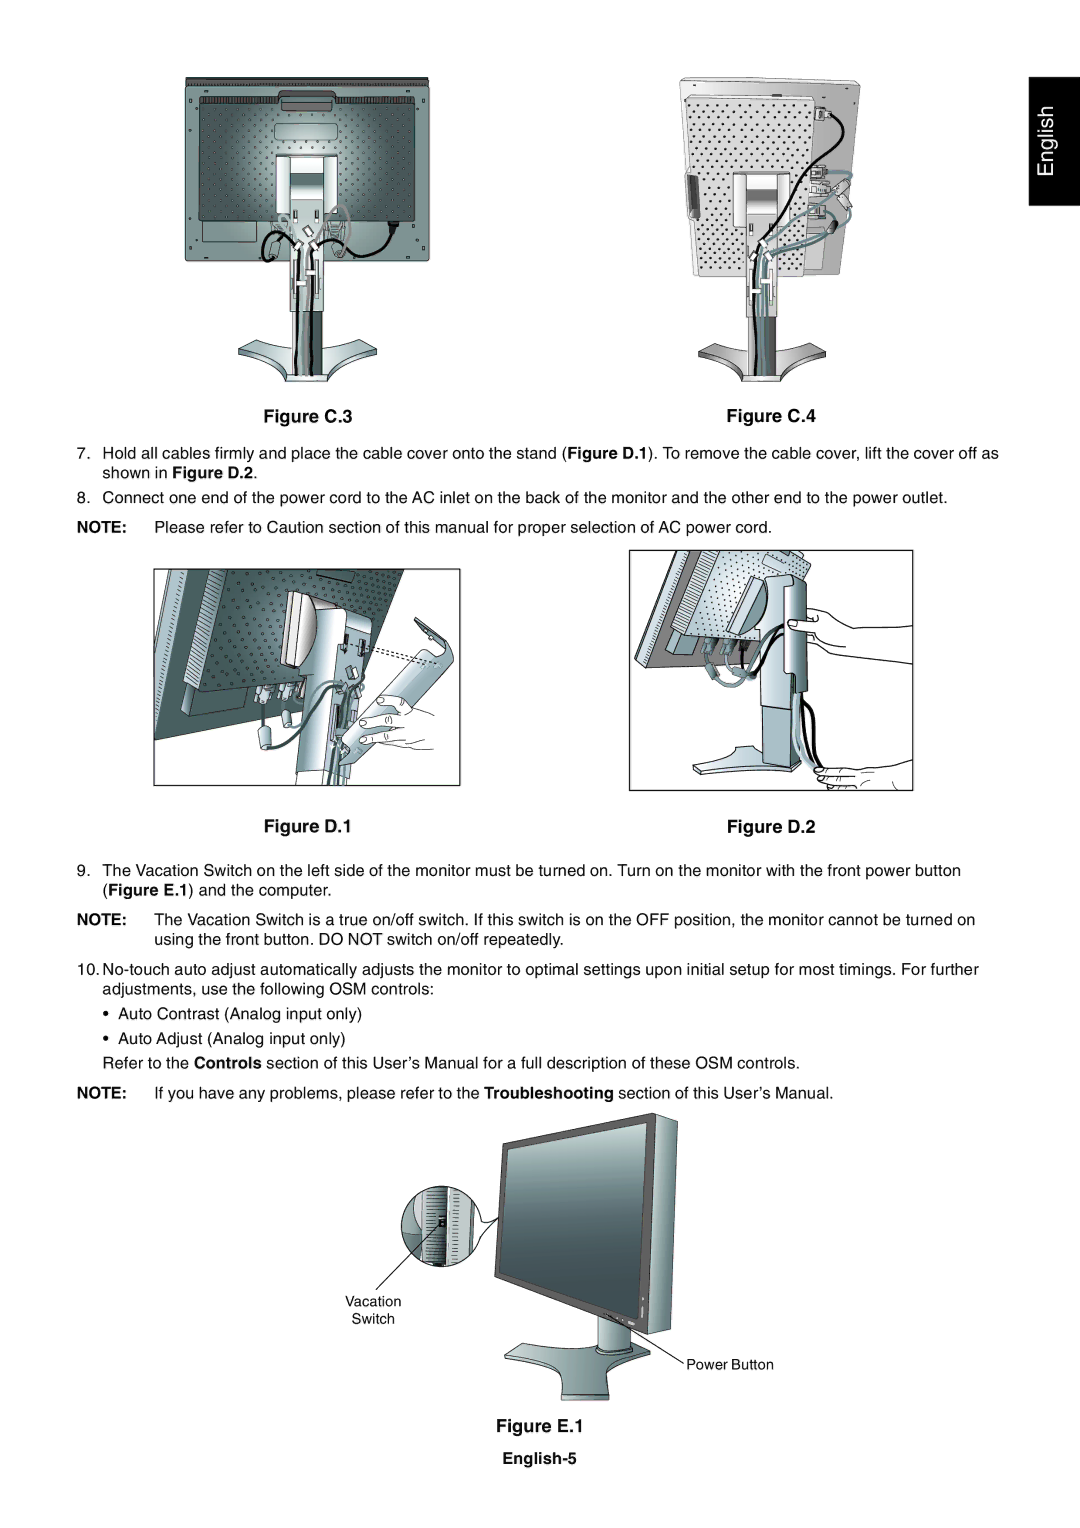
9.The Vacation Switch on the left side of the monitor must be turned on. Turn on the monitor with the front power button (Figure E.1) and the computer.
NOTE: The Vacation Switch is a true on/off switch. If this switch is on the OFF position, the monitor cannot be turned on using the front button. DO NOT switch on/off repeatedly.
10.
¥Auto Contrast (Analog input only)
¥Auto Adjust (Analog input only)
Refer to the Controls section of this UserÕs Manual for a full description of these OSM controls.
NOTE: If you have any problems, please refer to the Troubleshooting section of this UserÕs Manual.
Vacation
Switch
Power Button