Installation Instructions
Viewing Angle Adjustment
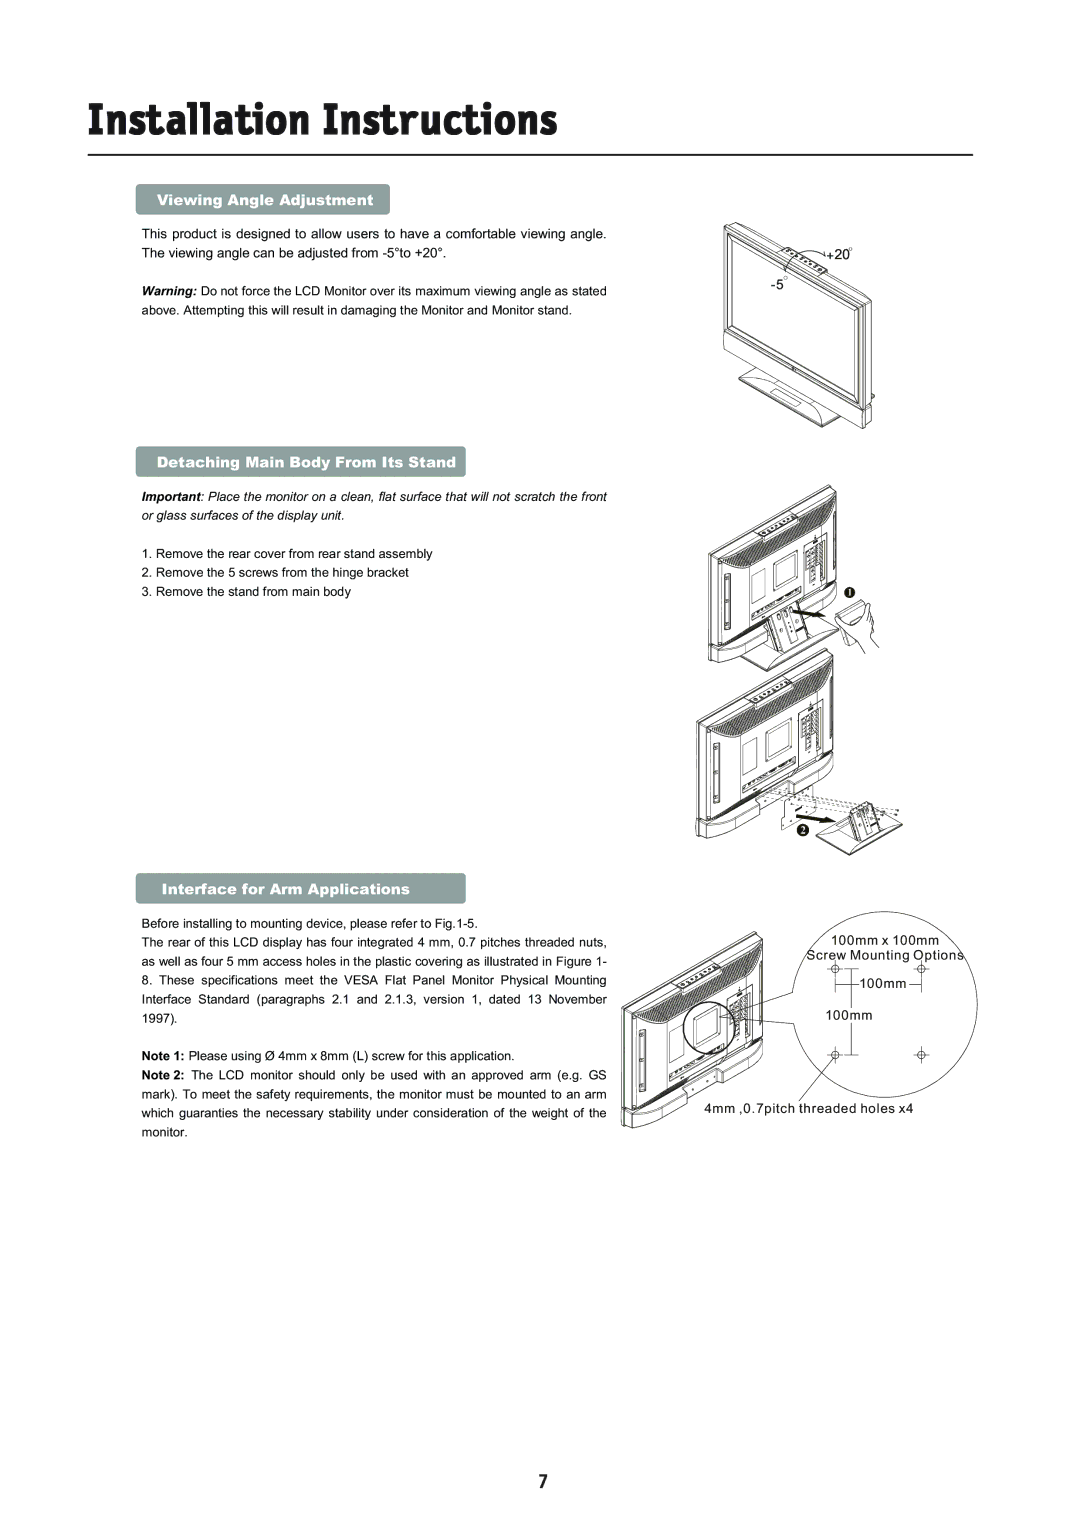
This product is designed to allow users to have a comfortable viewing angle. The viewing angle can be adjusted from
Warning: Do not force the LCD Monitor over its maximum viewing angle as stated above. Attempting this will result in damaging the Monitor and Monitor stand.
Detaching Main Body From Its Stand
Important: Place the monitor on a clean, flat surface that will not scratch the front or glass surfaces of the display unit.
1.Remove the rear cover from rear stand assembly
2.Remove the 5 screws from the hinge bracket
3.Remove the stand from main body
Interface for Arm Applications
Before installing to mounting device, please refer to Fig.1-5.
The rear of this LCD display has four integrated 4 mm, 0.7 pitches threaded nuts, as well as four 5 mm access holes in the plastic covering as illustrated in Figure 1-
8.These specifications meet the VESA Flat Panel Monitor Physical Mounting Interface Standard (paragraphs 2.1 and 2.1.3, version 1, dated 13 November 1997).
Note 1: Please using Ø 4mm x 8mm (L) screw for this application.
Note 2: The LCD monitor should only be used with an approved arm (e.g. GS mark). To meet the safety requirements, the monitor must be mounted to an arm which guaranties the necessary stability under consideration of the weight of the monitor.
1
2
100mm x 100mm
Screw Mounting Options
100mm
100mm
4mm ,0.7pitch threaded holes x4
7