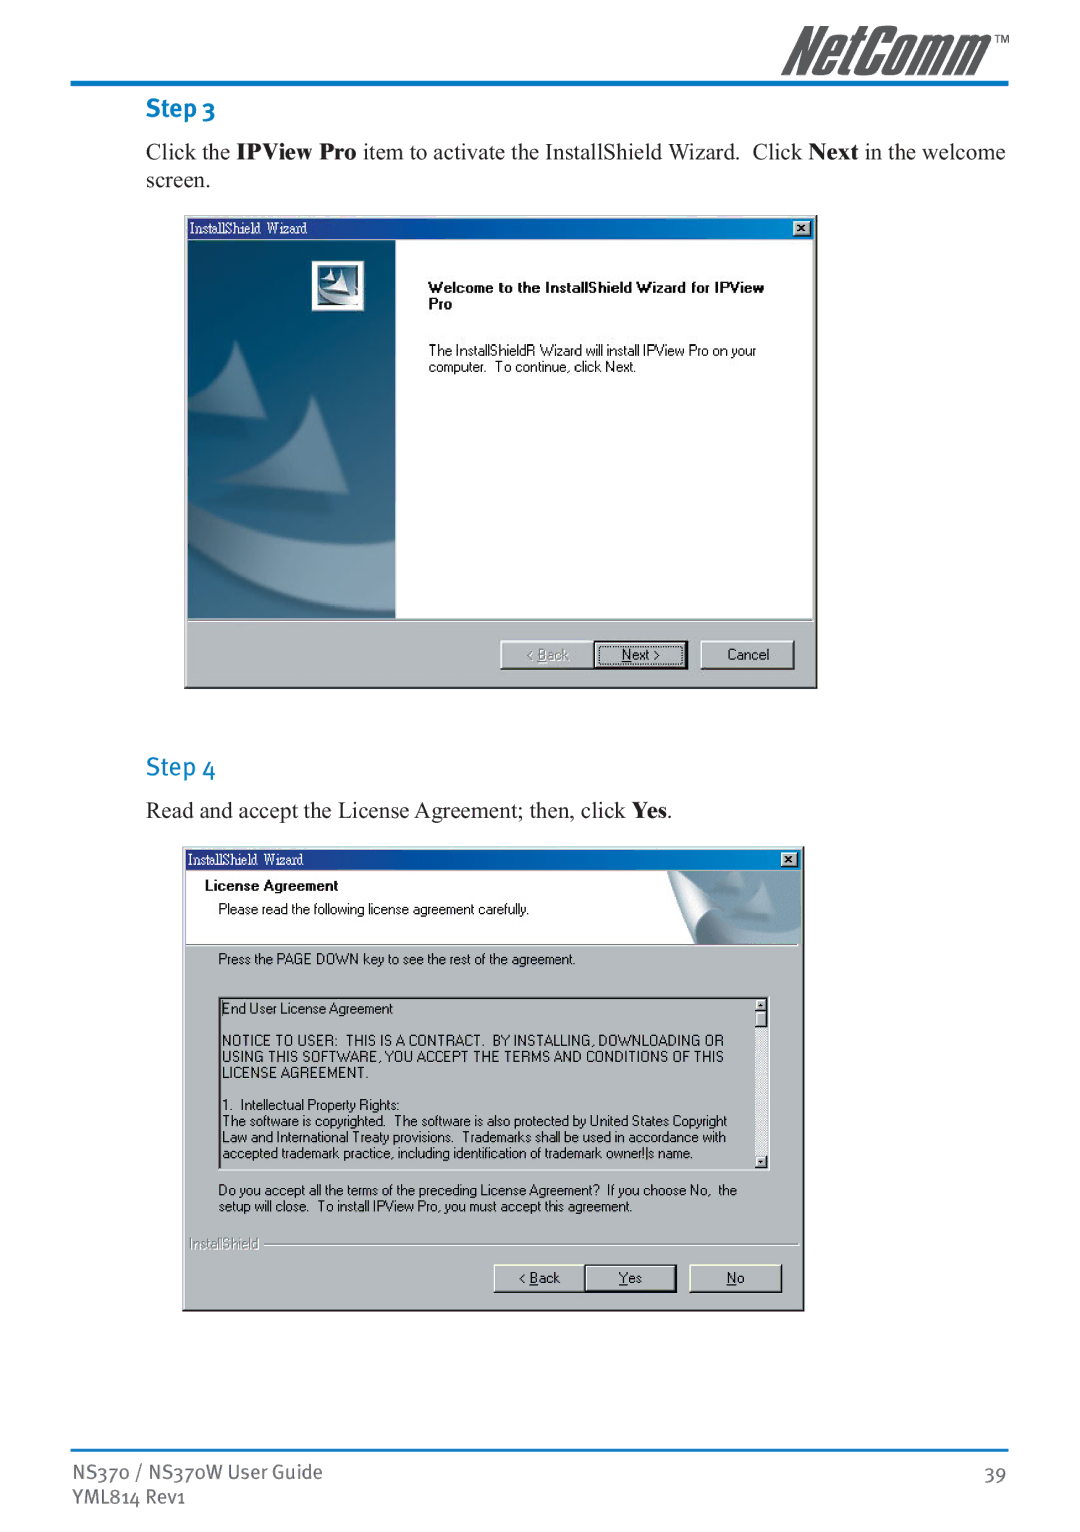
Page
Contents
NS370 / NS370W User Guide
YML814 Rev1
NS370 / NS370W User Guide
YML814 Rev1
Viewing a Camera
About This Guide
Introduction
Support Variety of Platforms
Features and Benefits
Web Configuration
Simple To Use
Package Contents
For Networking
Wireless Local Area Network for NS370W only
For Accessing the Camera
System Requirements
2. Link LED
1. Power LED
Physical Description
Front Panel
Rear Panel
1. Network Cable Connector
3. Reset Button
4. DC Power Connector
label Power on the Internet Camera is illuminated
Hardware Installation
Connecting the Ethernet cable
Attaching the Power Supply
will not be enabled until the “Admin ID” and “Admin Password” is
that you set the “Admin ID” and “Admin Password” when you use
defined, only the administrator has the access to the management
features of the Internet Camera. This procedure should be done as
Using the Internet Camera
Usage Examples
Home Applications
SOHO Applications
NS370 / NS370W User Guide
YML814 Rev1
Welcome Screen of the Configuration Utility
Web Configuration Utility
Accessing the Camera with the Web Configuration Utility
192.168.0.10 in order to access the camera
store the settings, or Cancel to abandon, or Refresh to reload the
System Administration
System Administration Management
Once you have changed the settings in each option, click Save to
Ethernet Status
System
Video
Device Status
Network Status
Wireless NS370W only
Wireless Status
Network
Active Users
User
System Administration Configuration
System Setting
System
Dummy
Normal
Video
Video Setting
Wireless Interface
Wireless NS370W only
Encryption
ASCII input format
HEX input format
Advanced Setting
TCP/IP
Network
PPPoE - If your application requires a direct connection from an ADSL modem through the camera’s RJ-45 LAN port, click this option and enter the User ID and Password into the respective boxes. You should have an ISP PPPoE account. The camera will get an IP address from the ISP as starting up
Upload/E-mail Video
User Access Control
User
Define Users
Date & Time
DateTime
FTP Server
Upload
Manual Operation
Time Schedule
Manual Operation
E-mail
E-mail Account
Time Schedule
Test FTP Account
System Administration Tools
FTP Test
E-mail Test
Backup
Reset
Factory Reset
Firmware Upgrade
Restore Device Configuration from File
Backup Device Configuration to File
About
System Administration Help
View Video - ActiveX Mode
Configuration
install to the Web Server, and 2. install to your Local PC
2. The administrator has the authority to set the upload video
function through the setting in the Upload option under
Step
Using IPView Pro with the Internet Camera
Installation
Step
NS370 / NS370W User Guide
Step
Step
Read and accept the License Agreement then, click Yes
Choose the destination location. If no specific requirement, leave the default setting and click Next
Step
Step
Windows
Windows XP
Step
Step
Getting Started
may shows incomplete screen when launching the program
IPView Pro requires the system’s resolution setting up to
Please configure the resolution to 1024x768 or higher otherwise, it
Description
Item Feature
Power Button
Configure
Using IPView Pro
Adding a Camera
To add a camera
Removing a Camera
2. Click Delete Camera
1. Select the camera you want to remove
Viewing a Camera
Playing Recorded Video
Recording Video
YML814 Rev1
Configuring the System
System Configuration Screen
NS370 / NS370W User Guide
Camera Configuration
Motion Configuration-1
Web Configuration
Motion Configuration-2
Tools
Mailing Configuration
Proxy Server
NS370 / NS370W User Guide
YML814 Rev1
Recording Configuration
Schedule-Recording Configuration
Log Storage
YML814 Rev1
NS370 / NS370W User Guide
Log List
Others
This filed provides information of the software application
Account
Change the Admin ID and Admin password using the fields on this page
About
Q What is an Internet Camera?
Appendix A Frequently Asked Questions
Internet Camera Features
Internet Camera Installation
Q Can the Internet Camera be connected on the network if it consists of only private IP addresses?
Appendix B PING Your IP Address
Q Why does the Link LED not light up properly?
Appendix C Trouble Shooting
Q I cannot access the Internet Camera from a web browser
Q Why does the Power LED not light up constantly?
Q There is poor image quality, how can I improve the image?
Q Noisy images occur how can I solve the problem?
dithering artifacts in the image
Q There is bad focus on the Internet Camera, what should be done?
Appendix D Time Zone Table
NS370 / NS370W User Guide
YML814 Rev1
Appendix E Adjust Internet Camera Focus
You can further adjust the Internet Camera’s image quality through
Web Configuration section for further details
Resolution
Appendix F Specification
Video specification
Image Video Setting
NUMBERS
Access point
BOOTP
Appendix G Glossary of Terms
Fast Ethernet
DHCP
Enterprise network
Ethernet
Intranet
Gateway
Group
IEEE
PING
JAVA
Network
NWay Protocol
SMTP
Protocol
RARP
Server
Utility
TCP/IP
Transceiver
User Name
pair connection does not exceed 100 metres
To prevent loss of signal, make sure that the length of any twisted
Appendix H Cable Information
RJ-45 Network Ports
To prevent loss of signal, make sure that the length of any twisted
Straight and crossover cable configuration
Straight-Through Cabling
Cross-Over Cabling
Customer Information
Appendix I Registration and Warranty Information
Contact Information
Copyright Information
YML814 Rev1
Product Warranty
Limitations of Warranty
NS370 / NS370W User Guide