HDX101 Powerline HD Ethernet Adapter User Guide
1.Go to the HDX101 support page at http://kbserver.netgear.com/products/hdx101.asp. If you see a recent firmware image to download, follow the download instructions on the support site, and take note of where you save the downloaded file on your PC. If the file you downloaded is a .zip file, extract the encapsulated firmware file and note its name and location on your PC.
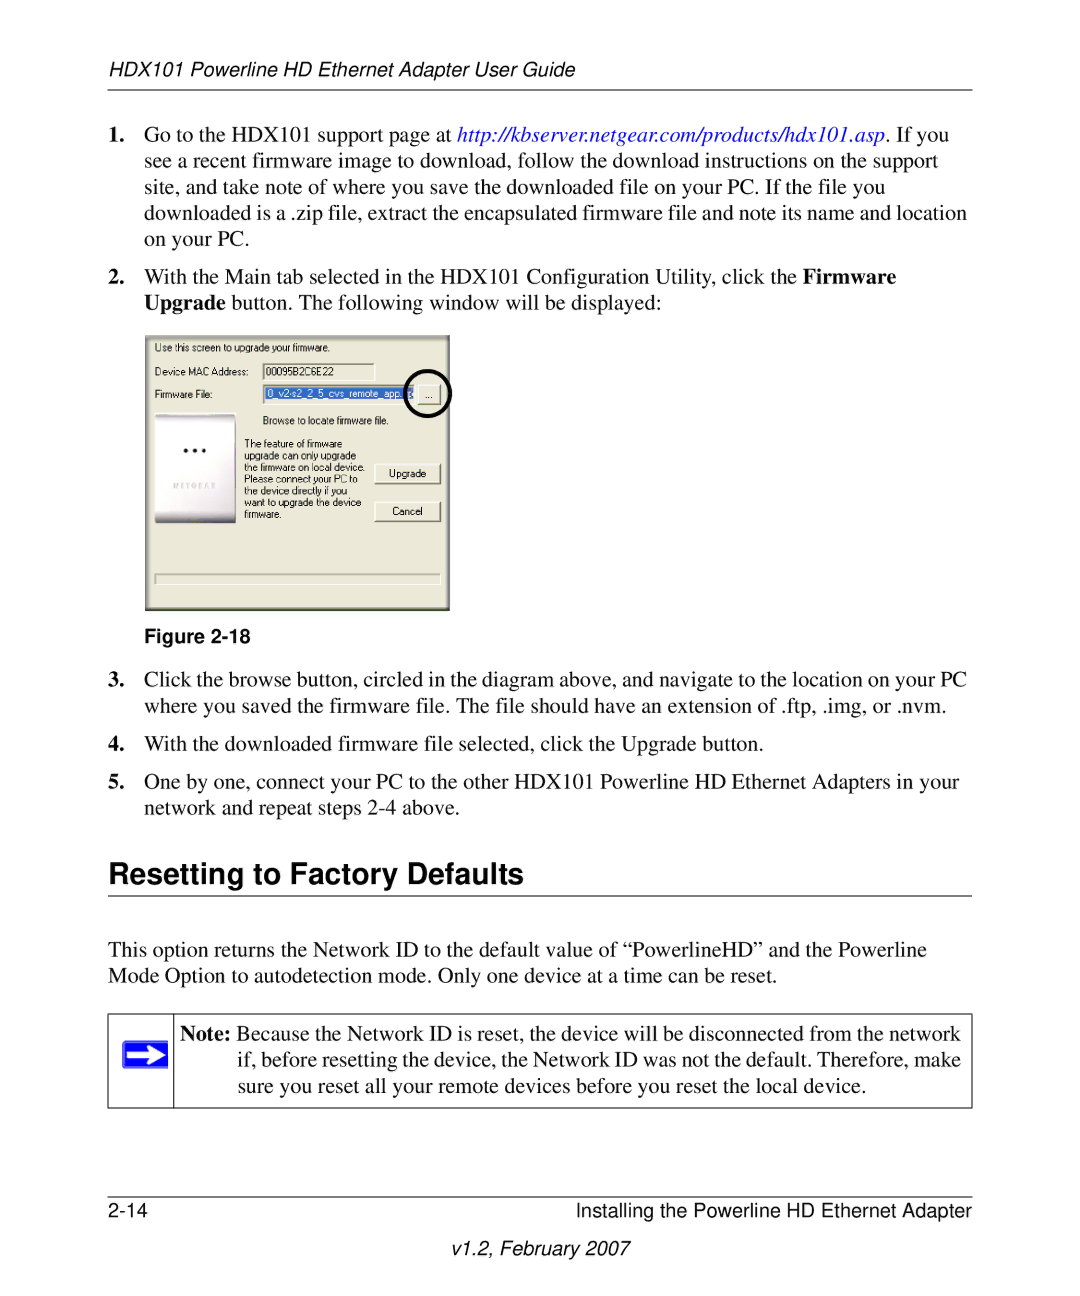
2.With the Main tab selected in the HDX101 Configuration Utility, click the Firmware Upgrade button. The following window will be displayed:
Figure
3.Click the browse button, circled in the diagram above, and navigate to the location on your PC where you saved the firmware file. The file should have an extension of .ftp, .img, or .nvm.
4.With the downloaded firmware file selected, click the Upgrade button.
5.One by one, connect your PC to the other HDX101 Powerline HD Ethernet Adapters in your network and repeat steps
Resetting to Factory Defaults
This option returns the Network ID to the default value of “PowerlineHD” and the Powerline Mode Option to autodetection mode. Only one device at a time can be reset.
Note: Because the Network ID is reset, the device will be disconnected from the network ![]() if, before resetting the device, the Network ID was not the default. Therefore, make
if, before resetting the device, the Network ID was not the default. Therefore, make
sure you reset all your remote devices before you reset the local device.
Installing the Powerline HD Ethernet Adapter |