Hardware Features
Before you install and connect your router, take a moment to become familiar with the front and back panels of the
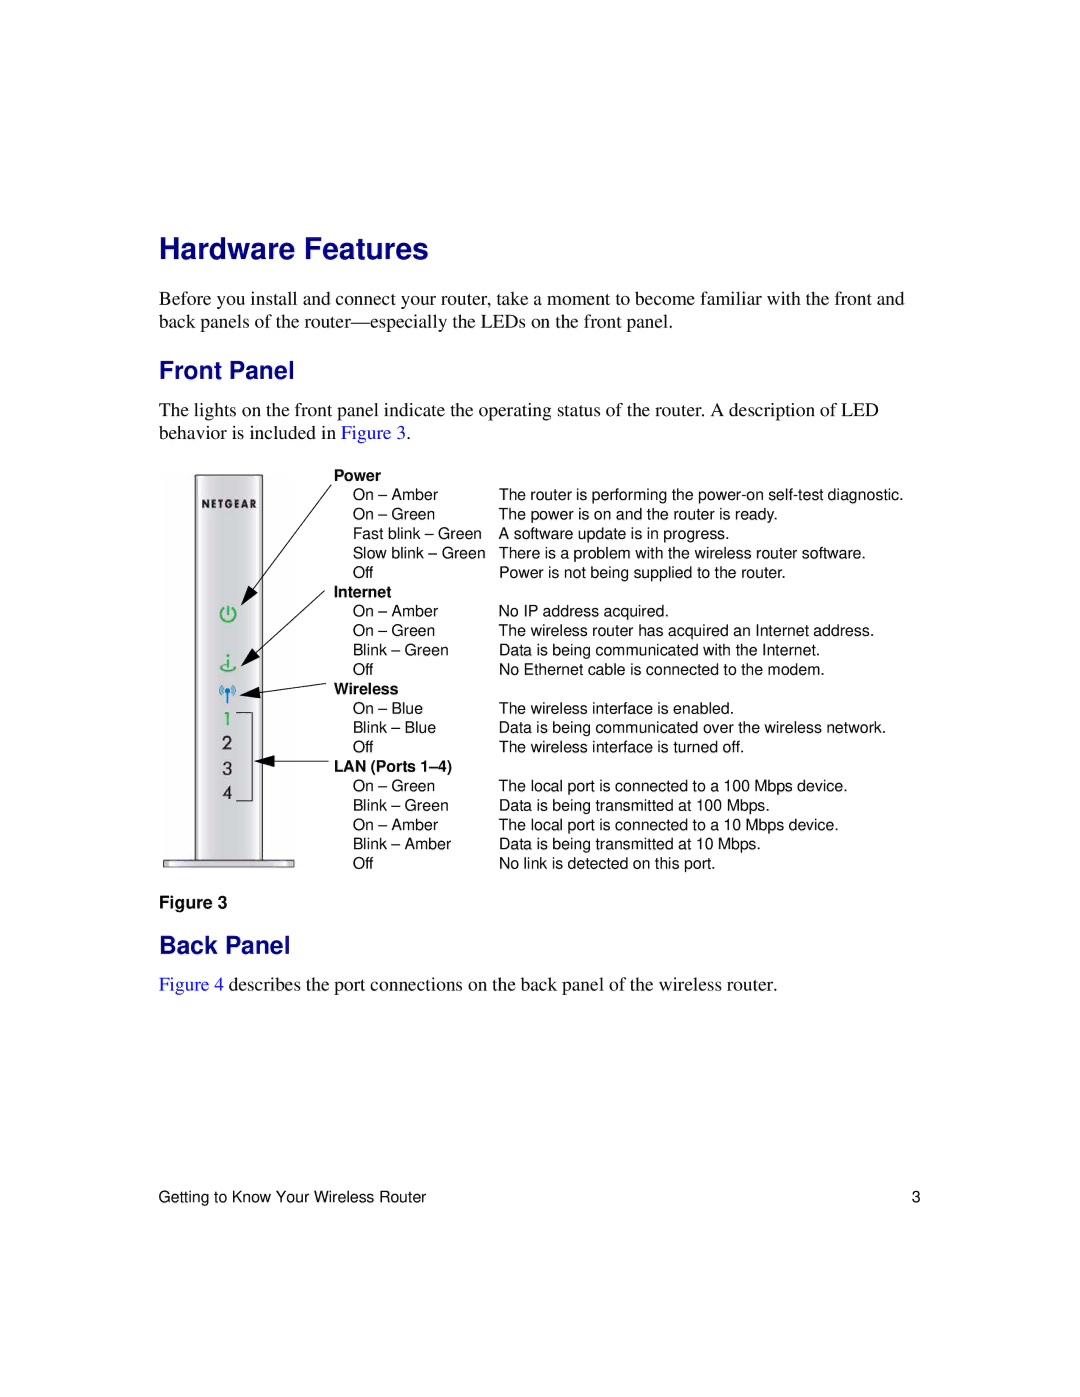
Front Panel
The lights on the front panel indicate the operating status of the router. A description of LED behavior is included in Figure 3.
Power |
|
On – Amber | The router is performing the |
On – Green | The power is on and the router is ready. |
Fast blink – Green | A software update is in progress. |
Slow blink – Green | There is a problem with the wireless router software. |
Off | Power is not being supplied to the router. |
Internet |
|
On – Amber | No IP address acquired. |
On – Green | The wireless router has acquired an Internet address. |
Blink – Green | Data is being communicated with the Internet. |
Off | No Ethernet cable is connected to the modem. |
Wireless |
|
On – Blue | The wireless interface is enabled. |
Blink – Blue | Data is being communicated over the wireless network. |
Off | The wireless interface is turned off. |
LAN (Ports |
|
On – Green | The local port is connected to a 100 Mbps device. |
Blink – Green | Data is being transmitted at 100 Mbps. |
On – Amber | The local port is connected to a 10 Mbps device. |
Blink – Amber | Data is being transmitted at 10 Mbps. |
Off | No link is detected on this port. |
Figure 3
Back Panel
Figure 4 describes the port connections on the back panel of the wireless router.
Getting to Know Your Wireless Router | 3 |