NTI XTENDEX Extenders
d)If the Local Unit has RS232 support, connect the local user's RS232 cable from a touch screen monitor to the RJ45 port on the Local Unit using the
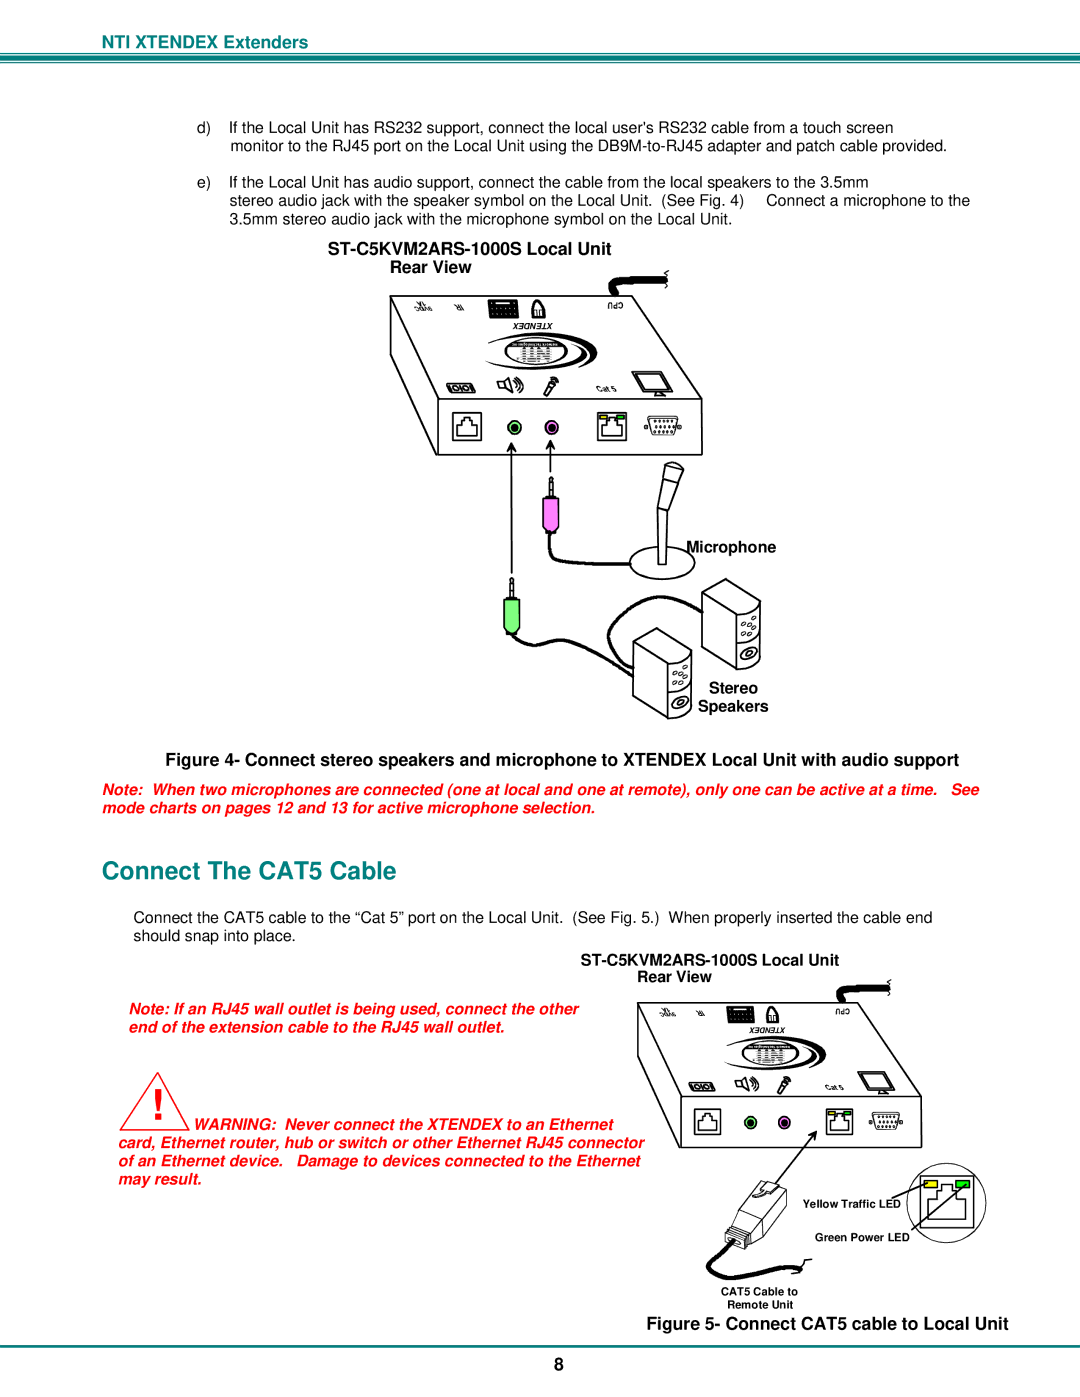
e)If the Local Unit has audio support, connect the cable from the local speakers to the 3.5mm
stereo audio jack with the speaker symbol on the Local Unit. (See Fig. 4) Connect a microphone to the 3.5mm stereo audio jack with the microphone symbol on the Local Unit.
ST-C5KVM2ARS-1000S Local Unit
Rear View
XTENDEX
Inc Technologies Network
RNTI
Microphone
Stereo

 Speakers
Figure 4- Connect stereo speakers and microphone to XTENDEX Local Unit with audio support
Note: When two microphones are connected (one at local and one at remote), only one can be active at a time. See mode charts on pages 12 and 13 for active microphone selection.
Connect The CAT5 Cable
Connect the CAT5 cable to the “Cat 5” port on the Local Unit. (See Fig. 5.) When properly inserted the cable end should snap into place.
ST-C5KVM2ARS-1000S Local Unit
Rear View
Note: If an RJ45 wall outlet is being used, connect the other end of the extension cable to the RJ45 wall outlet.
!WARNING: Never connect the XTENDEX to an Ethernet card, Ethernet router, hub or switch or other Ethernet RJ45 connector of an Ethernet device. Damage to devices connected to the Ethernet may result.
XTENDEX
Inc Technologies Network
RNTI
Yellow Traffic LED
Green Power LED
CAT5 Cable to
Remote Unit
Figure 5- Connect CAT5 cable to Local Unit
8