NTI XTENDEX Extenders
Installing The Remote Unit
1.Position the Remote Unit such that the CAT5 cable, the monitor cable, device cables, and the AC adapter power connector can each reach the Remote Unit without putting strain on the cables.
2.Connect the monitor cable to the female 15HD video connector on the Remote Unit.
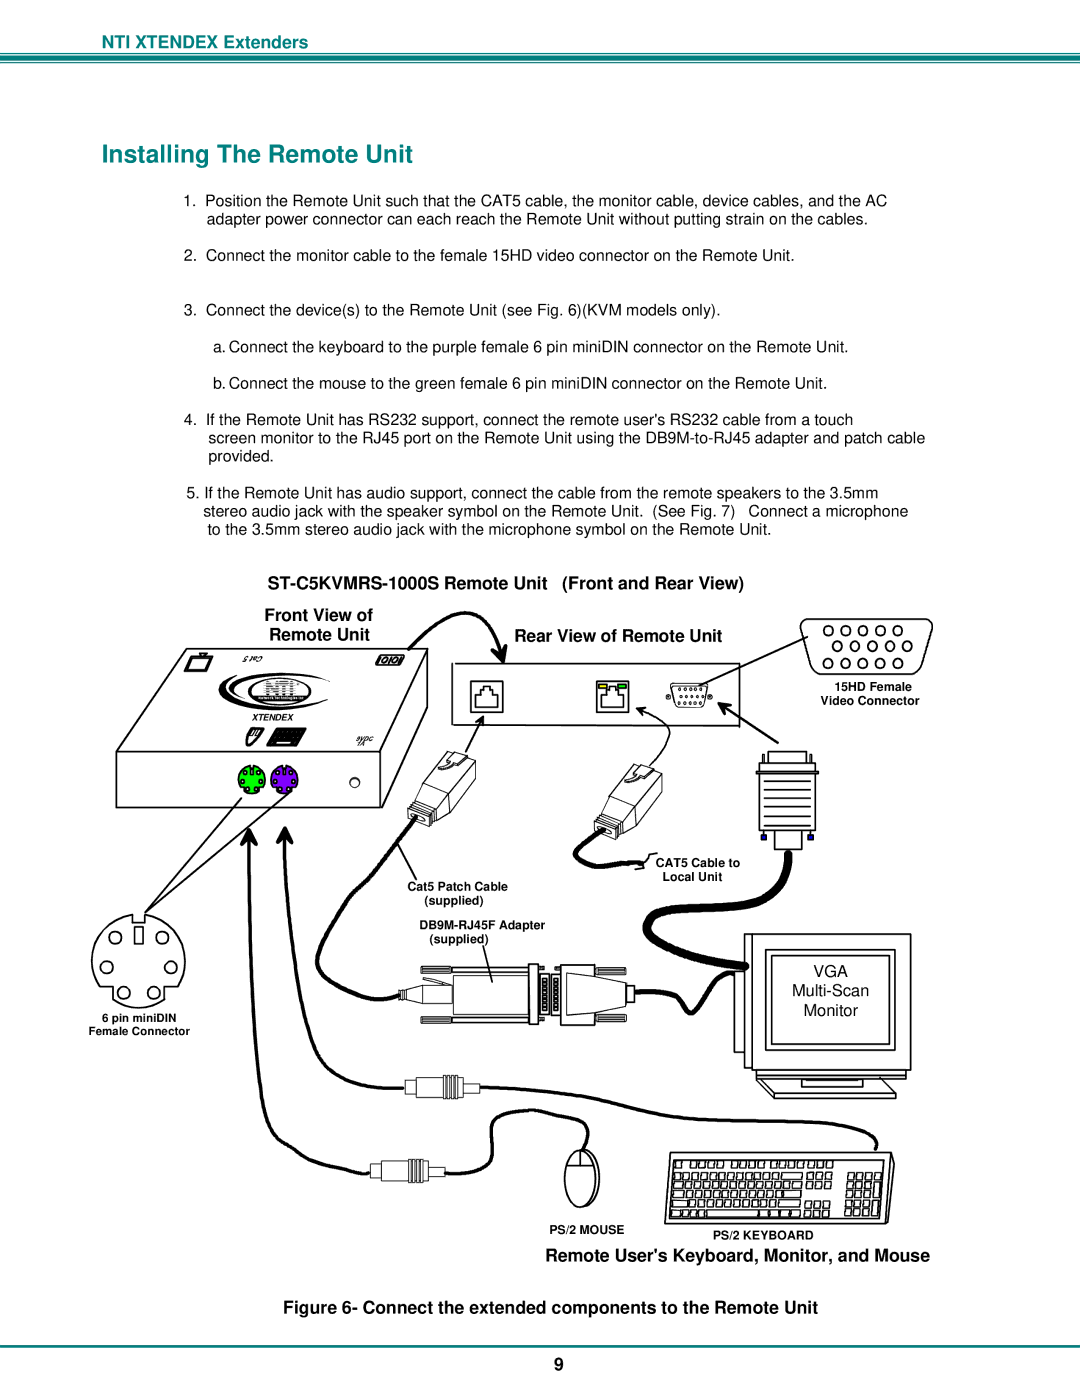
3.Connect the device(s) to the Remote Unit (see Fig. 6)(KVM models only).
a.Connect the keyboard to the purple female 6 pin miniDIN connector on the Remote Unit.
b.Connect the mouse to the green female 6 pin miniDIN connector on the Remote Unit.
4.If the Remote Unit has RS232 support, connect the remote user's RS232 cable from a touch
screen monitor to the RJ45 port on the Remote Unit using the
5. If the Remote Unit has audio support, connect the cable from the remote speakers to the 3.5mm stereo audio jack with the speaker symbol on the Remote Unit. (See Fig. 7) Connect a microphone to the 3.5mm stereo audio jack with the microphone symbol on the Remote Unit.
ST-C5KVMRS-1000S Remote Unit (Front and Rear View)
Front View of |
| |
Remote Unit | Rear View of Remote Unit | |
R | Video Connector | |
NetworkNTITechnologies Inc | ||
15HD Female | ||
XTENDEX |
|
Cat5 Patch Cable (supplied)
![]()
![]() CAT5 Cable to Local Unit
CAT5 Cable to Local Unit
6 pin miniDIN
Female Connector
VGA
Monitor
PS/2 MOUSE | PS/2 KEYBOARD |
|
Remote User's Keyboard, Monitor, and Mouse
Figure 6- Connect the extended components to the Remote Unit
9