INSTALLATION
HORIZONTAL TERMINATION (continued)
Note:
The four wood screws provided should be replaced with appropriate fasteners for stucco, brick, concrete, or other types of siding.
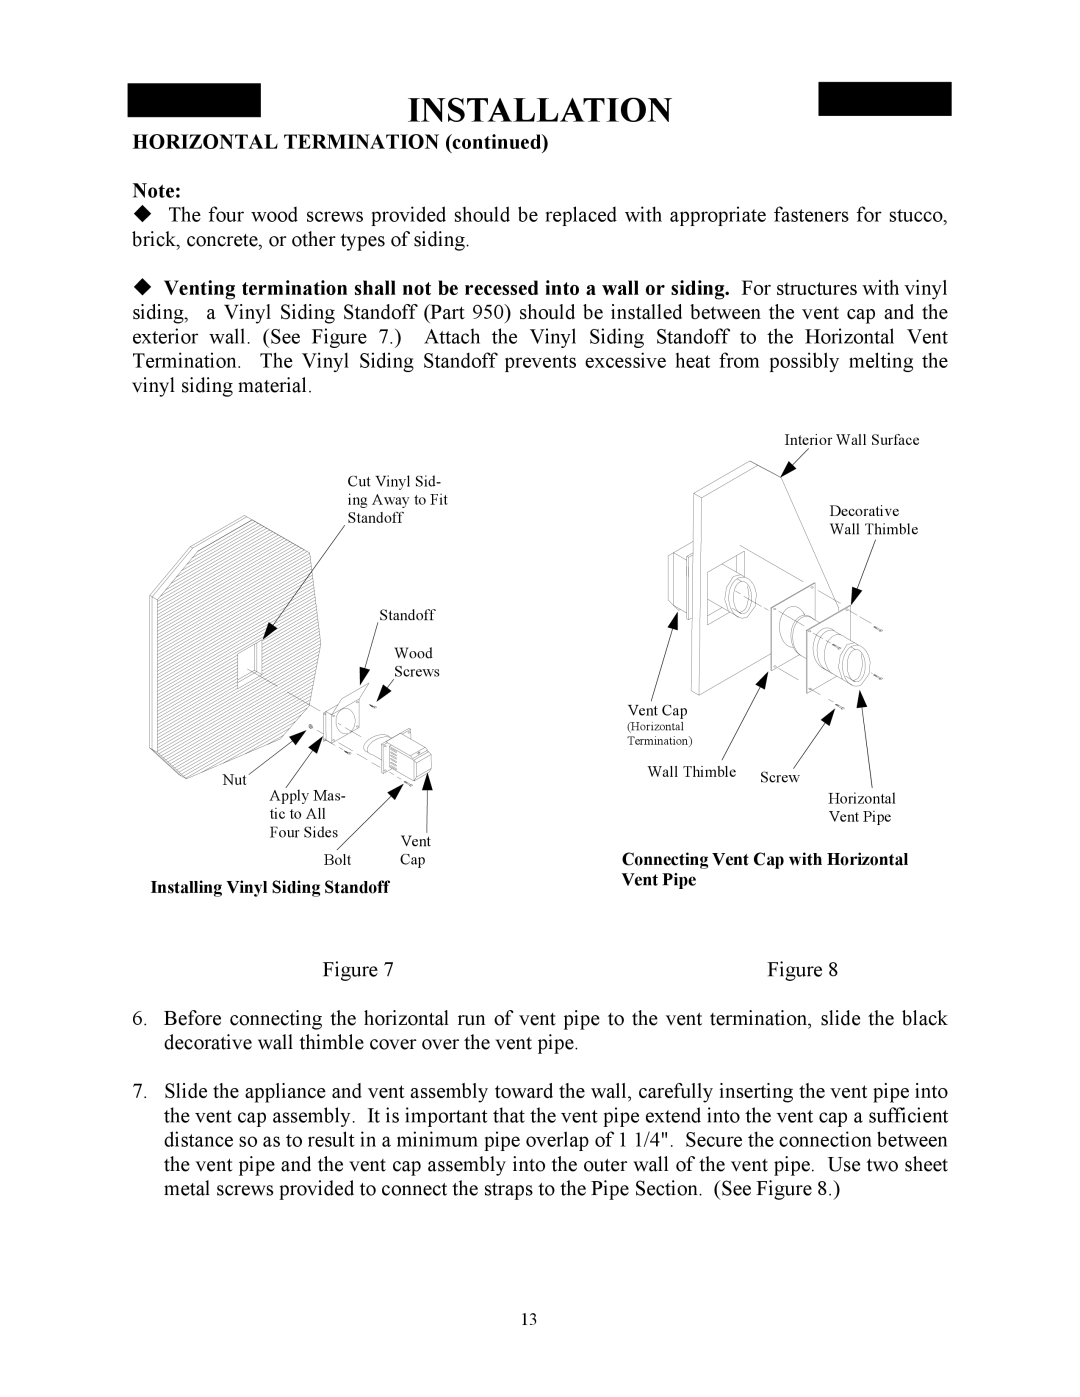
Venting termination shall not be recessed into a wall or siding. For structures with vinyl siding, a Vinyl Siding Standoff (Part 950) should be installed between the vent cap and the exterior wall. (See Figure 7.) Attach the Vinyl Siding Standoff to the Horizontal Vent Termination. The Vinyl Siding Standoff prevents excessive heat from possibly melting the vinyl siding material.
Cut Vinyl Sid- ing Away to Fit Standoff
Standoff
Wood
Screws
Nut Apply Mas-
tic to All
Four Sides Vent
Bolt Cap
Installing Vinyl Siding Standoff
Interior Wall Surface
Decorative
Wall Thimble
Vent Cap
(Horizontal
Termination)
Wall Thimble | Screw |
|
Horizontal
Vent Pipe
Connecting Vent Cap with Horizontal Vent Pipe
Figure 7 | Figure 8 |
6.Before connecting the horizontal run of vent pipe to the vent termination, slide the black decorative wall thimble cover over the vent pipe.
7.Slide the appliance and vent assembly toward the wall, carefully inserting the vent pipe into the vent cap assembly. It is important that the vent pipe extend into the vent cap a sufficient distance so as to result in a minimum pipe overlap of 1 1/4". Secure the connection between the vent pipe and the vent cap assembly into the outer wall of the vent pipe. Use two sheet metal screws provided to connect the straps to the Pipe Section. (See Figure 8.)
13