CONTROLS IN DETAIL-continued____
The joint connects the arm to the speedlight and allows the flash head to be positioned as required for various shooting situations .
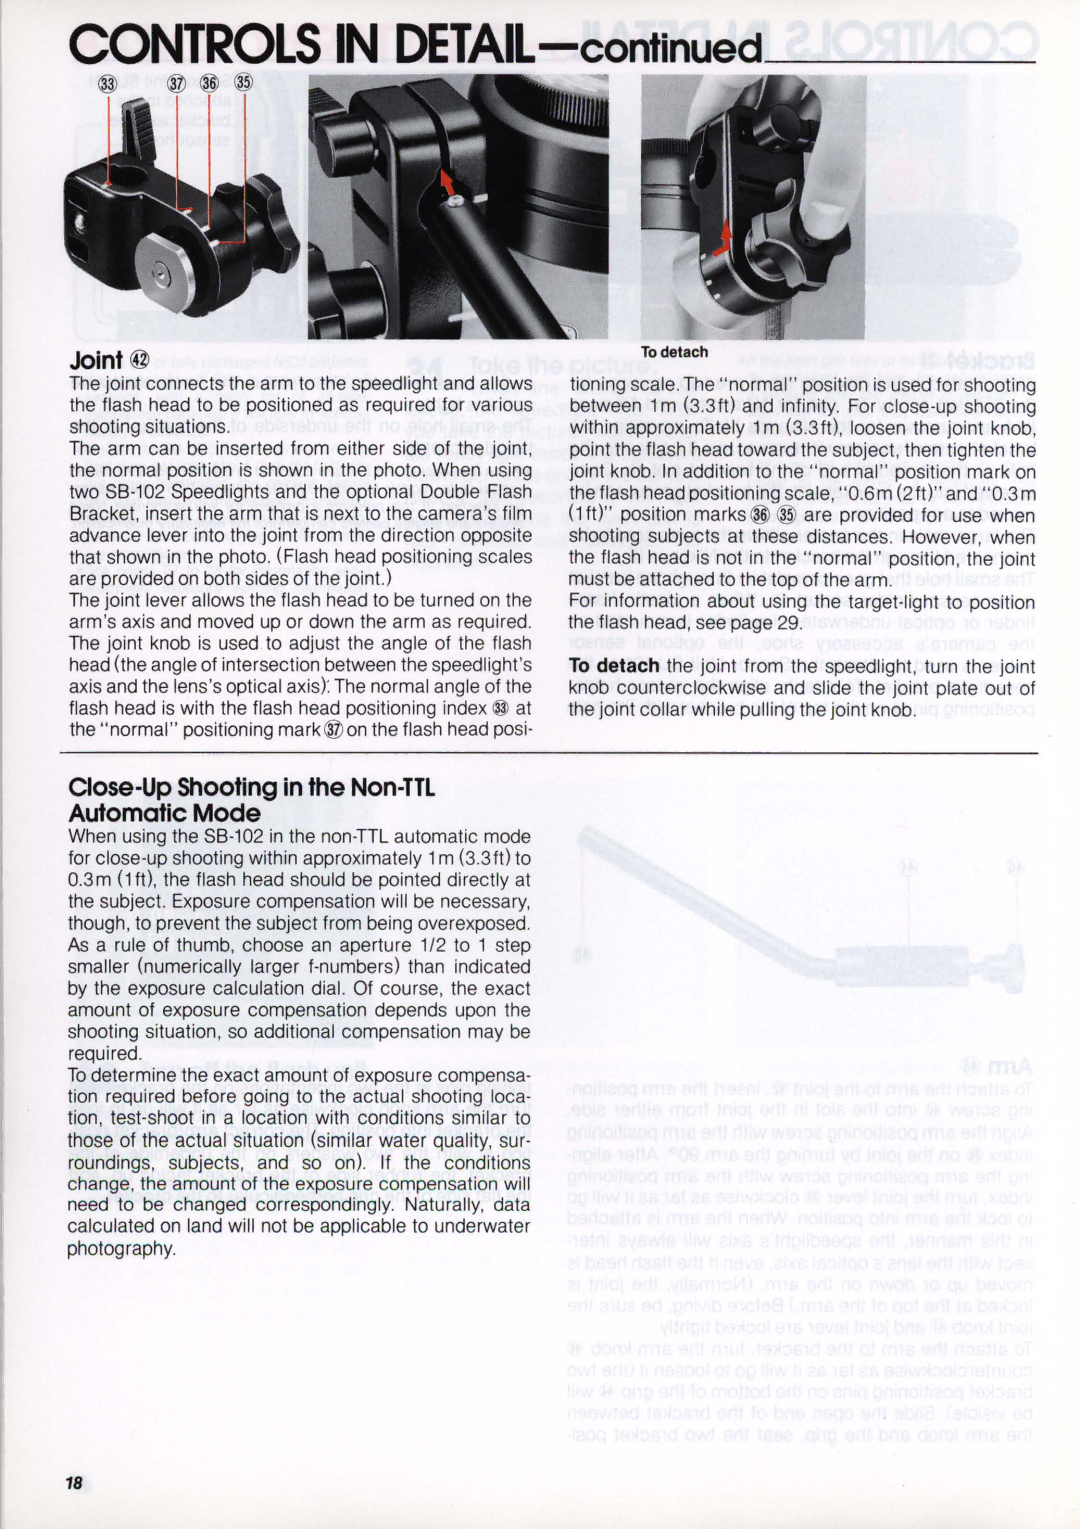
The arm can be inserted from either side of the joint, the normal position is shown in the photo. When using two SB-102 Speedlights and the optional Double Flash Bracket, insert the arm that is next to the camera'sfilm advance lever into the joint from the direction opposite that shown in the photo. (Flash head positioning scales are provided on both sides of the joint.)
The joint lever allows the flash head to be turned on the arm's axis and moved up or down the arm as required . The joint knob is used to adjust the angle of the flash head (the angle of intersection between the speedlight's axis and the lens's optical axis): The normal angle of the flash head is with the flash head positioning index @ at the "normal" positioning mark @ ontheflash head posi-
tioning scale. The "normal " position is used for shooting between 1m (3.3ft) and infinity. For close-up shooting within approximately 1m (3 .3ft), loosen the joint knob, point the flash head toward the subject, then tighten the joint knob. In addition to the "normal" position mark on the flash head positioning scale, "0.6m (2ft)" and " 0.3m (1ft)" position marks ® ® are provided for use when shooting subjects at these distances. However, when the flash head is not in the "normal " position , the joint must be attached to the top of the arm .
For information about using the target-light to position the flash head, see page 29.
To detach the jOint from the speedlight, turn the joint knob counterclockwise and slide the jOint plate out of the joint collar while pulling the joint knob.
Close-Up Shooting in the Non-TTL Automatic Mode
When using the SB-102 in the non-TTL automatic mode for close-up shooting within approximately 1m (3.3ft) to 0.3m (1 ft), the flash head should be pointed directly at the subject. Exposure compensation will be necessary, though , to prevent the subject from being overexposed . As a rule of thumb, choose an aperture 1/2 to 1 step smaller (numerically larger f-numbers) than indicated by the exposure calculation dial. Of course, the exact amount of exposure compensation depends upon the shooting situation, so additional compensation may be required.
To determine the exact amount of exposure compensa- tion required before going to the actual shooting loca- tion, test-shoot in a location with conditions similar to those of the actual situation (similar water quality, sur- roundings, subjects, and so on). If the conditions change, the amount of the exposure compensation will need to be changed correspondingly. Naturally, data calculated on land will not be applicable to underwater photog raphy.