Examining and lubricating the O-rings:
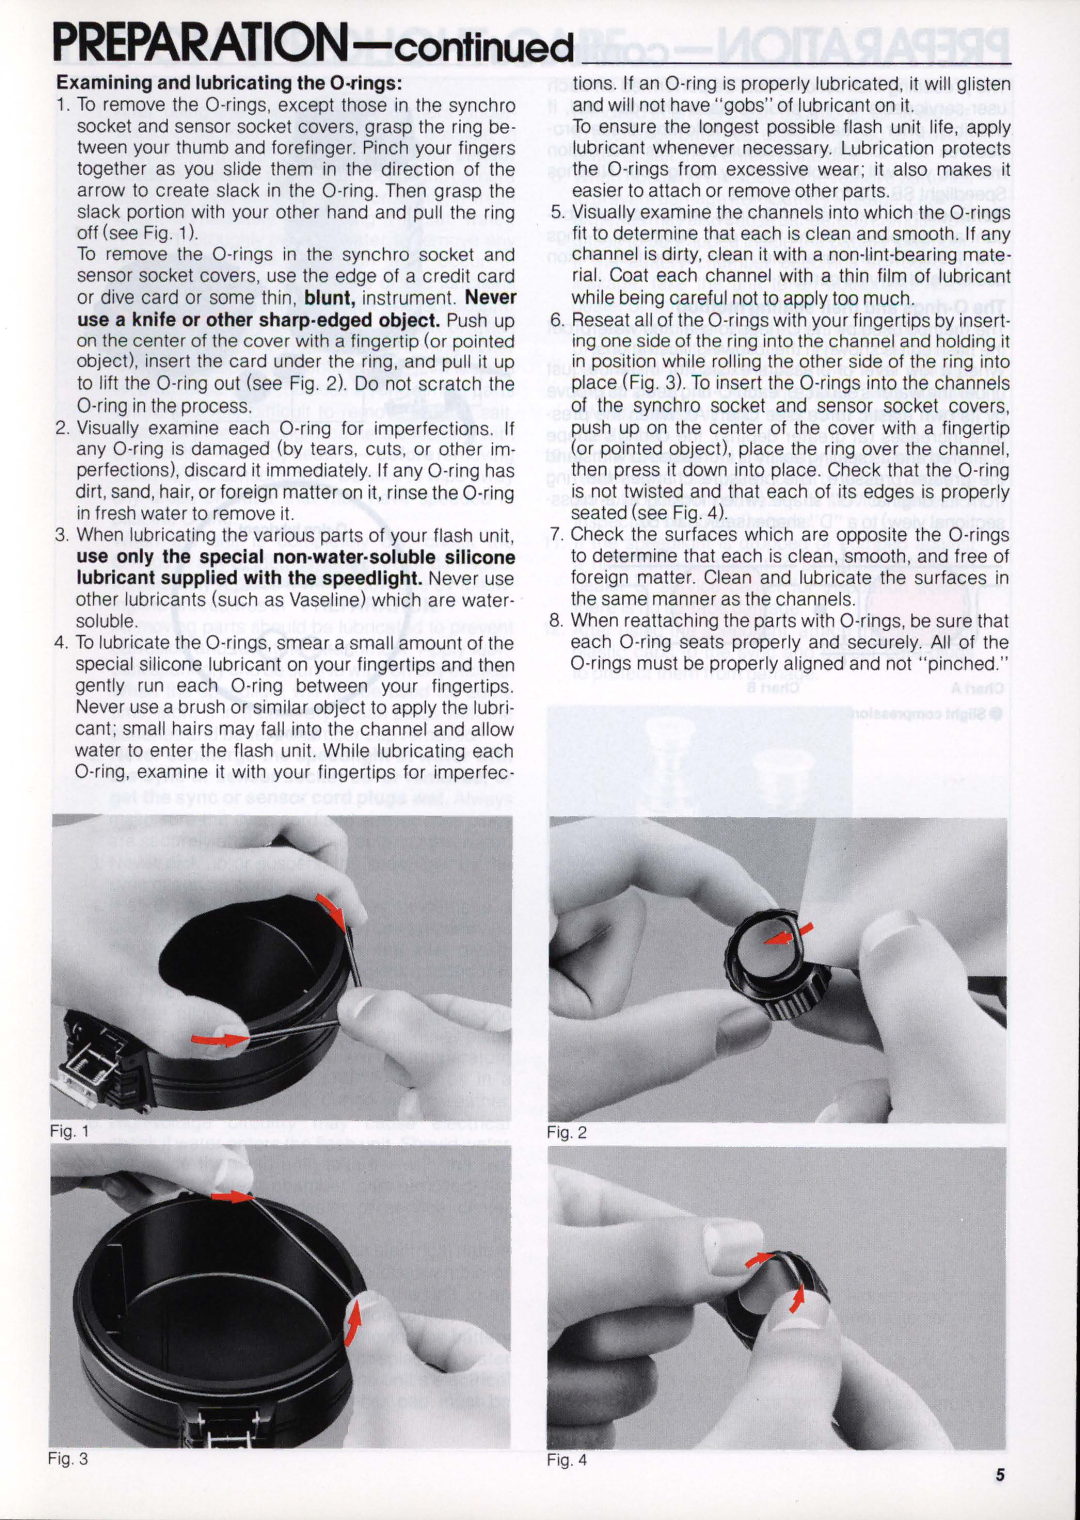
1.To remove the O-rings, except those in the synchro socket and sensor socket covers, grasp the ring be- tween your thumb and forefinger. Pinch your fingers together as you slide them in the direction of the arrow to create slack in the O-ring. Then grasp the slack portion with your other hand and pull the ring off (see Fig . 1).
To remove the O-rings in the synchro socket and sensor socket covers, use the edge of a credit card or dive card or some thin , blunt, instrument. Never use a knife or other sharp-edged object. Push up on the center of the cover with a fingertip (or pointed object), insert the card under the ring , and pull it up to lift the O-ring out (see Fig. 2). Do not scratch the O-ring in the process.
2.Visually examine each O-ring for imperfections. If any O-ring is damaged (by tears, cuts, or other im- perfections), discard it immediately. If any O-ring has dirt, sand, hair, or foreign matter on it, rinse the O-ring in fresh water to remove it.
3.When lubricating the various parts of your flash unit, use only the special non-water-soluble silicone lubricant supplied with the speedlight. Never use other lubricants (such as Vaseline) which are water- soluble .
4.To lubricate the O-rings, smear a small amount of the special silicone lubricant on your fingertips and then gently run each O-ring between your fingertips . Never use a brush or similar object to apply the lubri- cant ; small hairs may fall into the channel and allow water to enter the flash unit. While lubricating each O-ring, examine it with your fingertips for imperfec-
tions . If an O-ring is properly lubricated, it will glisten and will not have "gobs" of lubricant on it.
To ensure the longest possible flash unit life, apply lubricant whenever necessary. Lubrication protects the O-rings from excessive wear; it also makes it easier to attach or remove other parts.
5.Visually examine the channels into which the O-rings fit to determine that each is clean and smooth. If any channel is dirty, clean it with a non-lint-bearing mate - rial. Coat each channel with a thin film of lubricant while being careful not to apply too much.
6.Reseat all of the O-rings with your fingertips by insert- ing one side of the ring into the channel and holding it in pOSition while rolling the other side of the ring into place (Fig. 3) . To insert the O-rings into the channels of the synchro socket and sensor socket covers, push up on the center of the cover with a fingertip (or pointed object), place the ring over the channel , then press it down into place . Check that the O-ring is not twisted and that each of its edges is properly seated (see Fig. 4).
7.Check the surfaces which are opposite the O-rings to determine that each is clean, smooth , and free of foreign matter. Clean and lubricate the surfaces in the same manner as the channels.
8.When reattaching the parts with O-rings, be sure that each O-ring seats properly and securely. All of the O-rings must be properly aligned and not "pinched."