ENGLISH
USER MANUAL
WET or GEL battery setting
7.The machine factory setting is for lead batteries (WET). If lead batteries (WET) are installed, do not change the machine settings.
Otherwise, the machine electronic board must be set according to the following procedure.
8.Ensure that the battery connector (25) is disconnected.
9.Remove the support rod (36) and close the hood (22).
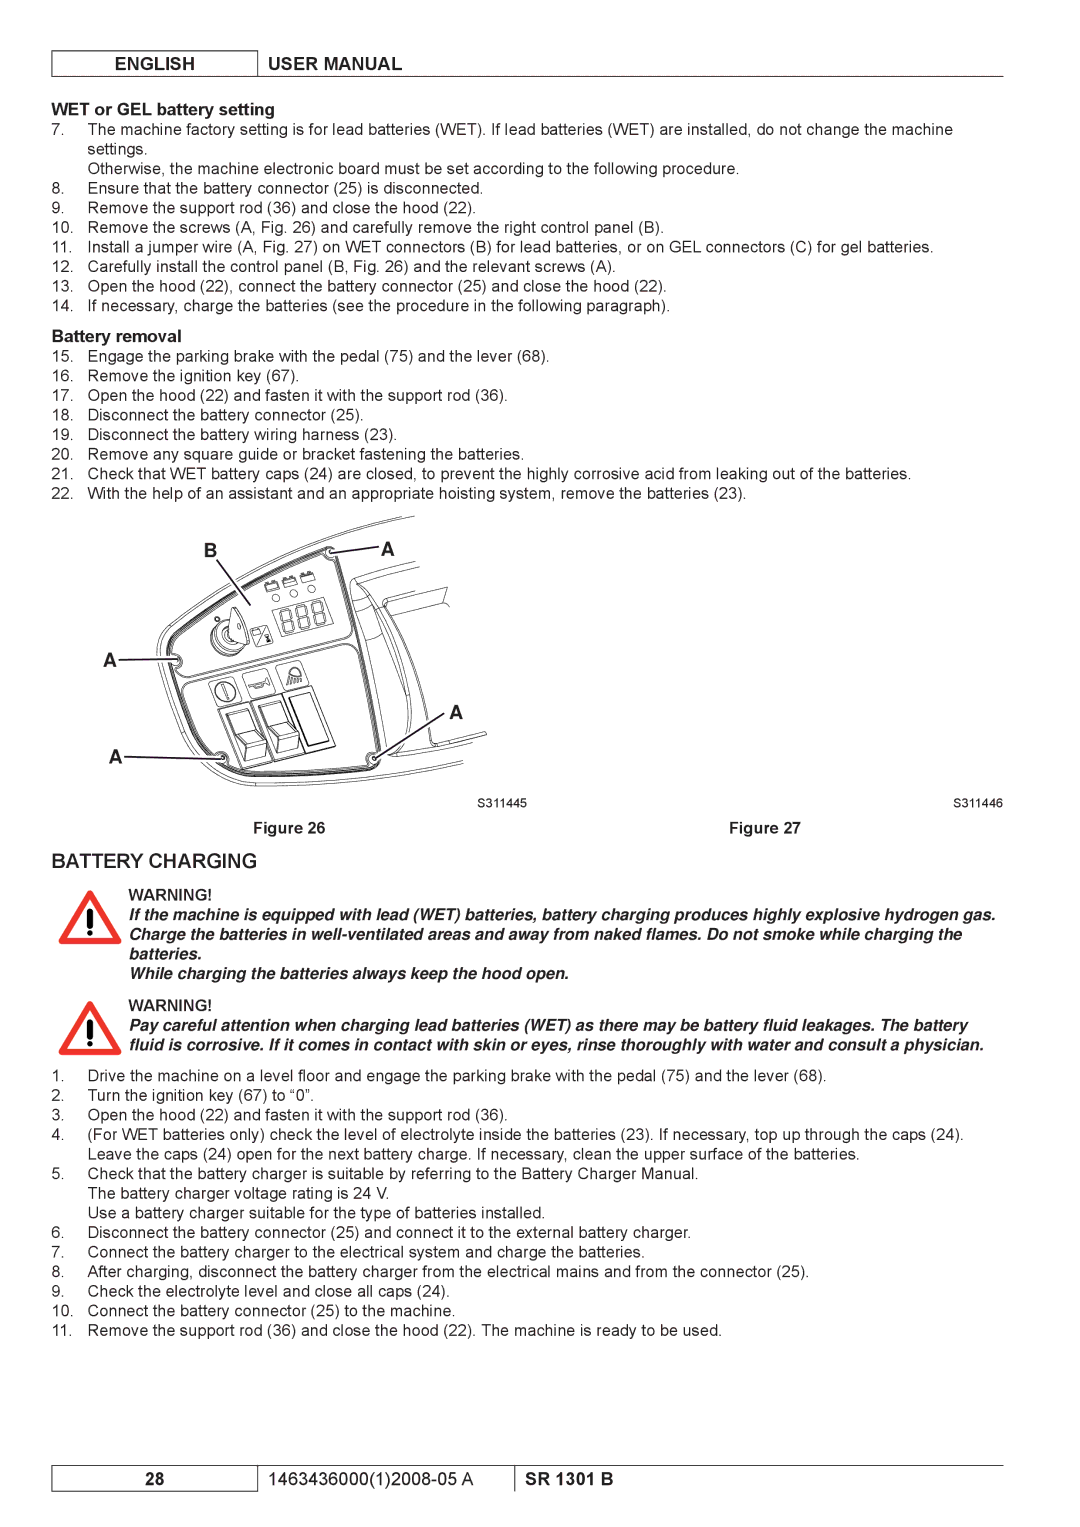
10.Remove the screws (A, Fig. 26) and carefully remove the right control panel (B).
11.Install a jumper wire (A, Fig. 27) on WET connectors (B) for lead batteries, or on GEL connectors (C) for gel batteries.
12.Carefully install the control panel (B, Fig. 26) and the relevant screws (A).
13.Open the hood (22), connect the battery connector (25) and close the hood (22).
14.If necessary, charge the batteries (see the procedure in the following paragraph).
Battery removal
15.Engage the parking brake with the pedal (75) and the lever (68).
16.Remove the ignition key (67).
17.Open the hood (22) and fasten it with the support rod (36).
18.Disconnect the battery connector (25).
19.Disconnect the battery wiring harness (23).
20.Remove any square guide or bracket fastening the batteries.
21.Check that WET battery caps (24) are closed, to prevent the highly corrosive acid from leaking out of the batteries.
22.With the help of an assistant and an appropriate hoisting system, remove the batteries (23).
B ![]()
![]()
![]()
![]() A
A
A![]()
![]()
![]()
![]()
![]()
A
A![]()
![]()
![]()
![]()
![]()
![]()
![]()
![]()
S311445 | S311446 |
Figure 26 | Figure 27 |
BATTERY CHARGING
WARNING!
If the machine is equipped with lead (WET) batteries, battery charging produces highly explosive hydrogen gas. Charge the batteries in
While charging the batteries always keep the hood open.
WARNING!
Pay careful attention when charging lead batteries (WET) as there may be battery fluid leakages. The battery fluid is corrosive. If it comes in contact with skin or eyes, rinse thoroughly with water and consult a physician.
1.Drive the machine on a level floor and engage the parking brake with the pedal (75) and the lever (68).
2.Turn the ignition key (67) to “0”.
3.Open the hood (22) and fasten it with the support rod (36).
4.(For WET batteries only) check the level of electrolyte inside the batteries (23). If necessary, top up through the caps (24). Leave the caps (24) open for the next battery charge. If necessary, clean the upper surface of the batteries.
5.Check that the battery charger is suitable by referring to the Battery Charger Manual. The battery charger voltage rating is 24 V.
Use a battery charger suitable for the type of batteries installed.
6.Disconnect the battery connector (25) and connect it to the external battery charger.
7.Connect the battery charger to the electrical system and charge the batteries.
8.After charging, disconnect the battery charger from the electrical mains and from the connector (25).
9.Check the electrolyte level and close all caps (24).
10.Connect the battery connector (25) to the machine.
11.Remove the support rod (36) and close the hood (22). The machine is ready to be used.
28
