ASSEMBLY
Assembly requires two persons. Set the treadmill in a cleared area and remove all packing materials. Do not dispose of the packing materials until assembly is completed.
Note: The underside of the treadmill walking belt is coated with
Assembly requires the included hex key ![]() and your own Phillips screwdriver
and your own Phillips screwdriver ![]()
![]() , and rub-
, and rub-
ber mallet ![]() . Use the drawings below to identify the assembly hardware. The number in paren- theses below each drawing is the key number of the part, from the PART LIST near the end of this man- ual. The number following the parentheses is the quantity needed for assembly. Note: Some small parts may have been
. Use the drawings below to identify the assembly hardware. The number in paren- theses below each drawing is the key number of the part, from the PART LIST near the end of this man- ual. The number following the parentheses is the quantity needed for assembly. Note: Some small parts may have been
Plastic Washer | Extension Leg | Star Washer | 1" Tek Screw | |
| Nut | |||
| ||||
|
|
|
| |
Extension Leg Bolt |
| Console Bolt | ||
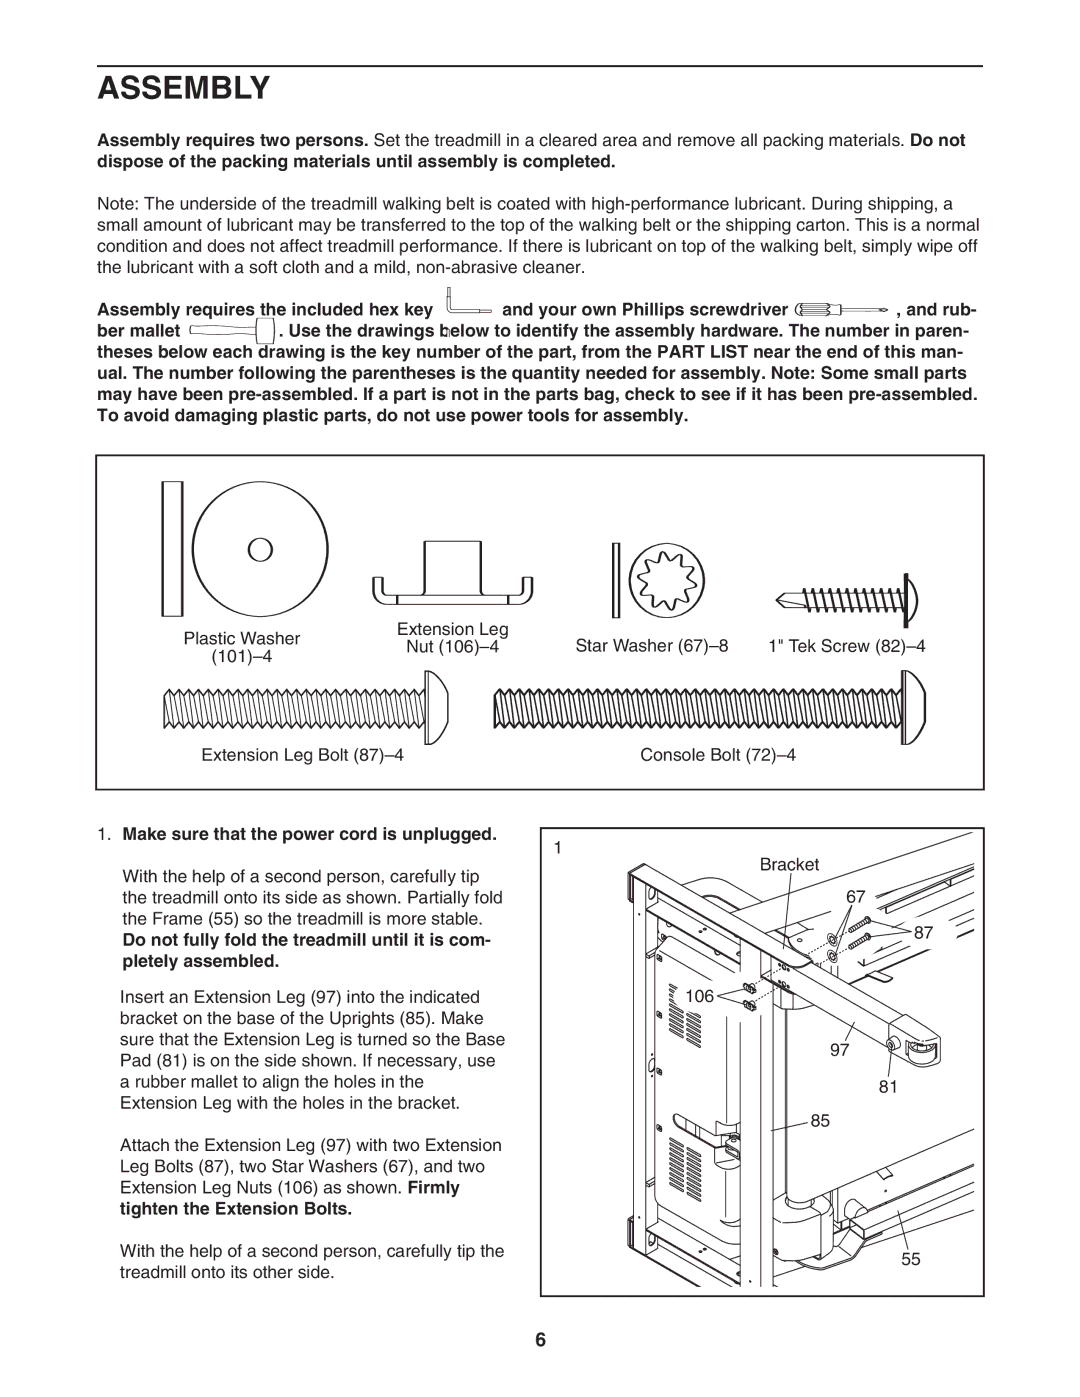
1. Make sure that the power cord is unplugged. | 1 | |
| ||
With the help of a second person, carefully tip | Bracket | |
| ||
the treadmill onto its side as shown. Partially fold | 67 | |
the Frame (55) so the treadmill is more stable. | 87 | |
Do not fully fold the treadmill until it is com- | ||
| ||
pletely assembled. |
| |
Insert an Extension Leg (97) into the indicated | 106 | |
bracket on the base of the Uprights (85). Make |
| |
sure that the Extension Leg is turned so the Base | 97 | |
Pad (81) is on the side shown. If necessary, use | ||
| ||
a rubber mallet to align the holes in the | 81 | |
Extension Leg with the holes in the bracket. | ||
85 | ||
| ||
Attach the Extension Leg (97) with two Extension |
| |
Leg Bolts (87), two Star Washers (67), and two |
| |
Extension Leg Nuts (106) as shown. Firmly |
| |
tighten the Extension Bolts. |
| |
With the help of a second person, carefully tip the | 55 | |
treadmill onto its other side. | ||
| ||
| 6 |
