Machine Component Identification
III.) Handle Assembly
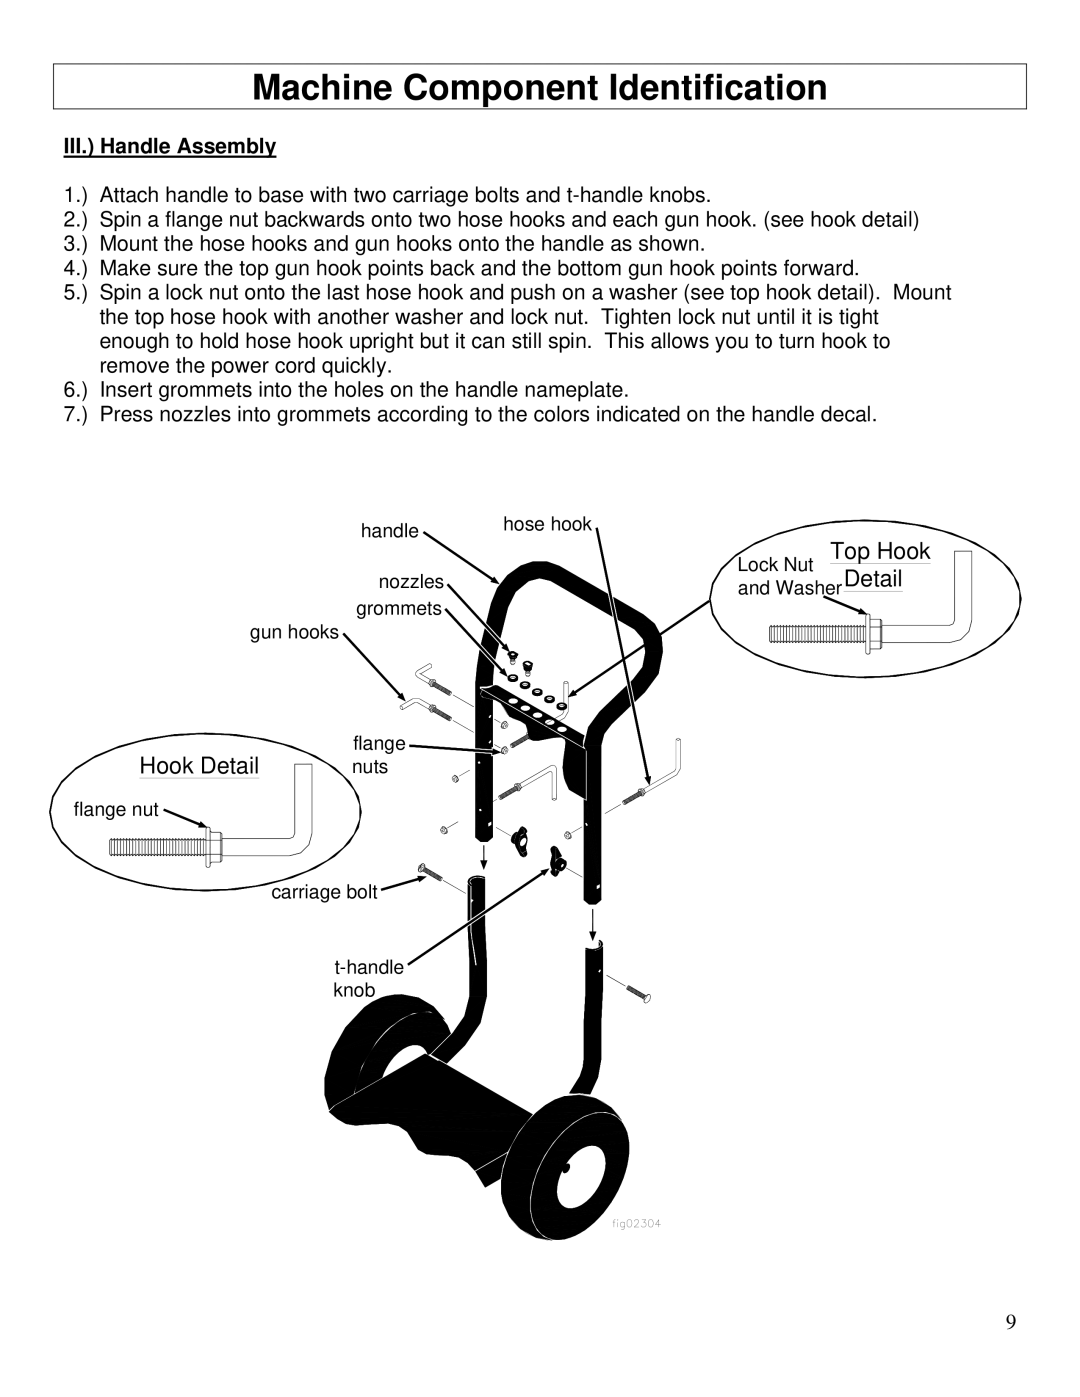
1.) Attach handle to base with two carriage bolts and
2.) Spin a flange nut backwards onto two hose hooks and each gun hook. (see hook detail)
3.) Mount the hose hooks and gun hooks onto the handle as shown.
4.) Make sure the top gun hook points back and the bottom gun hook points forward.
5.) Spin a lock nut onto the last hose hook and push on a washer (see top hook detail). Mount the top hose hook with another washer and lock nut. Tighten lock nut until it is tight enough to hold hose hook upright but it can still spin. This allows you to turn hook to remove the power cord quickly.
6.) Insert grommets into the holes on the handle nameplate.
7.) Press nozzles into grommets according to the colors indicated on the handle decal.
handle | hose hook |
|
| nozzles |
gun hooks | grommets |
| |
Hook Detail | flange |
nuts | |
flange nut |
|
![]()
![]()
![]() carriage bolt
carriage bolt ![]()
![]()
![]()
![]()
![]()
![]() Lock Nut Top Hook and WasherDetail
Lock Nut Top Hook and WasherDetail
9
